3T Exploro RaceMax Gravel Bike - They Fixed It!
Disclaimer: This post contains affiliate links, through which we earn a commission.
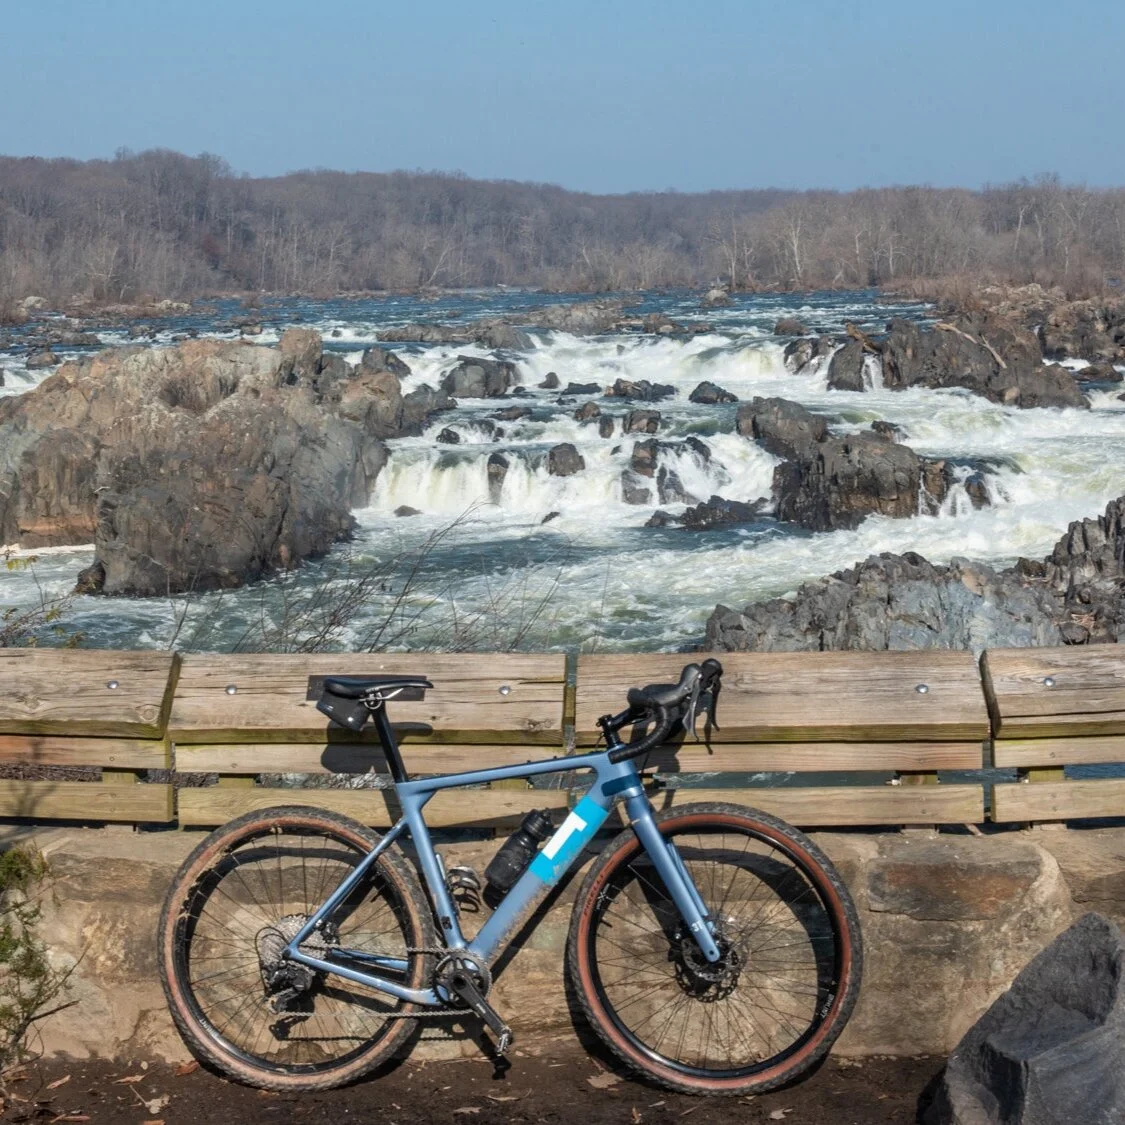
I’ve been the proud owner of a 3T Exploro Pro GRX gravel bike for the past 8 months and I can honestly say that I’ve been incredibly pleased with this super versatile bike. Each time I take this bike over some new roads or trails I am reminded how at home it is on so many different types of surfaces. Not only is it fast on paved surfaces (due to the aerodynamic design), but it feels just as zippy off-road. All-in-all I couldn’t be happier. You can read the full review for the 3T Exploro here.
If you read that blogpost carefully, you will see that my praise for the 3T Exploro’s design runs fairly high and it relates to (almost) all aspects of the bike. There is one exception to this statement - the rear derailleur hanger! Yep, it’s a seemingly small part of the bike, but it can have a huge impact on the overall experience. 3T decided to break from conventional hanger designs and created the hanger for the 3T Exploro to be what they call a “hang loose hanger.” As a refresher, here is my quote from the full review, to highlight my frustration with this hanger design:
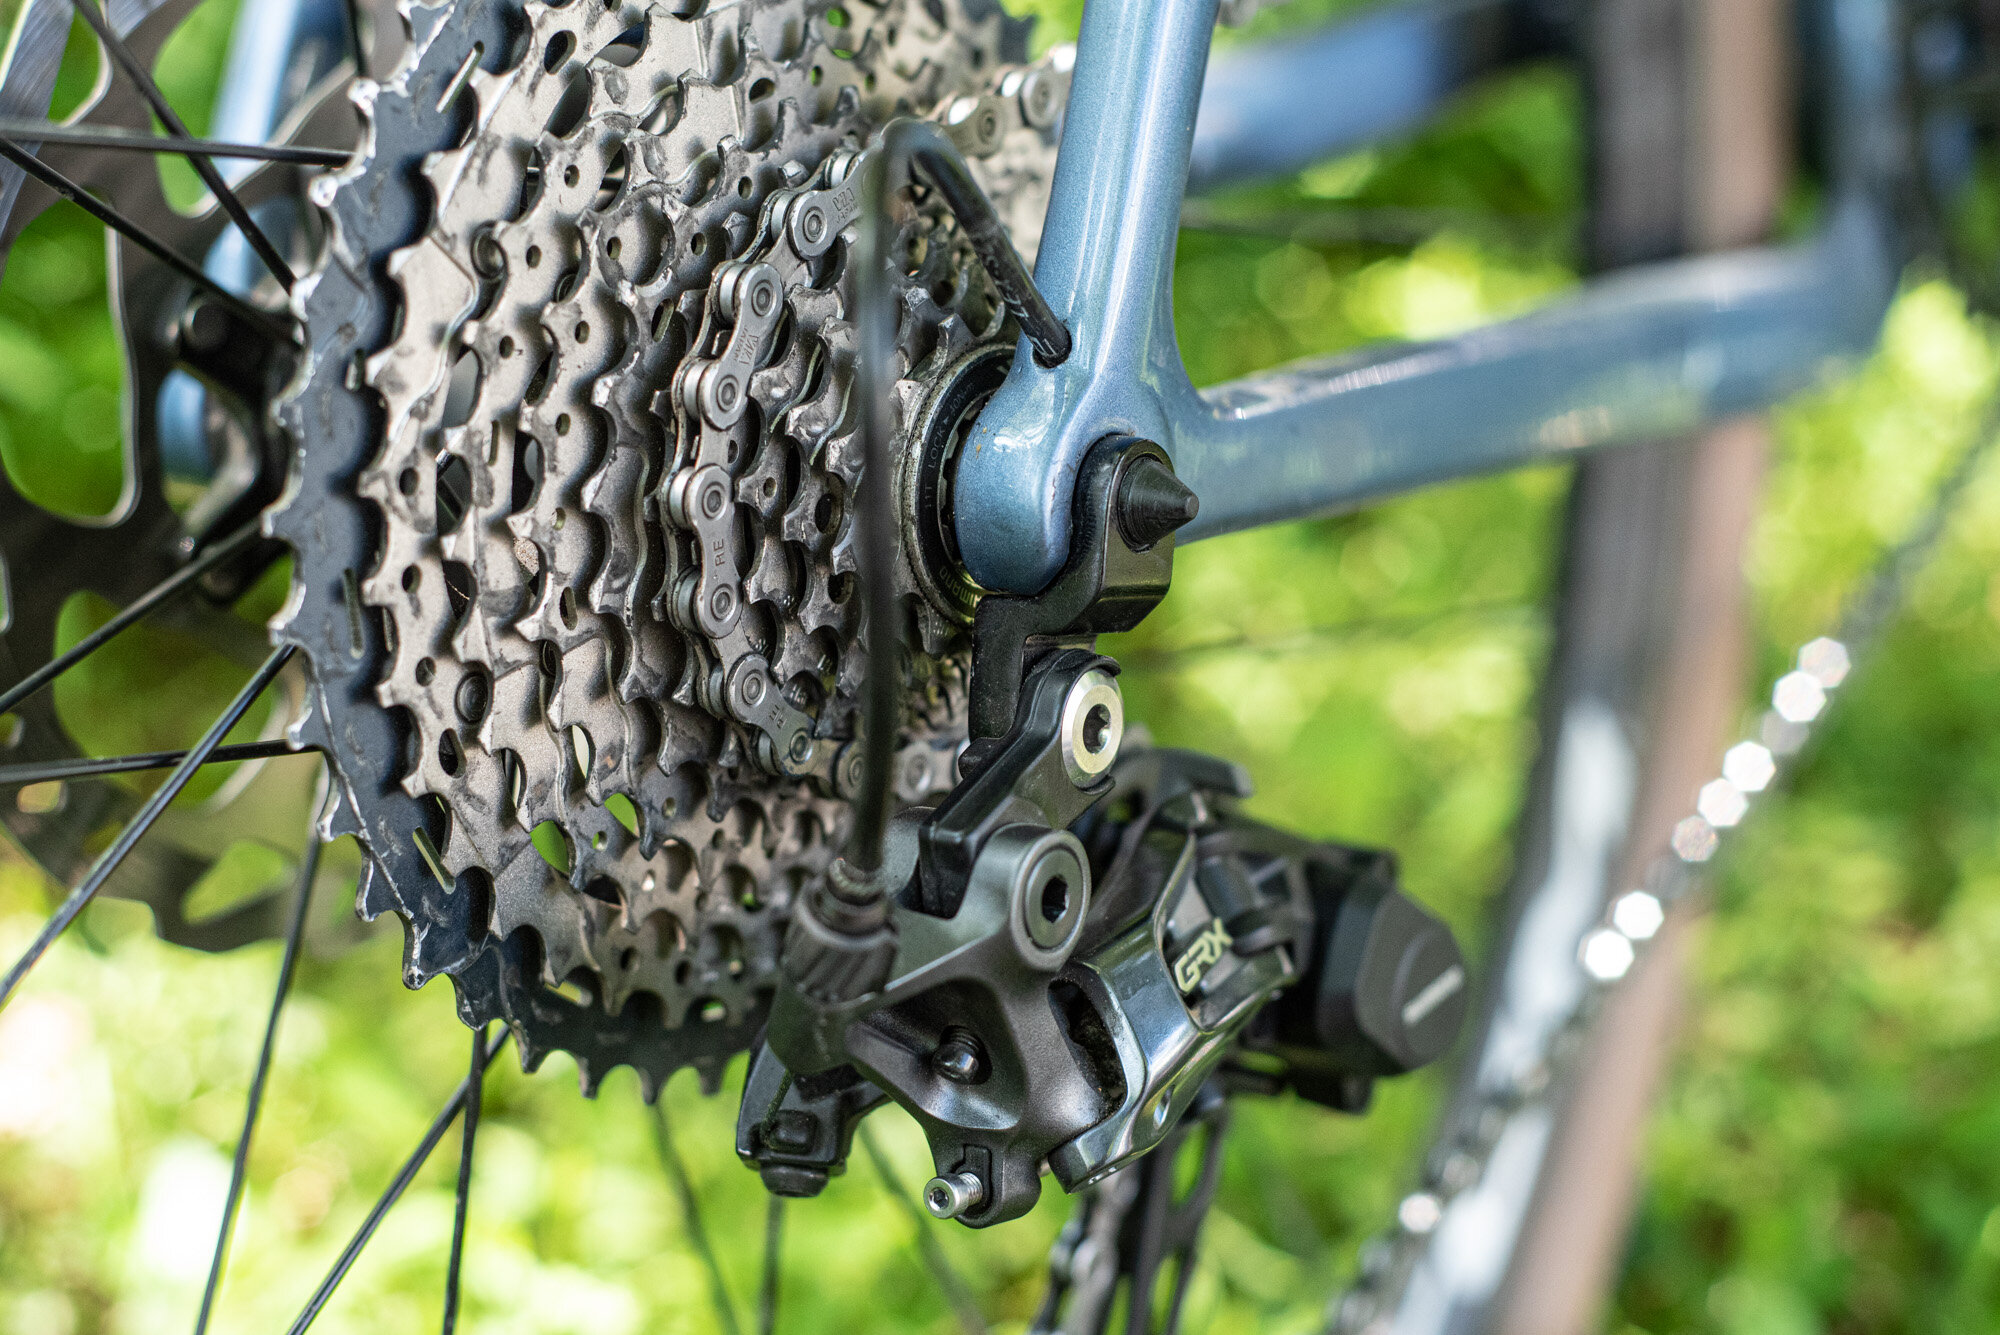
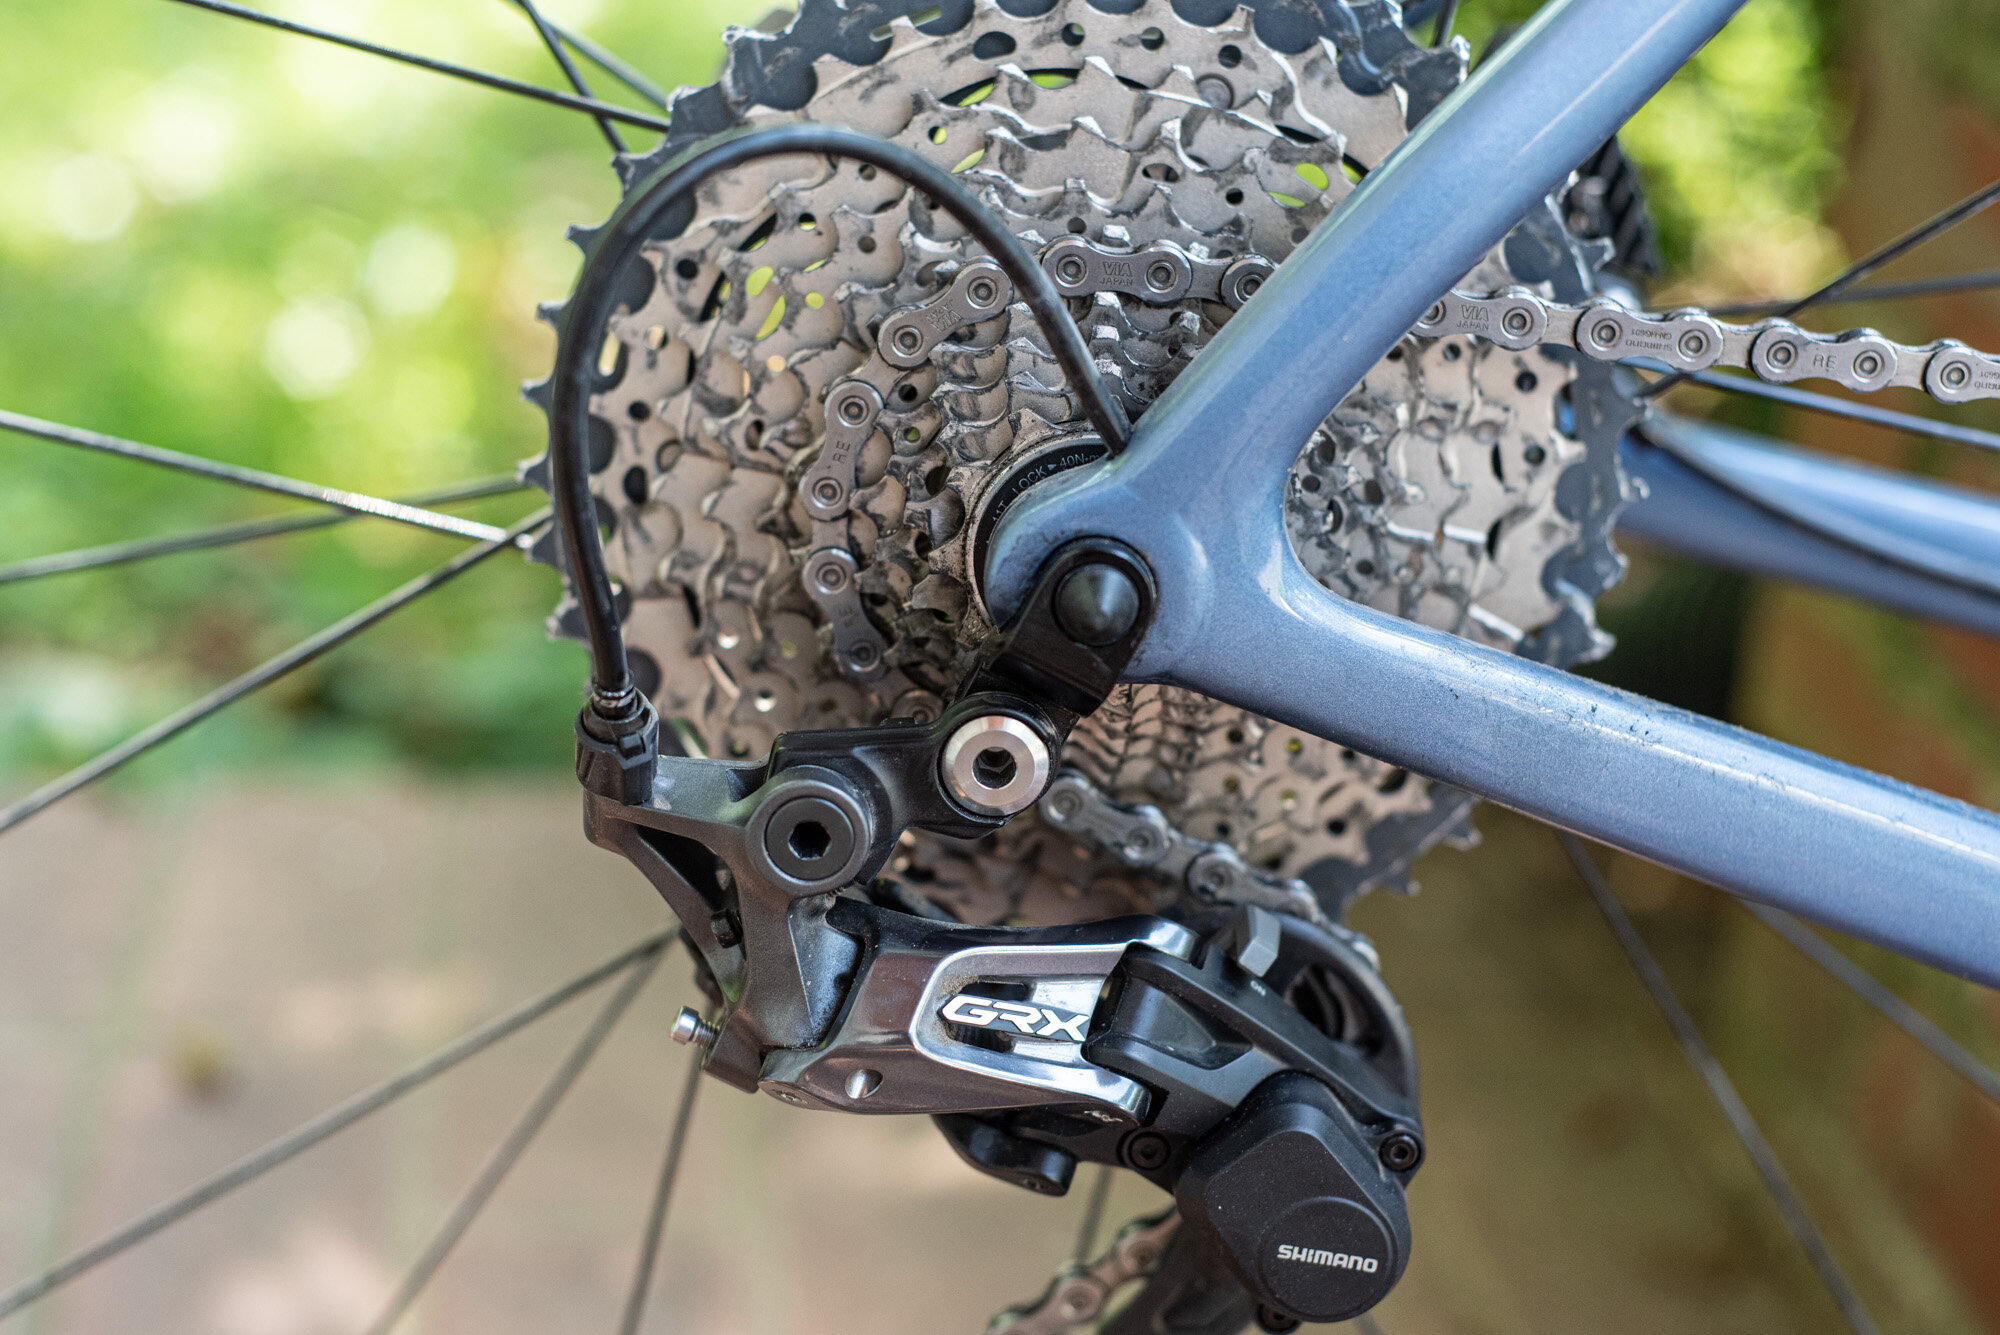
“There is however one component that I really wish they just left alone and avoided getting too fancy with - the rear derailleur hanger. This might be the smallest part of the frame, but it’s also the part that I have the biggest gripe with. If something isn’t broken, don’t fix it. The standard bike hanger has been attached to frames for decades, but 3T decided to make the 3T Exploro with a hang loose hanger. What this means is that the hanger screws into the rear axle after installing the wheel. It all looks great on paper, but actually installing the hanger this way is nothing short of annoying. Maybe things are a bit easier with an SRAM derailleur, where you can lock out the cage arm, but it’s been such a frustration with the GRX groupset. Please 3T, if there is one thing you can fix on future models it’s this. There are some other complications that also come with this design. Think of indoor smart trainers (like my Tacx Neo 1), which rely on a quick release adapter for thru-axle bikes. This hanger makes the installation of such adapters a mess. Each time you remove the back wheel, you will be faced with the frustration of also having to install the hanger (with the rear derailleur attached). Correct gear indexing depends heavily on the alignment of the hanger and with this design, one is just never assured that the hanger is straight and in the correct place. Ok, enough of my ranting.”
3T Exploro RaceMax
Turns out 3T listened to my plea and changed the design! Or at least I echoed what the bigger community felt and other owners of the 3T Exploro shared the same frustration. 3T released their latest model of the 3T Exploro, called the Exploro RaceMax, on June 1st, 2020. They made a ton of changes to the new models, including; a higher stack height, more bottle holders, increased aerodynamics, greater tire clearance, improved seat and seat post clamps, double dropped chainstays, this list goes on. I think the phrase “redesigned from the ground up” gets used a bit too easily these days, but in this instance, I can safely say that the new 3T Exploro comes with a whole host of very impressive updates that give it an entirely new look and feel.
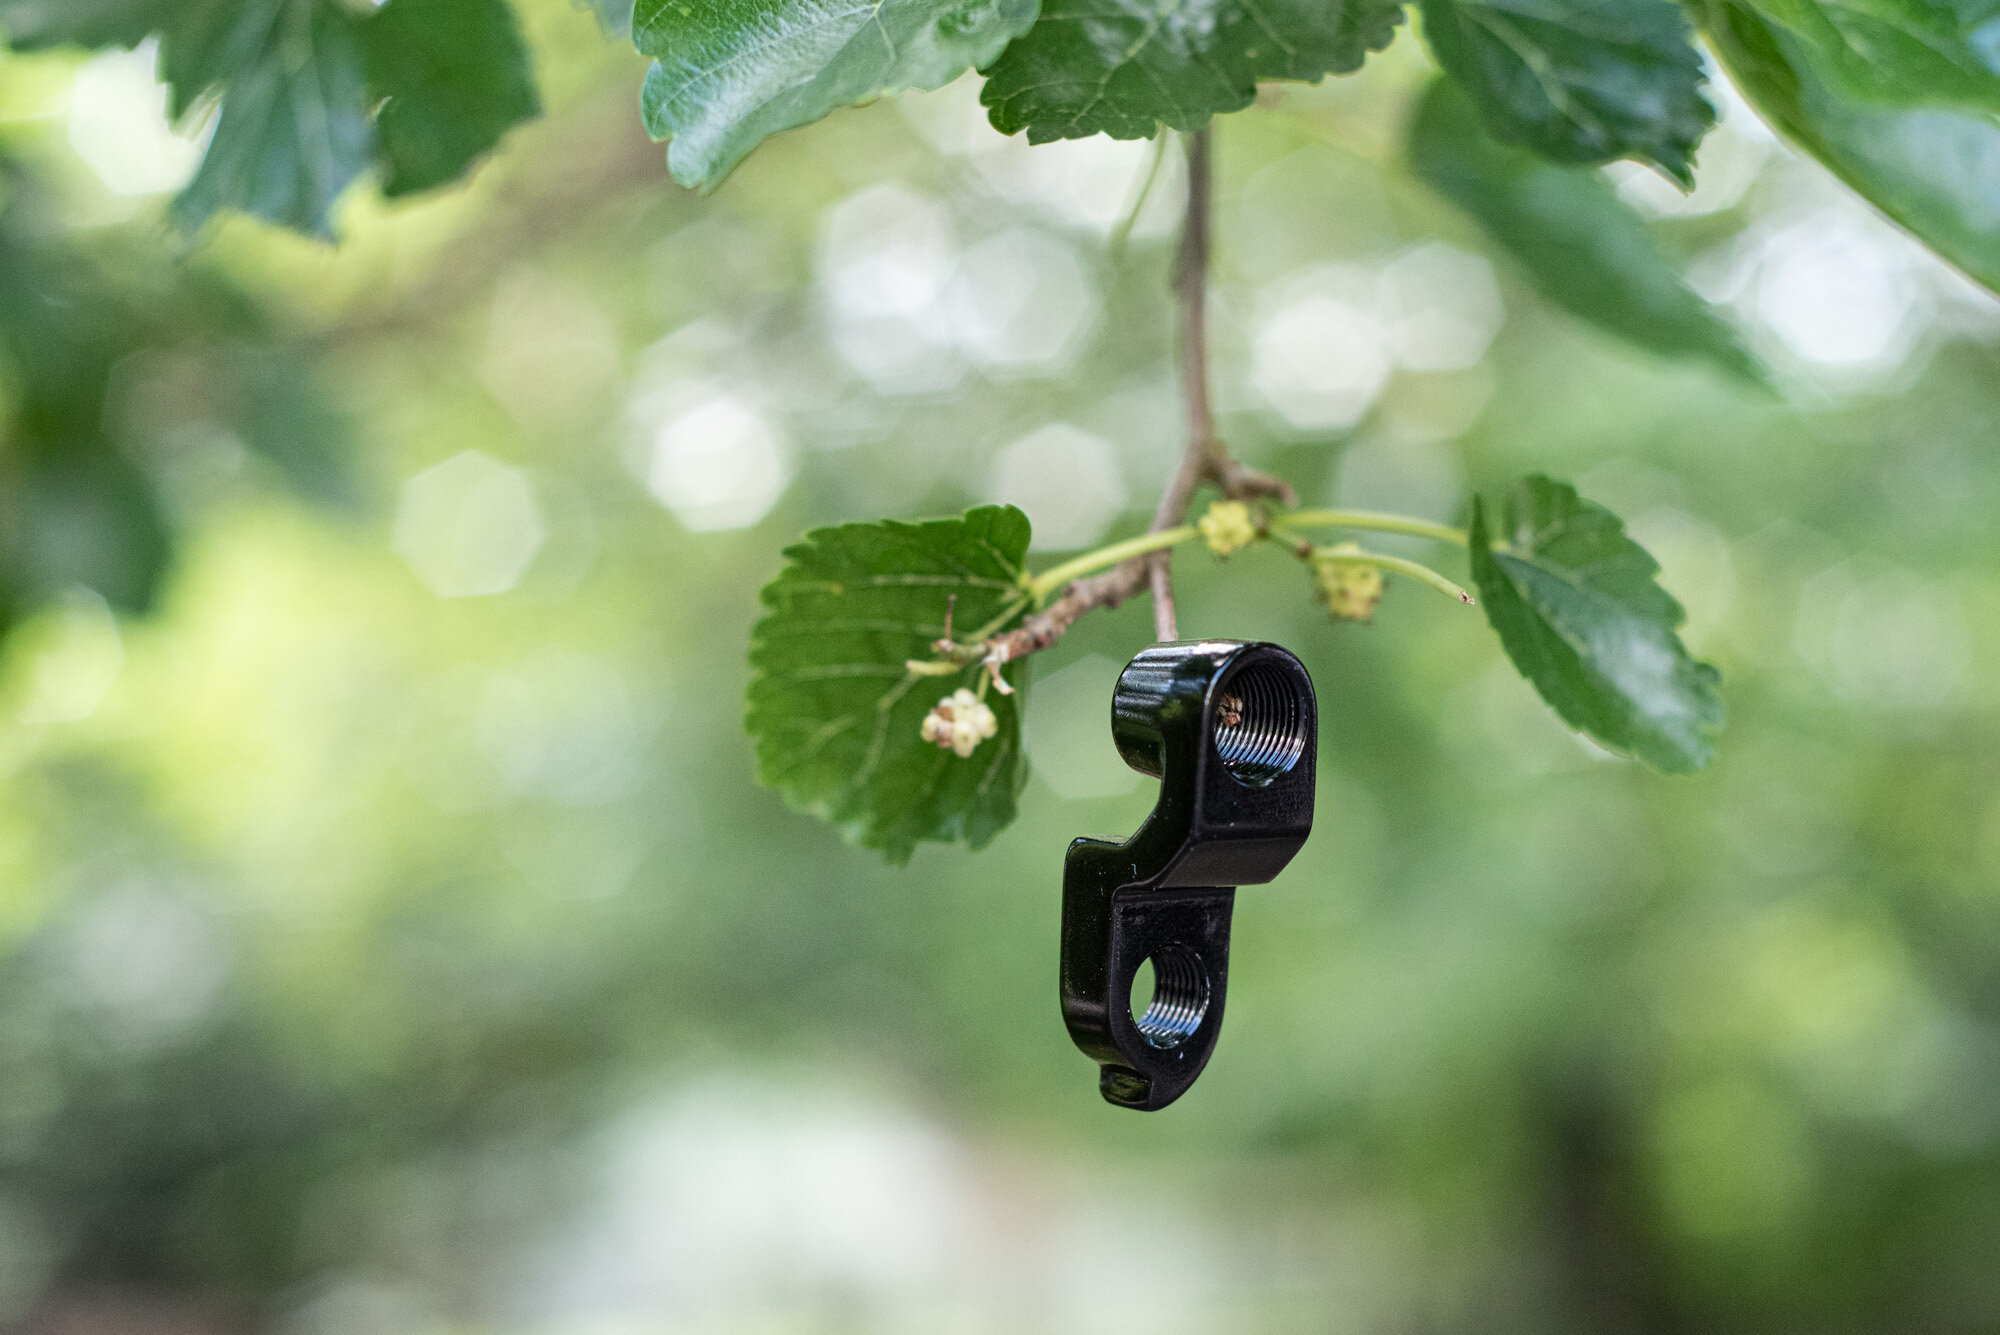
The update I was most excited about was the improvement to the derailleur hanger. The new models no longer come with a hanger that detaches each time you remove the rear wheel. Thank you! I was incredibly pleased to see that this update got included in the Exploro RaceMax redesign. It just makes more sense. I think the biggest reason for the redesign comes from the fact that more of the 3T models are now fitted with SRAM’s wireless rear derailleurs. Wireless shifting, and the lack of a shifting cable, means no support for the hang loose hanger, which in turn means that the derailleur is only (partly) suspended by the chain. This ultimately leads to the derailleur dropping into the sand or dirt when you are trying to fix a puncture, while out in the middle of nowhere (and away from a work stand). The decision to move to a hanger that remains fixed to the frame will prevent this issue from occurring on the new Exploro models fitted with wireless shifters.
Other restrictions that come with the hang loose hanger design are stated in my original review. In my opinion, the complications that come with a loose hanger far outweigh the potential benefit, which by the way, is suppose to be easier rear wheel fixing. If you want to see the required effort that comes with this type of hanger design, then be sure to check out the video that goes along with this blogpost. I’ll walk you through the rear wheel removal and installation process so you can see it for yourself.
Luckily this kind of frustration will no longer be a problem for owners of the new Exploro RaceMax. I think it’s a small, but ultimately very significant change that was made to the new Exploro. Now I’ll just need to find a way to get my hands on that updated Exploro frame-set.
Why this obsession with a derailleur hanger?
I wanted to wrap up this blog post by providing some backstory to help explain why I am so fixated on such a small component of a bike. It all goes back to 2003 when I was zipping around the streets in South Africa on my Scott Speedster S2. This aluminum frame was a thing of beauty (at least back then), but it had one significant shortcoming. The hanger on this frame was not replaceable at all - it was simply a part of the the complete frame.
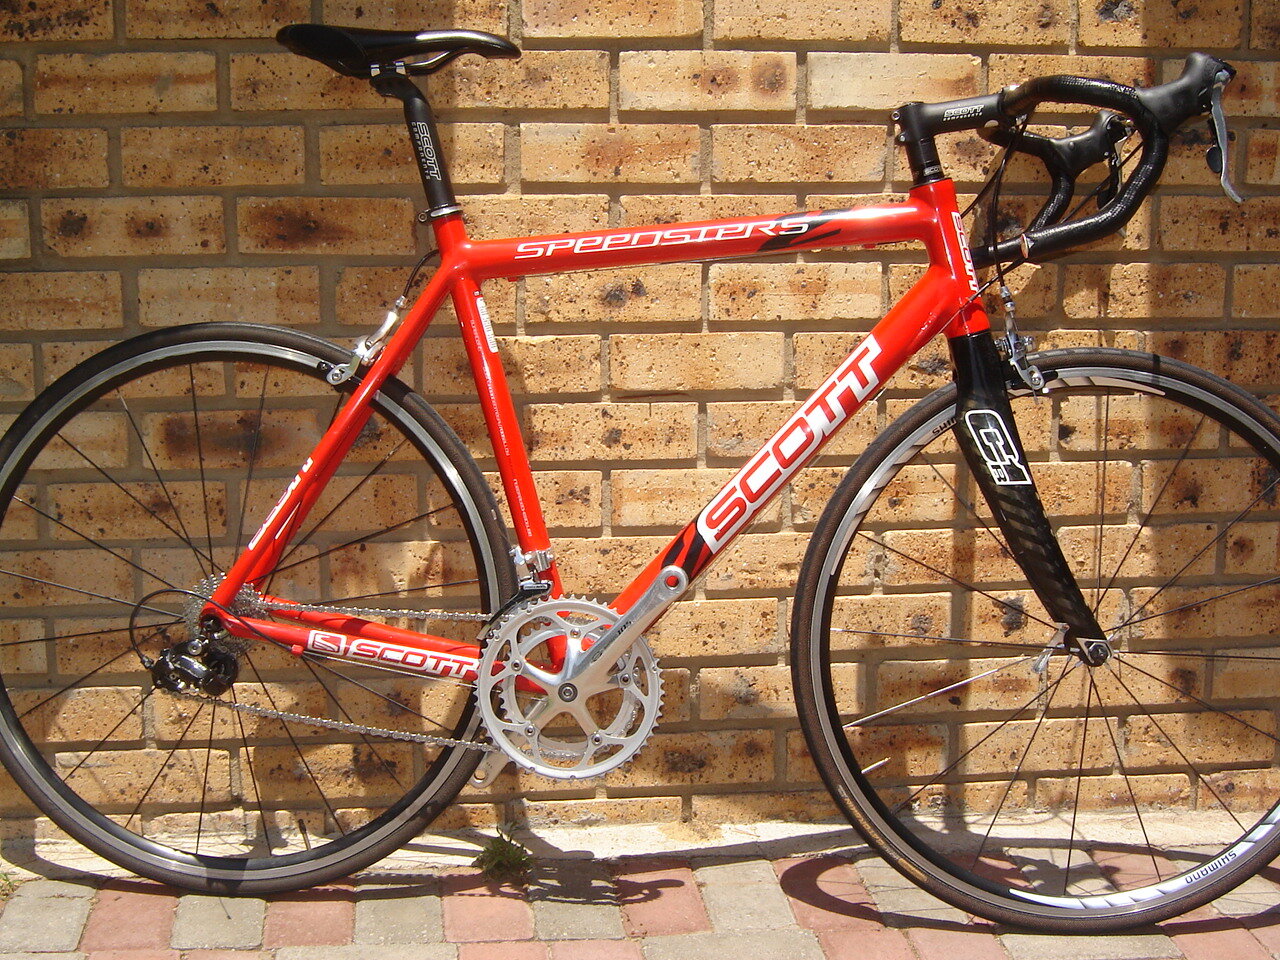
Throw-back to my Scott Speedster S2. This bike did not have a removable hanger, and it instead formed part of the complete aluminum frame.
I learned about this design’s shortcoming in a very hard way. On one particular ride, I had the incident where the derailleur got pulled into the rear wheel’s spokes because of incorrect gear settings. Not only did I destroy my derailleur, but the hanger, got totally bent. Long story short, I had to find an aluminum workshop that could bend the hanger back into place without snapping it off completely. The groove in the hanger subsequently also needed to be re-drilled, which made fitting the derailleur somewhat complicated. The end result of this story was a vow to never again own a frame that did not offer the ability to replace a hanger. Fast forward to today and I now own a frame that disconnects from the hanger a little too easily. It seems I just can’t win!
Wrap up
I am very excited about the latest updates to the 3T Exploro. They have taken an already impressive gravel bike and made it even more capable. Of course, one of the most significant changes to this bike (in my opinion) was the decision to move away from the “hang loose hanger” design. Operating wireless derailleurs, fitting indoor trainers, ensuring proper hanger alignment and road-side puncture repairs have all become a whole lot easier thanks to this small change. This comes to show, that in cycling, as with so many things in life, it’s the little things that matter.
Let us know - What detail about your bike do you consider as absolutely critical to its correct functioning?
- Wiehan