Waxed Chain for Gravel Cycling: Does It Work?
Disclaimer: This post contains affiliate links, through which we earn a commission.
Let’s face it, when it comes to cycling, efficiency is everything. Seeking out efficiency on a bike is not only reserved for the hardcore racers looking to be as aerodynamic as possible, or those looking to squeeze out each bit of “marginal gain” that they can get. No, even to an average rider, there is tremendous value in seeking out some additional efficiency on the bike, whether that be in the form of maintaining a correct and comfortable position that allows for a more enjoyable ride, or simply being more strategic about which food and fluids to consume while out on a ride.
Another area where efficiently really matters is having a well-maintained bike. A clean bike is a fast bike! And it’s simply more enjoyable to ride. When it comes to bike maintenance, the biggest culprit that can detract from a clean-looking ride is a dirty chain. The importance of keeping a chain in top working condition can so easily be overlooked and very few riders will actually admit that they look forward to the maintenance portion of owning a bike. I must admit that I form part of the exception to that statement and I’ve come to really enjoy the process of cleaning and maintaining my bike. Other bike nerds will be able to associate all too well when I say that I can sit and stare at a clean, perfectly maintained bike for minutes on end, simply to marvel at how good it looks. But I digress. The point is that I’ve spent my fair share of time trying out various methods to clean and maintain my bike over the years. I’ve tested out so many types of chain cleaning and lubrication methods that it will be hard to name them all here. Some methods work better than others and, for the most part, each have their own set of pros and cons.
An Alternative Chain Maintenance Method For Gravel
In this post, I want to walk you through an interesting chain maintenance method that I started following recently. While many have commented on how this method works for road cycling, I wanted to specifically address how it performs within a gravel riding context. Gravel cycling poses a unique set of challenges to the drivetrain of a bike, and as such, demands an effective chain lubrication method. Most standard lubrications that we use on road bikes attract a high level of dirt, which is not all that great for a cycling discipline that takes place on dirt roads!
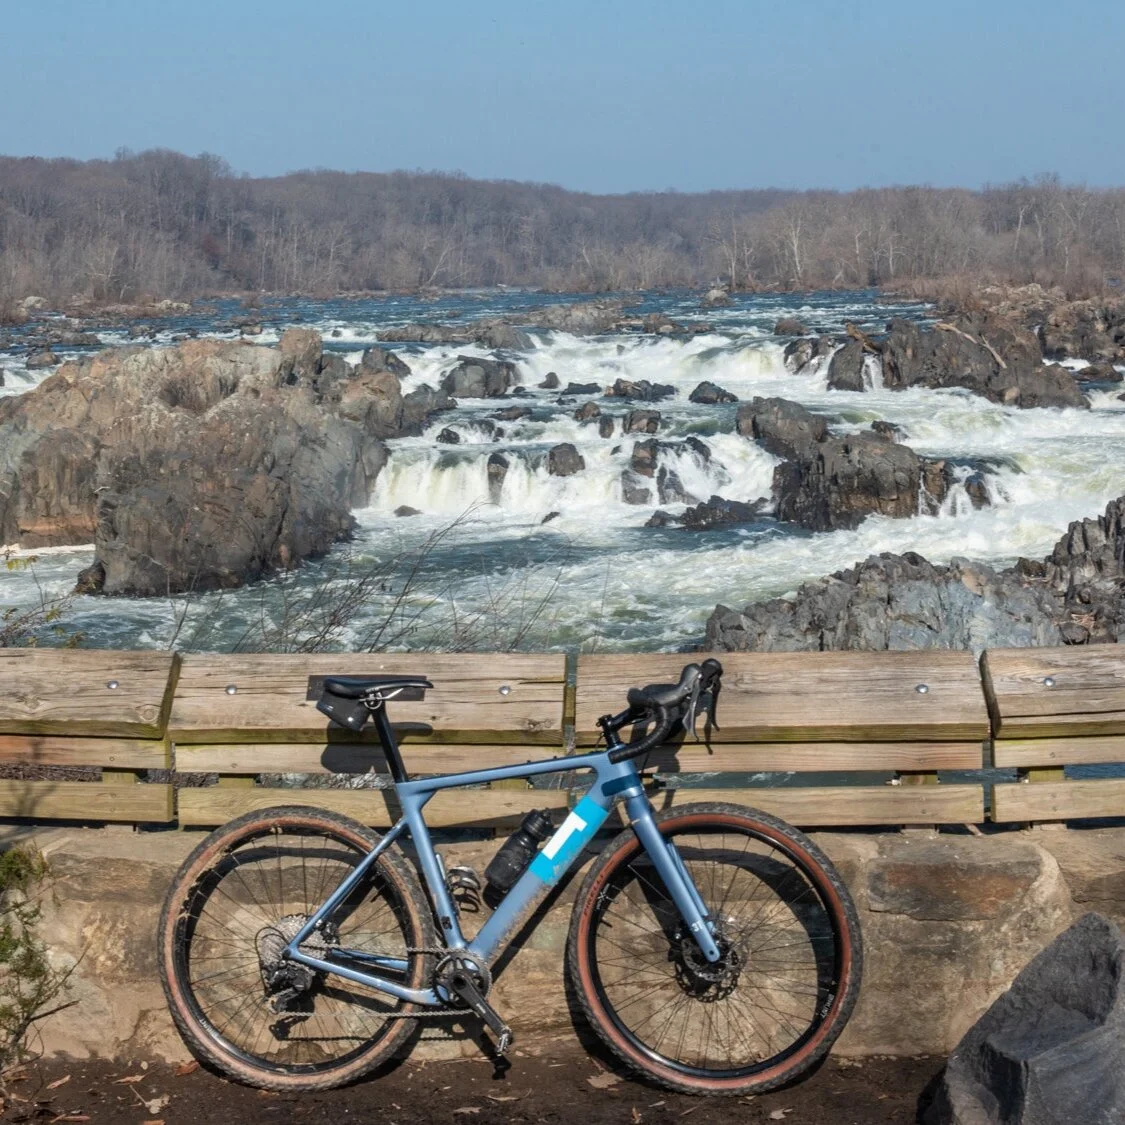
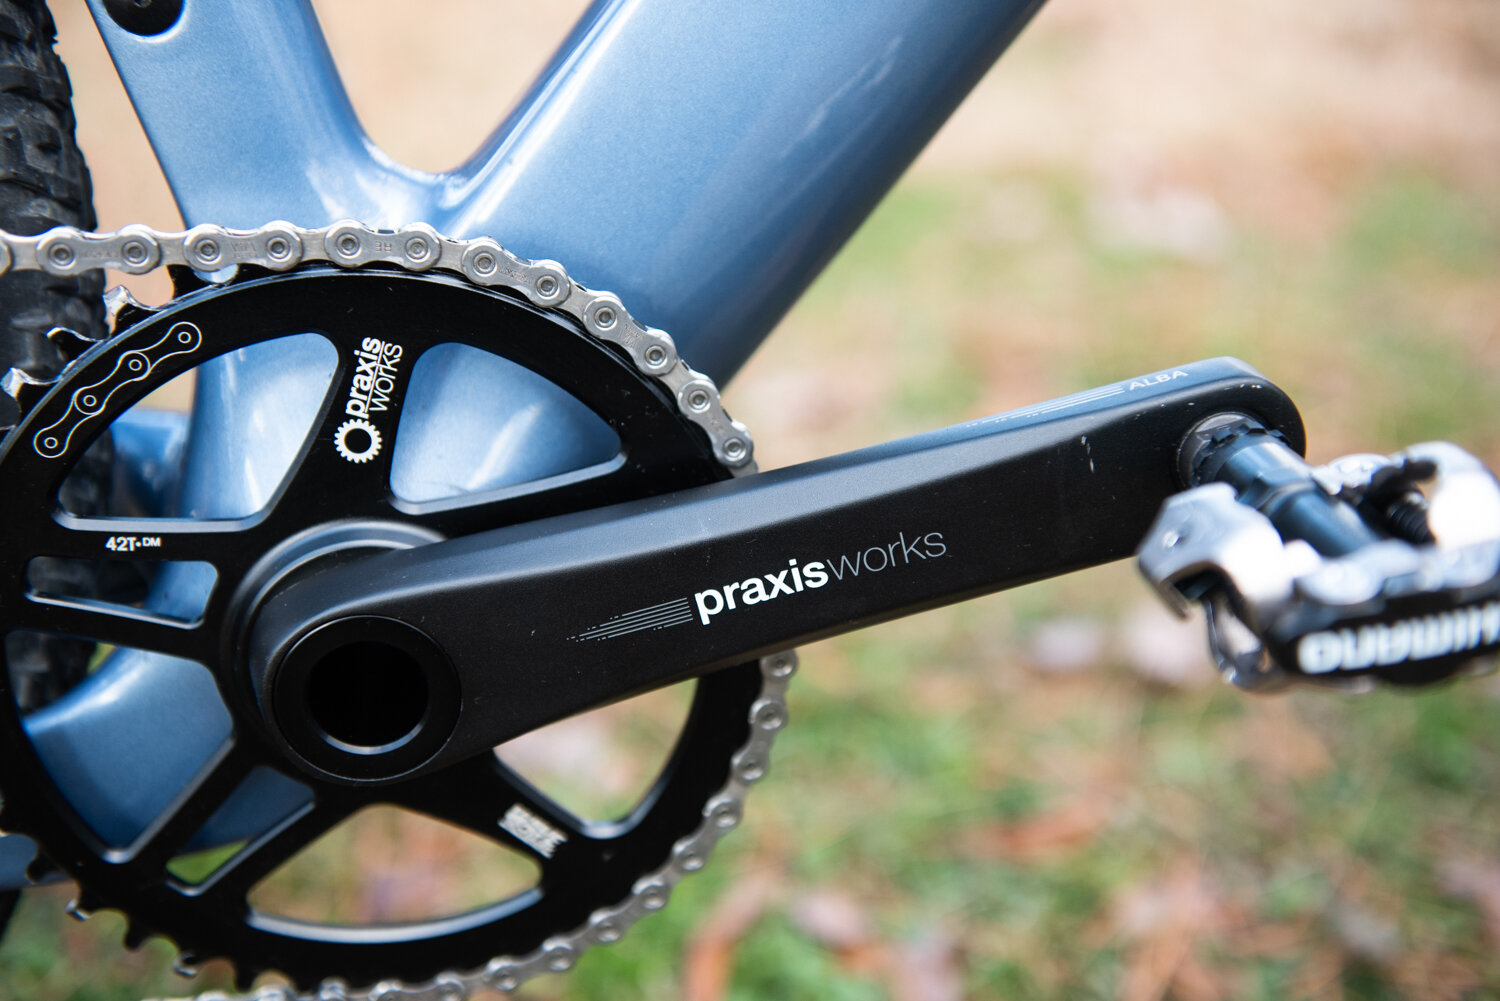
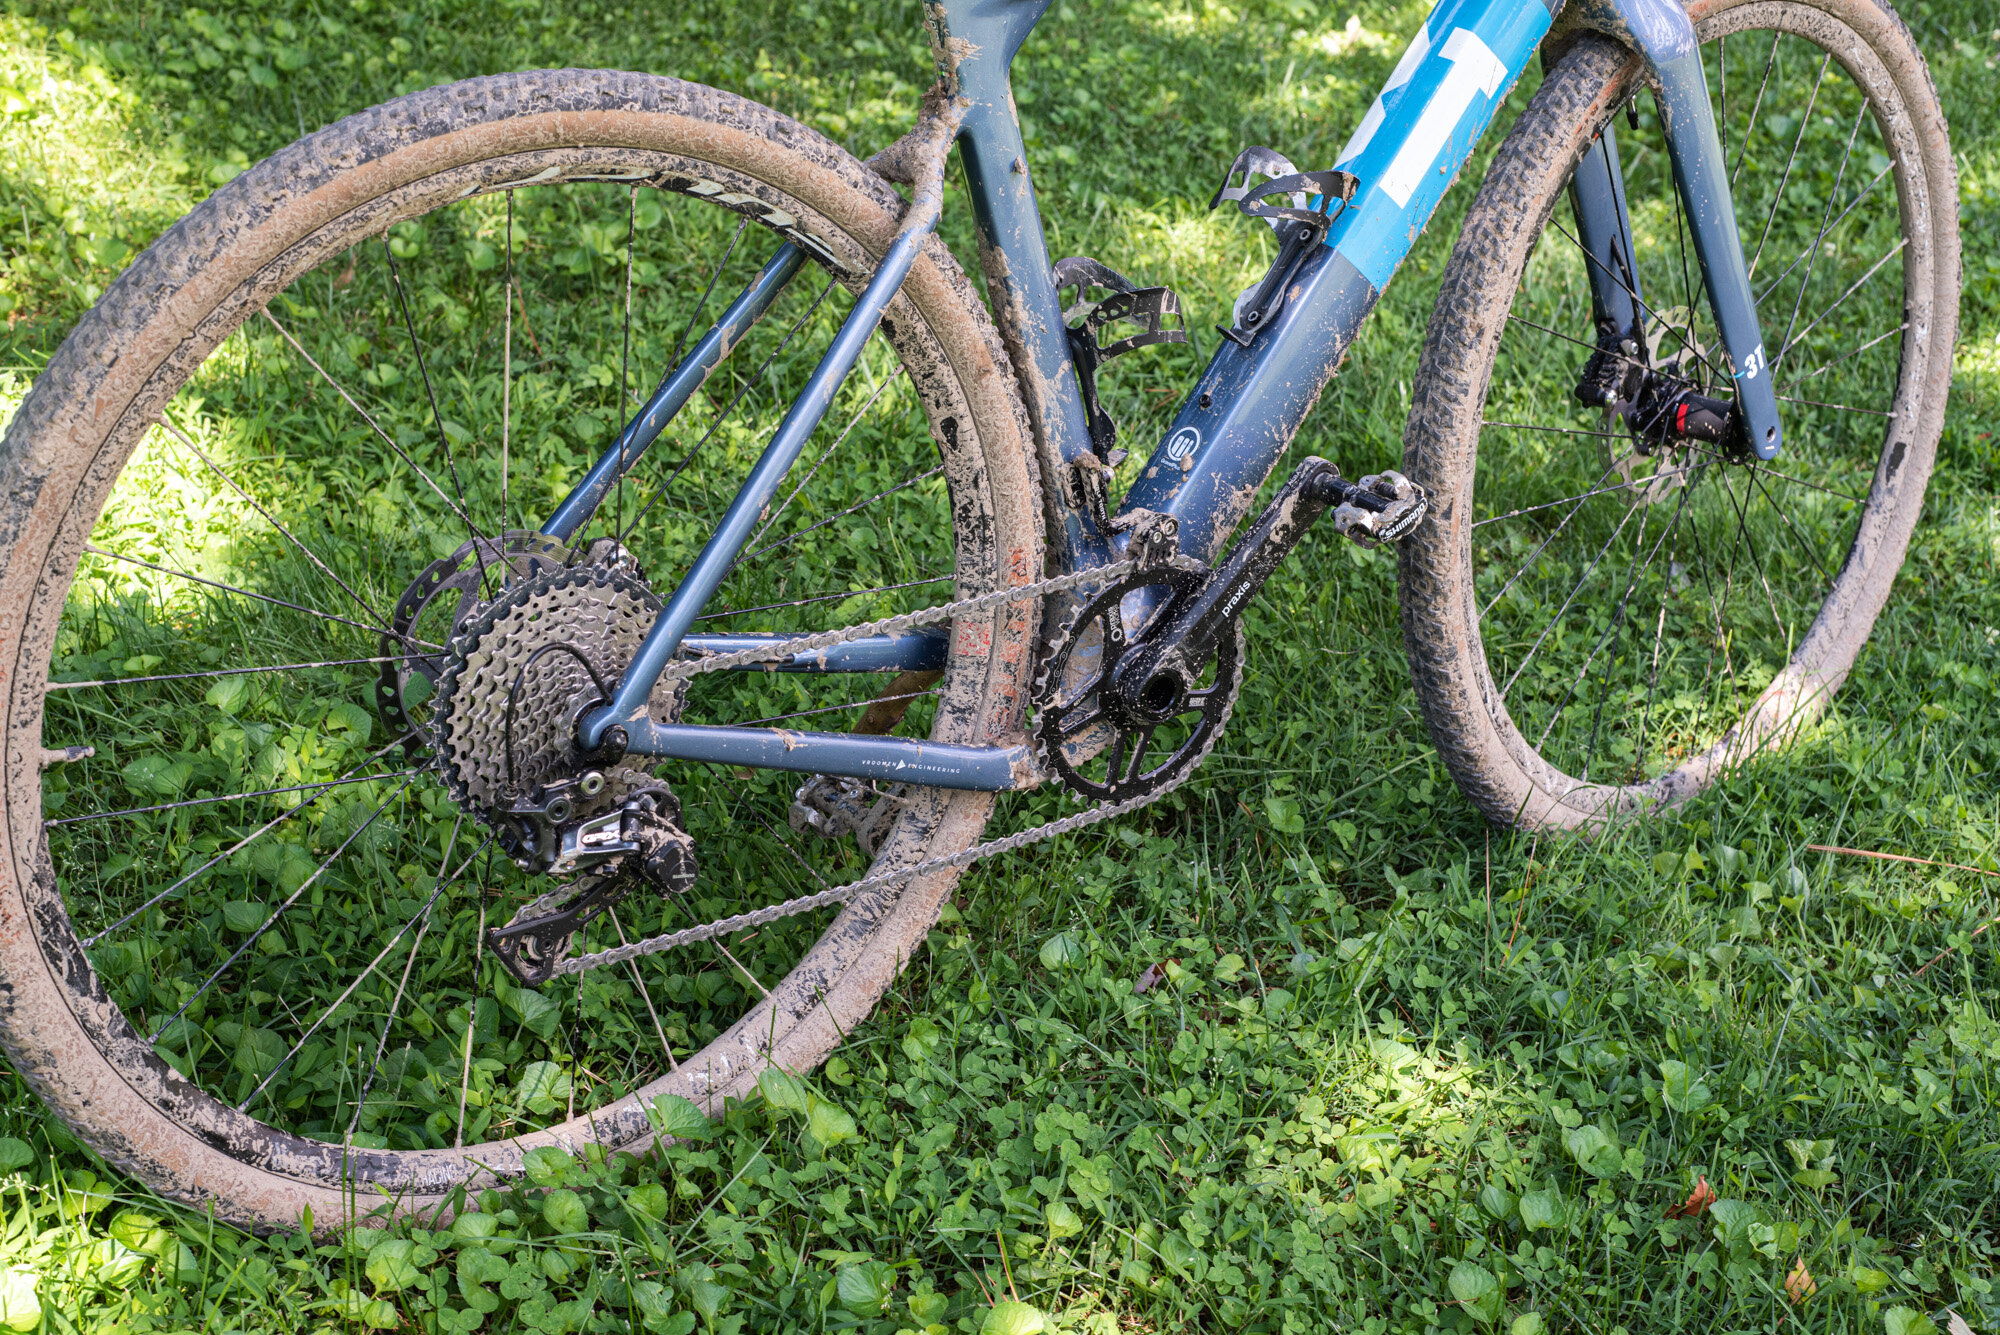
The dirt and mud that are attributed to a gravel bike ride can cause far greater levels of friction on the chain (when compared to a road ride), which in turn can lead to a noisy and inefficient shifting experience. To make matters even worse, many gravel bikes these days come equipped with a 1x drivetrain (such as my test subject, the 3T Exploro). The 1x set-up, which allows for a drivetrain with a more minimalistic look, can lead to greater stress on the chain due to the extreme chain angles that need to be operated. The additional demands that come from dirty riding conditions and extreme chain angles all factor into why the chain maintenance of a gravel bike is even more complicated than your standard road bike. There is, however, some hope for a better solution, and I’ll share my thoughts about my new chain maintenance routine next.
The Wax Chain Method
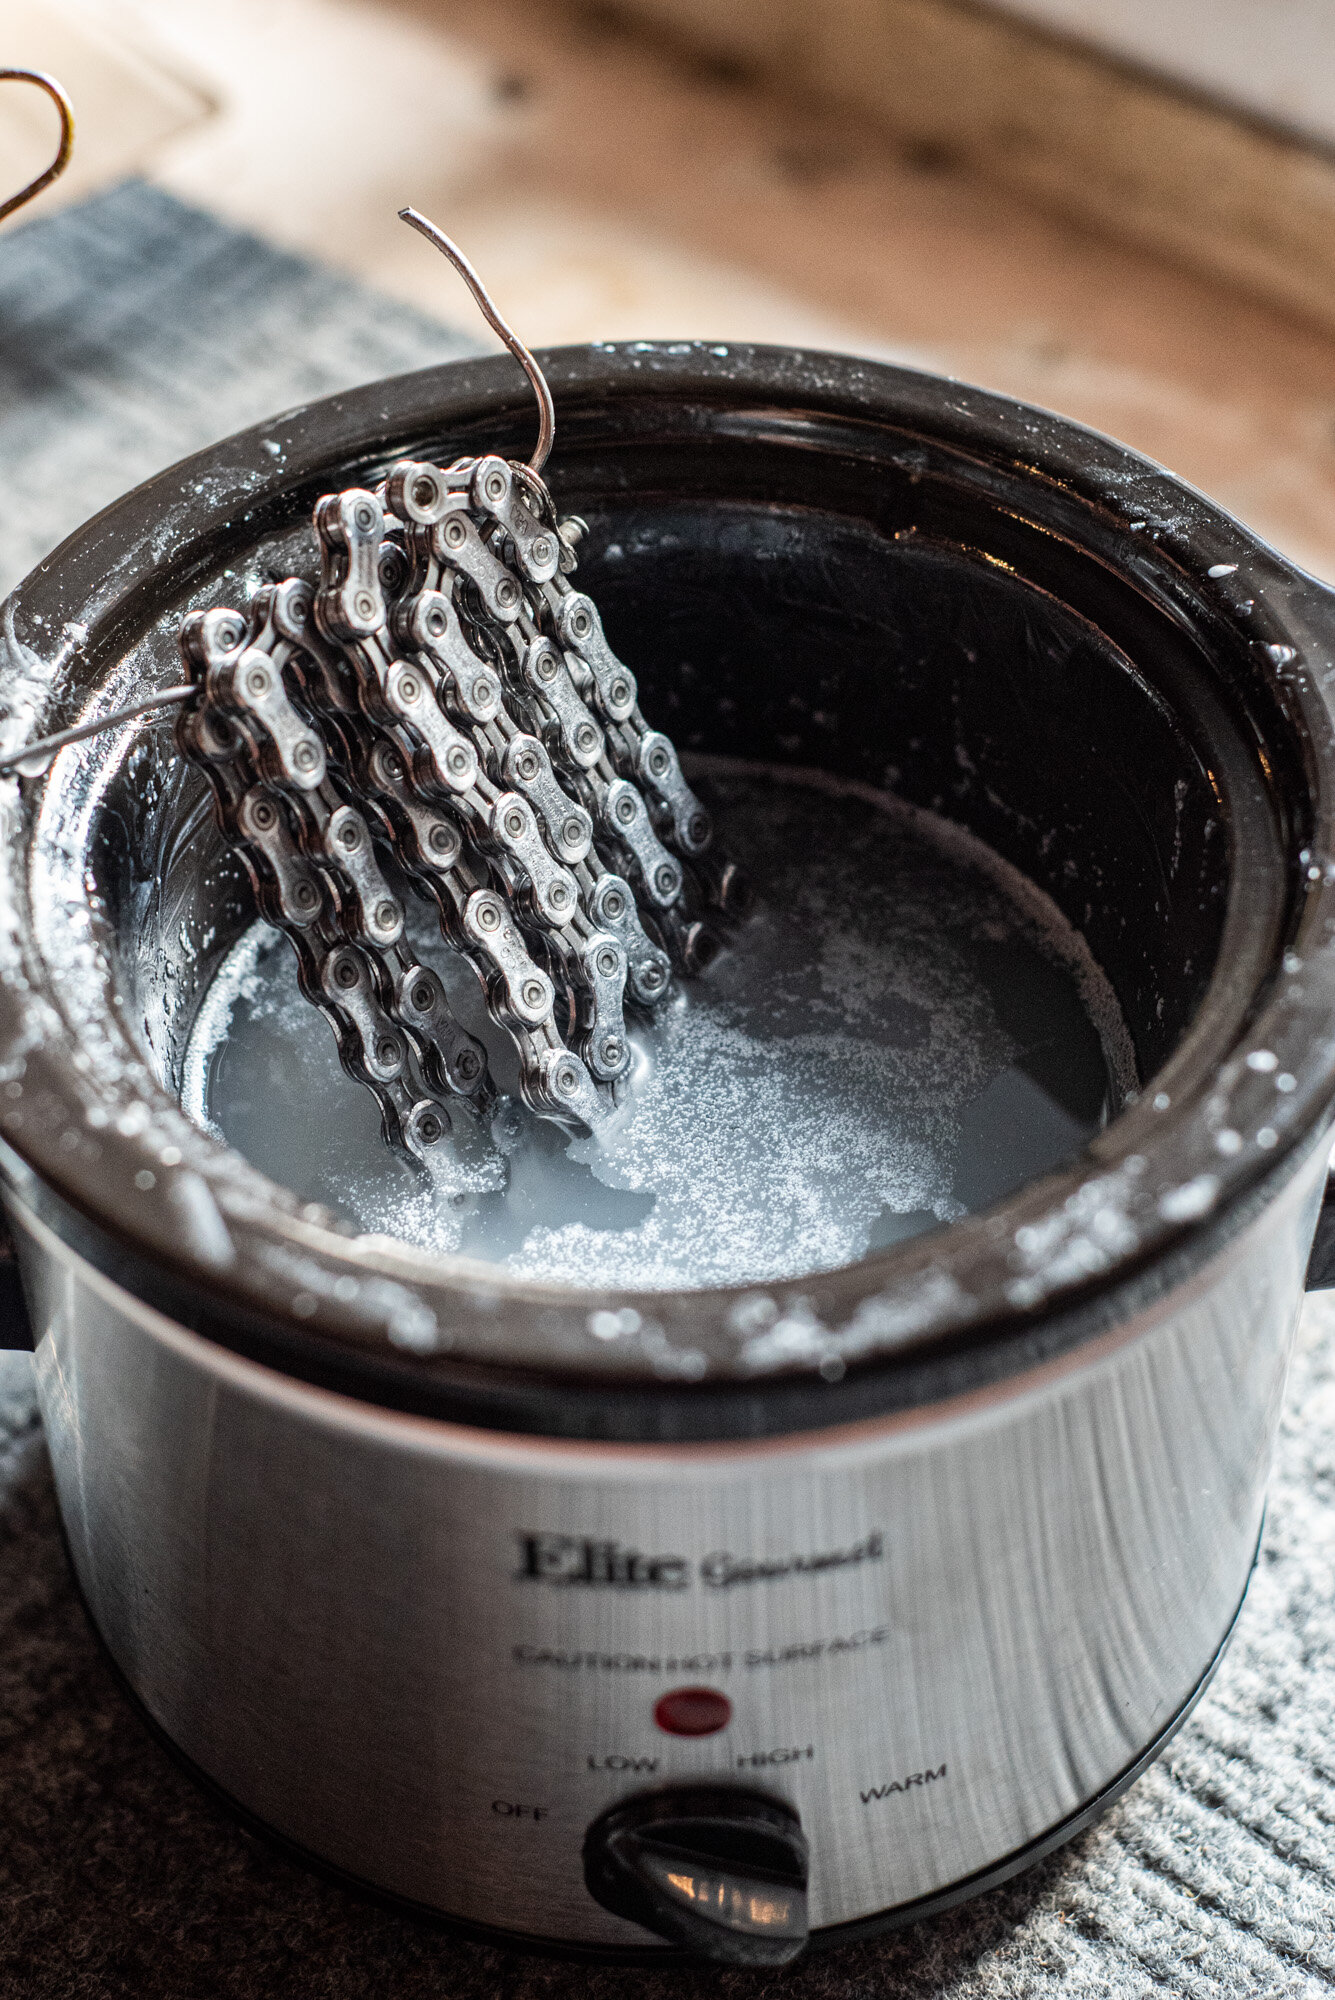
Okay, enough with the delay, the alternative chain lubrication method to which I am referring is waxing. I am not referring to simply adding a wax-based chain lube onto your bike, but instead this method involves submerging your chain into a melted mixture of paraffin wax and Polytetrafluoroethylene (PTFE) to allow all the inner parts of the chain to be lubricated throughly.
I’m not going to claim that I am the mastermind behind this technique, and I am very happy to give credit where credit is due. I first learned about this technique from the OZ Cycle YouTube channel. I can definitely recommend that you watch three of his videos that cover the full spectrum of what you will need to know before you give this method a try. Instead of restating all OZ Cycle’s research and the science behind this method, I’ll point you to the following steps and videos to help explain what makes this lubrication method so effective:
1) The first step requires that you completely clean your existing chain (or even a new chain) from any of the oils and lubrications that it contains. This step is critical to allow the wax mixture to stick to the chain. Any contamination on the chain and the wax will simply fall off. Watch this video from OZ Cycle carefully to see what he recommends. You’ll note that this is the only part of the process that involves some harsh chemicals. Be sure to research how to correctly and safely dispose of these chemicals in your local area. Please don’t just dump this onto the ground!


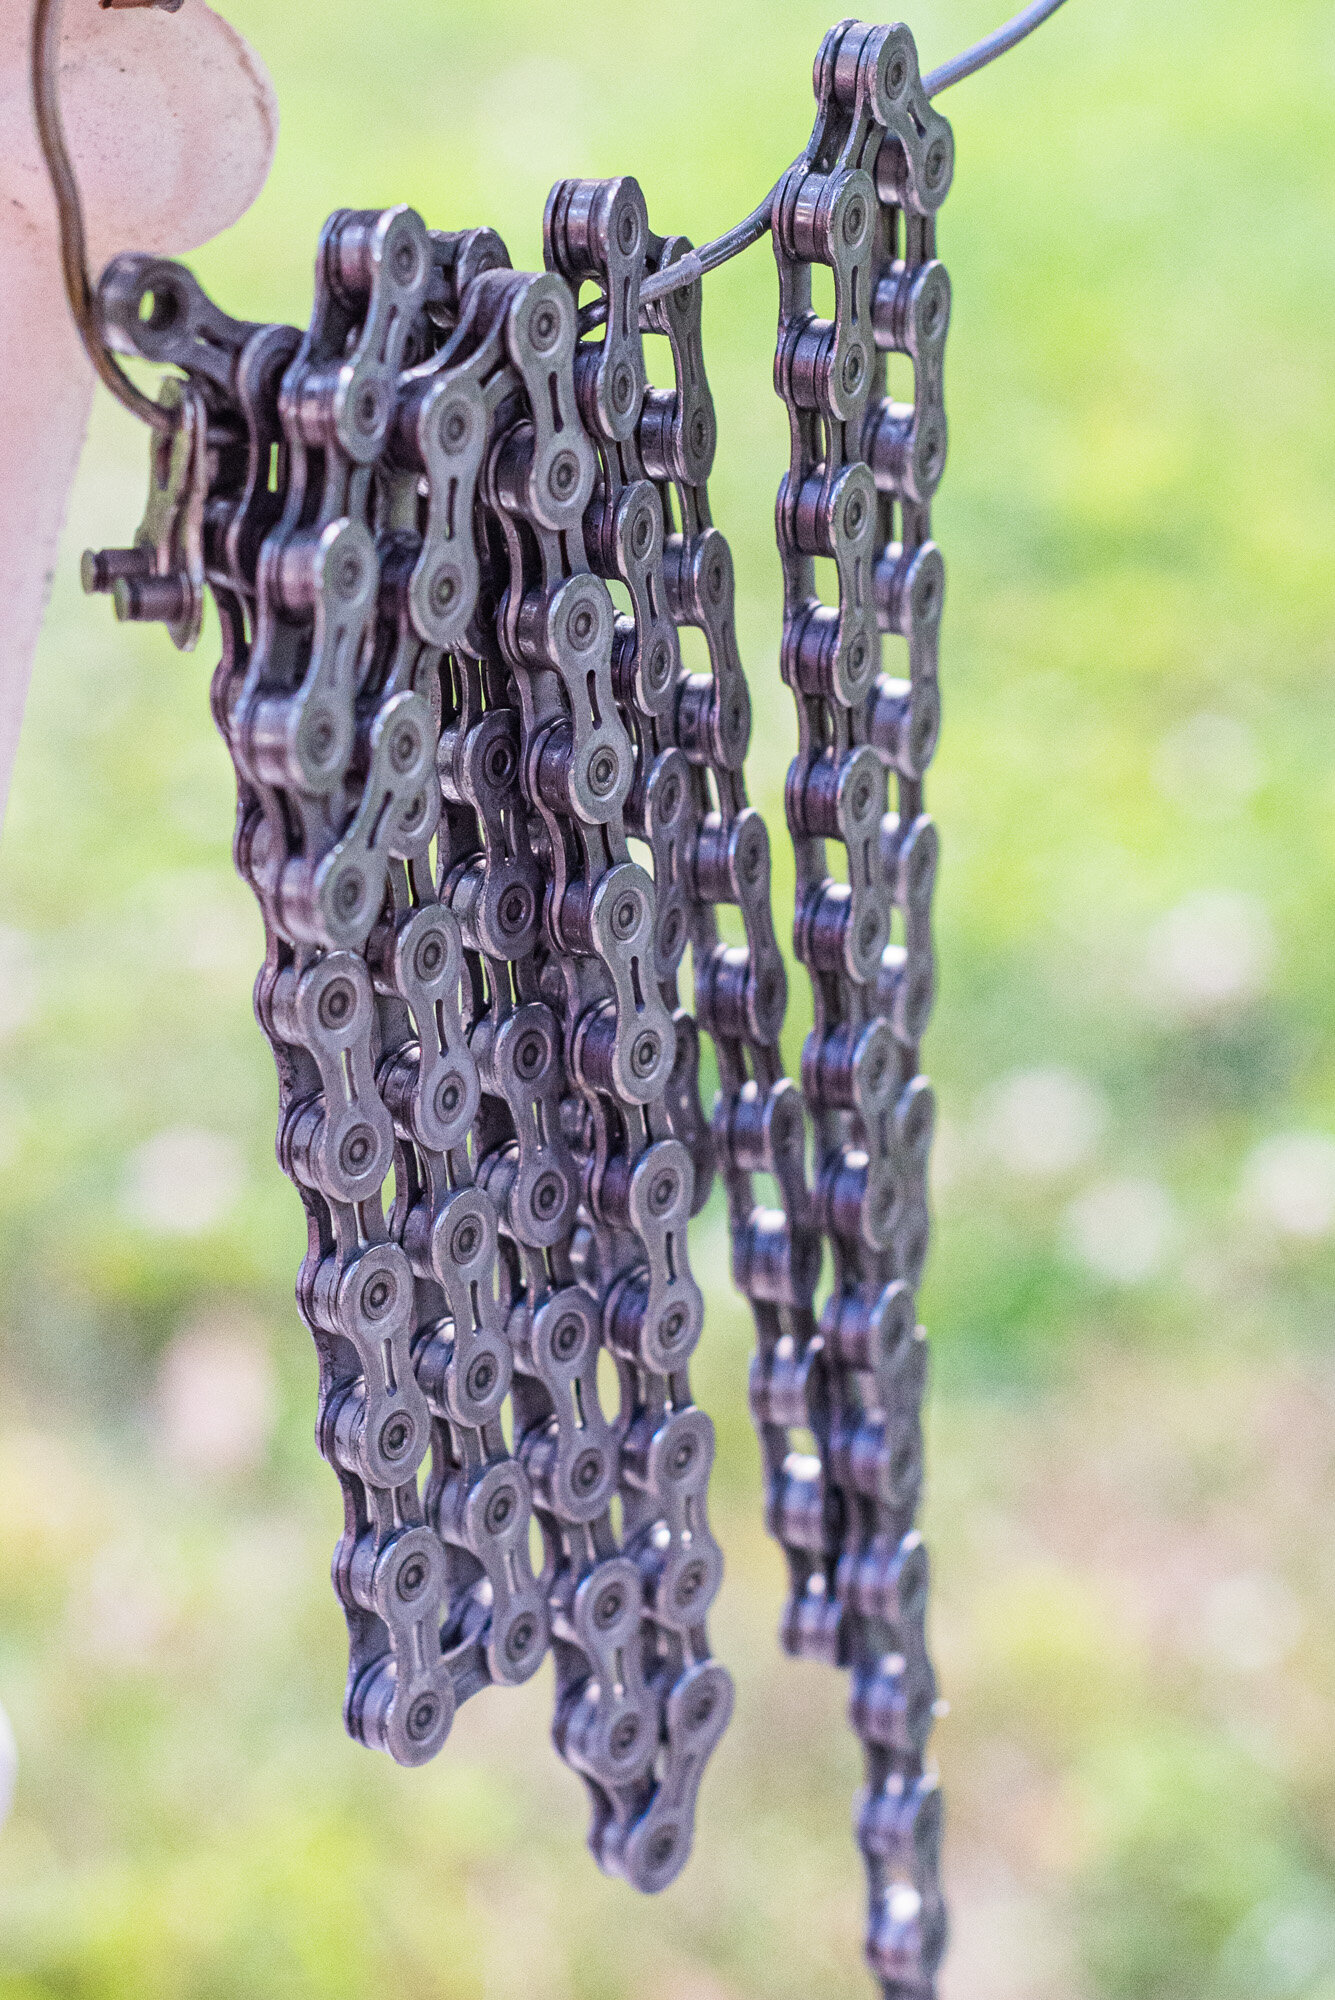
2) The second step is where the waxing begins. You’ll need a small slow-cooker (crockpot), paraffin wax and Polytetrafluoroethylene (PTFE) powder. Watch this video from OZ Cycle that explains the waxing process in detail. He even gives some handy pointers on how to construct a hook that will allow for the chain to be placed into the hot wax. Once done, you’ll have to hang the chain up to dry and then work out the initial stiffness in the chain that results from the waxing. You are then ready to place the chain back on your bike. It should reach maximum efficiency after about 15mins of riding. According to OZ Cycle, the waxed chain remains effectively lubed for 250-300kms (~155-185miles) of riding. More about my experiences later.
3) The third part of the OZ Cycle wax chain maintenance relates to creating a handy quick application bottled chain wax. Gravel riding often goes along with multi-day bikepacking adventures that won’t allow for access to a slow cooker and the wax mixture. This is where you’ll need a bottled version of the wax mixture that can act as a temporary substitute for the full wax-bath. Be sure to watch this video from OZ Cycle to see the step by step guide on how to create this handy quick application version of the wax.
That’s the how-to part covered. I followed the steps outlined above to the T and would like to share my experiences about how this method actually performs. If you read the comments section on the OZ Cycle videos, then you’ll be quick to tell that lots of people have had great success with this method. I, however, wanted to put it to the test for myself and below you will find my thoughts about a wax chain in both a road and gravel context.
Does It Work For Road Cycling?
Before I get to my experiences with this chain lubrication method within a gravel context, it might be worthwhile to touch on how it performs on the road. Does it actually perform that much better than a regular chain lube? My short answer to that question is yes! It works really well. I was honestly blown away by how well this chain lubrication method performed on my road bike. Those praise comments on YouTube are there for a reason.
Gear changes are smooth, and you truly get the sense that the chain has been lubricated throughly. Some might argue that a waxed chain leads to more noise, but I actually found the opposite to be true. The shifting feels precise and without too much additional noise when compared to regular chain lube. The friction reducing PTFE within the wax really penetrates all the little links and rollers in the chain. I can’t back this up with any concrete data, but the drivetrain definitely feels more efficient. Whether this is just some kind of placebo effect or actual watts saved, the shifting experience feels much more comfortable.
Performance benefits aside, the biggest bonus with this method relates to how clean it is to operate. Wax is excellent at repelling dirt, which in turn gives it a very clean look. No greasy, oily, black stain messes to deal with. Even after a few rides, the chain remains clean and no matter how much you run your fingers over the chain, it won’t stain your hands. I’ve had a dropped chain on one of my rides and putting it back on was a pleasant experience. Honestly, if you’ve ever wished that your hard work from cleaning a bike could last longer, then this chain lubing method is a must. All-in-all, a wax chain works great within a road riding context. But what about gravel?
Does It Work For Gravel Cycling?
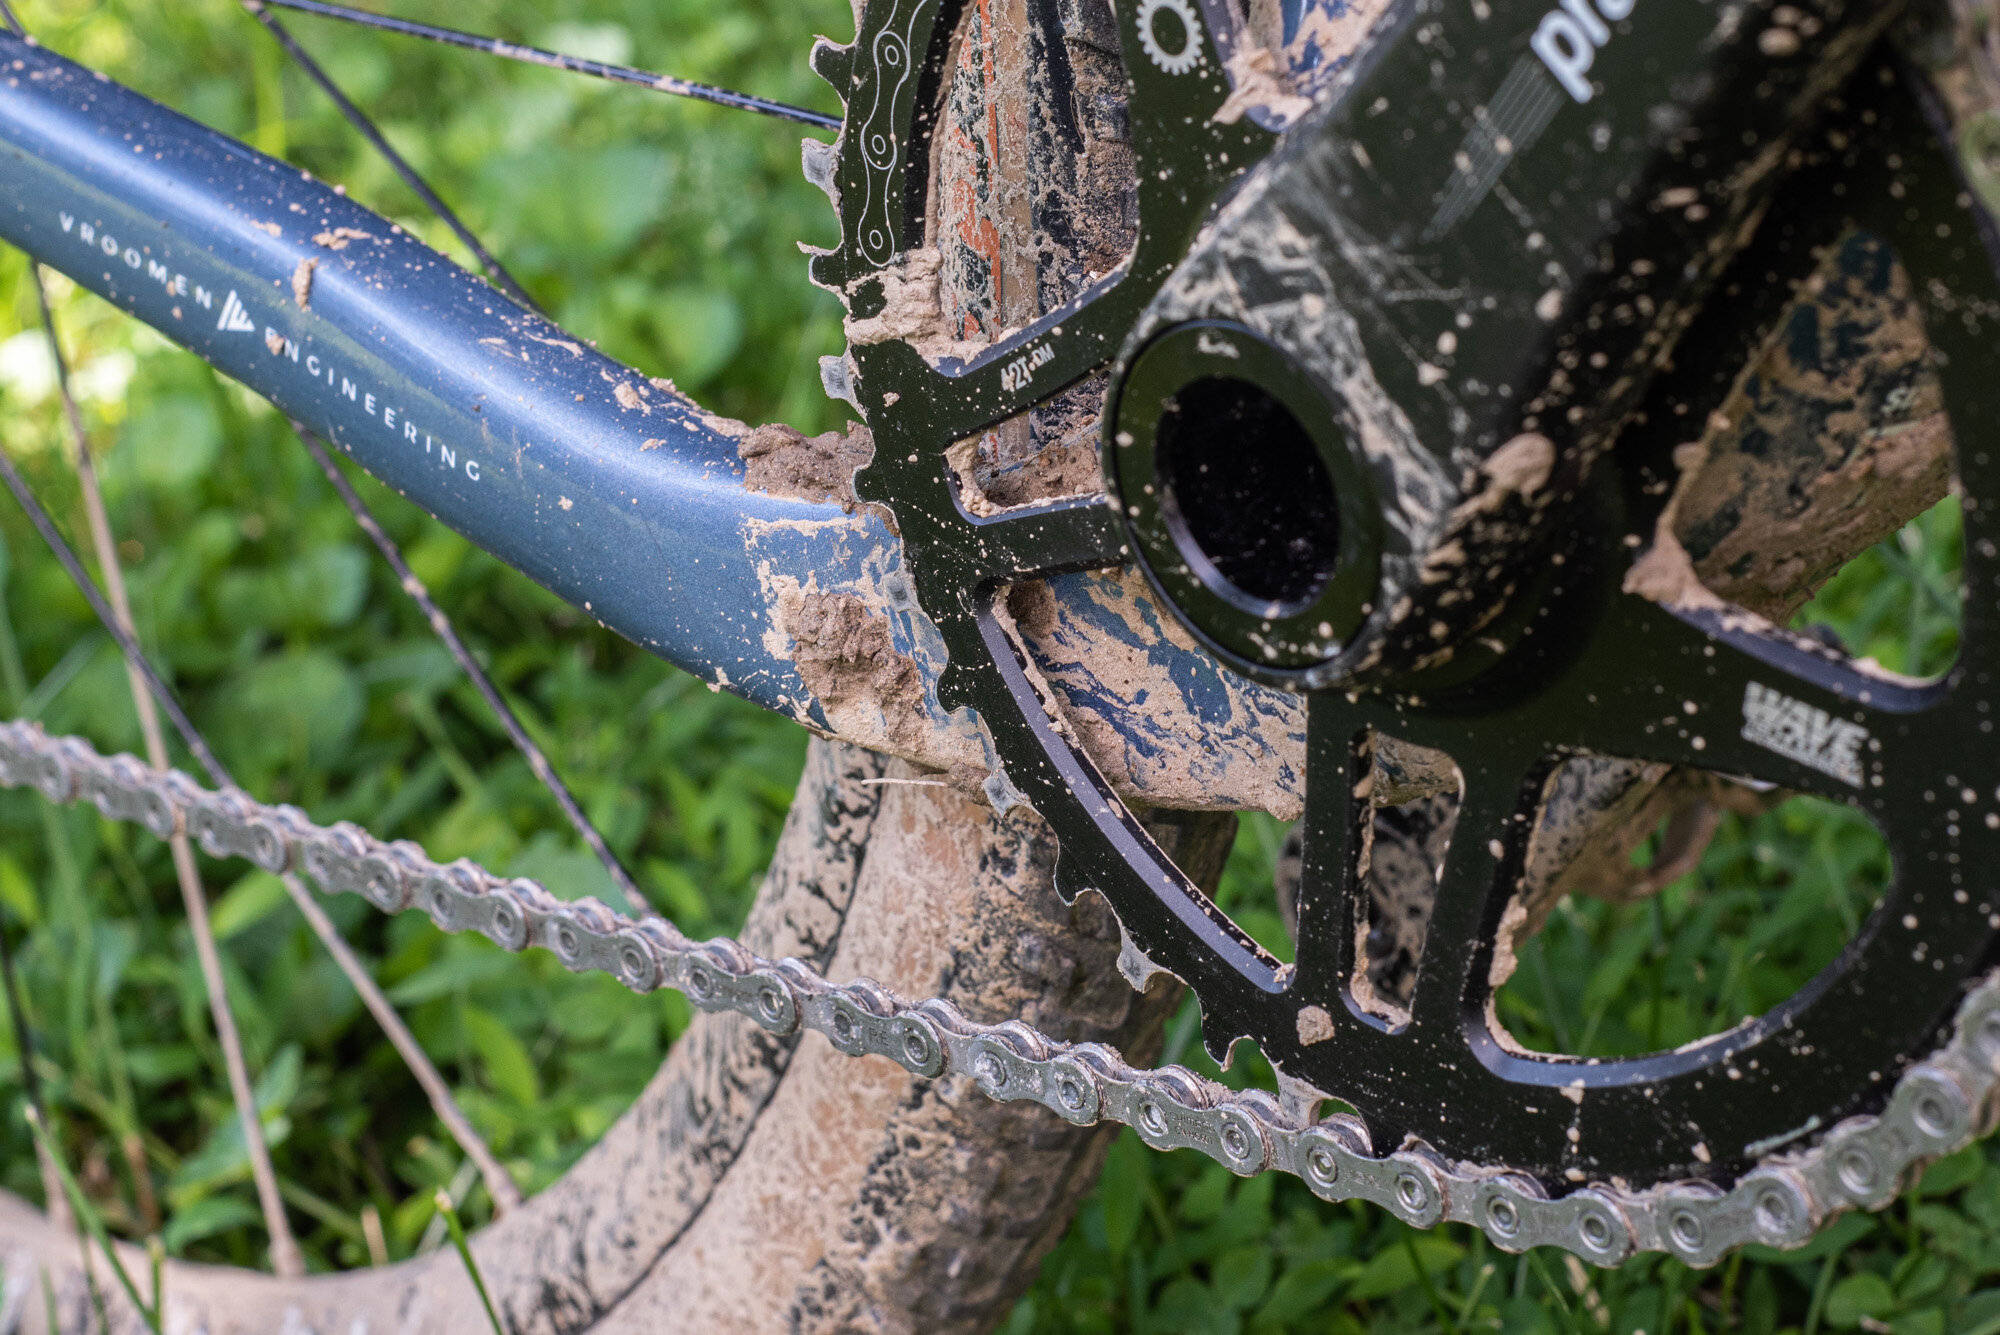
I’ve already explained why gravel riding pushes the demands on a chain that little bit further. Dirt roads will naturally be more dirty than paved roads, that’s a given. I must say, I was fairly skeptical if a waxed chain was going to work as well on gravel as it performed on the road. Well, guess what, it does! Even on a gravel bike, this lubrication method performs really well. I put the waxed chain lube to the test on my 1x drivetrain (42T front, 11-42T rear) and discovered a few interesting things along the way.
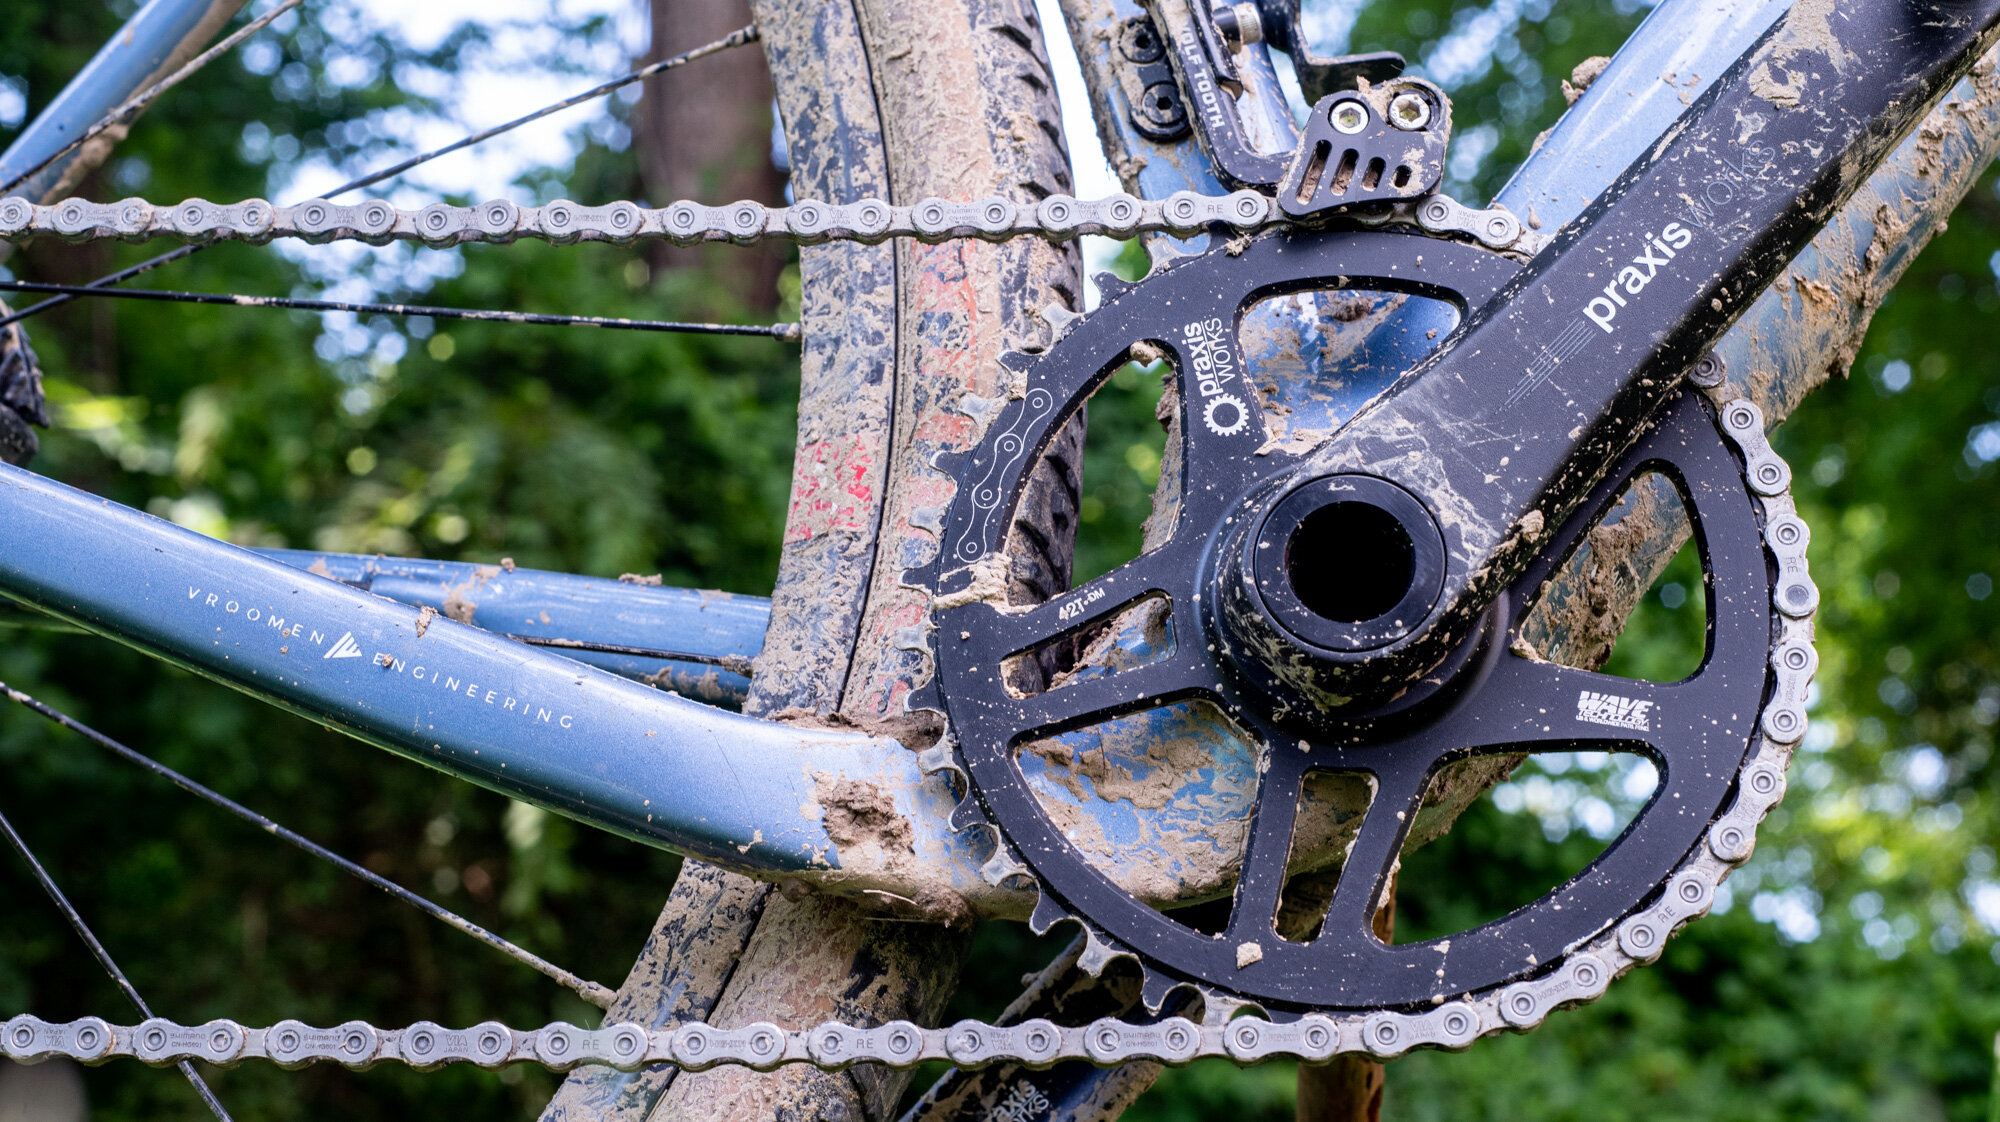
The dirt repelling properties of the wax really work wonders when it comes to gravel riding. In the past, I would spend hours cleaning my gravel bike, only to have it all undone after the first ride when the chain would be completely covered by the dirt. Regular lubes just aren’t as well suited for such dusty conditions, and although they might work well during the first few miles, they can quickly attract all kinds of grime to the chain. The wax and PTFE on the other hand, provide an excellent way to keep the drivetrain cleaner for longer. My experience is that on dry and dusty rides, the chain will hardly show any kind of noticeable dirt accumulation. Its mind boggling for someone who has grown used to seeing a dirty chain after each gravel ride.
The real test comes in wet and muddy conditions. I found that in such conditions the wax chain lube performs much better than I expected. Anyone who has ever cycled through a rainstorm on dirt roads will know that the mud and grime can quickly kick up onto the chain and also the cassette. Once the dirt gets lodged into the gears it becomes a grinding fest of epic proportions as regular lubes will cause all the wet dirt particles to stick to the drivetrain. Waxed chains are still subjected to the same level of dirt, but the difference lies in the fact that not as much accumulation takes place on the chain and cassette. In fact, during my testing, I found that rain actually helped to improve the shifting experience, since the water washes away most of the gunk that tries to stick to the chain and cassette. I was truly amazed at how well this performed. There was a noticeable improvement in the ride quality during challenging conditions when using the waxed chain method.


Even after a long, wet and muddy ride I could easily clean the bike and have it ready for the next ride. I followed OZ Cycle’s technique to simply clean the chain with boiling water and then re-waxed it. I place my chain in a stainless steel strainer whenever I pour the hot water over it. In the past I would have had to break out a chain cleaner and some degreaser to get the bike back into a ridable state. On-going maintenance is definitely much easier with a waxed chain. Gravel cycling in itself demands a much higher degree of bike maintenance and any chain lubrication method that can help simplify that process definitely deserves some credit.
I have clearly had really good results with a waxed chain when it comes to clean operation and good performance during challenging weather conditions. Let’s now turn the focus towards a 1x set-up. The extreme angles that a chain needs to endure when running a 1x set-up certainly places additional strain on the chain. Cross-chaining is very much a part of what happens when you run a 1x set-up. Even with a perfectly lubricated chain, you will still be reminded of the inefficiencies that come with the extreme chain angles. How does the wax chain method perform with such a set-up? Better than you would expect! I was pleasantly surprised when I first converted my chain to a wax lubricant and shifted through the whole 1x gear range. The extreme combinations, such as 42T-11T and 42T-42T (which are responsible for the most cross-chaining), ran much more smoothly than what I have ever experienced with other chain lubes. Other 1x owners will know that shifting into the lightest gear on a gravel bike does come with a fair bit of grinding. The term “gravel grinding” is there for a reason. Although I have no decibel meter data to back this up, I have noticed a slight drop in the grinding sound whenever I do shift into my easiest gear. This chain lubrication method truly impressed me on so many levels.
Things To Consider Before Following This Method
Clearly, I have high praise for a waxed chain and have found this method to be extremely useful on so many different levels. But nothing’s perfect, so here are a few points to consider before you convert to a waxed chain:
1) This method can be time-consuming. The initial chain clean required to strip the chain of all oils and lubes requires a good amount of time and effort. On-going chain waxing may also take longer than you expect. I have found that the biggest time-suck comes from waiting for the wax to completely melt. Given that this is done in a slow cooker, it can take between 40mins to an hour before it’s fully melted. But a little planning ahead can minimize that downside. Then there are other smaller steps (which aren’t required with traditional lubes) that also take time, such as: disconnecting the chain, reconnecting the chain, working out the stiffness in the chain after waxing, and dusting off the excess wax that comes off after fitting it back to the bike. Bottom line, give yourself enough time to complete the full waxing process correctly.
2) The initial chain clean involves the use of some harsh and potentially dangerous chemicals. Fortunately, you only need to run that initial clean once and not on an on-going basis. However, you still need to make sure that you have access to ways to correctly dispose of such chemicals after the initial clean. Another thing to consider is that these chemicals are toxic and will come with some strong fumes. You should not work with them in an enclosed home space, such as an apartment or townhouse. Your spouse will definitely kick you out if you start working with petrol in the kitchen. That means that you will need to have access to a space where you can safely work, in a well-ventilated place or even make use of an outside work area. If you lack access to this, then sticking to regular lubes might be a better option in the long run. In any case, be sure to wear gloves and a mask to limit exposure to chemicals. While we, at Mountain Road, strive for a nontoxic lifestyle, the fact of the matter is that when it comes to bike maintenance, chemical-free is a challenge to achieve.


3) Quick links. Since you’ll need to take your chain off the bike each time you perform the waxing, you will need to fit a quick link to your chain that makes it easier to remove and reinstall. Remember the saying, “A chain is only as strong as the weakest link”. If your quick link fails, then so will your chain. I recommend that you get a pack of KMC reusable quick-links. Some quick links require a new one to be fitted each time the chain is removed, the KMC reusable links may be reused a few times. Don’t push your luck for too long, however, as you need the quick link to be as secure as possible, to keep your chain strong. OZ Cycle mentions that he uses the Connex chain link, but I don’t have any experience with these links.
4) Slow-cooker storage and operation. Your melted pot of wax will obviously be very hot, which makes it hazardous for children and animals. Ensure that you have a safe place to work with, and store your chain concoction. You might also want to keep in mind that there is clearly an additional cost that comes with this lubrication method in the form of the electricity that’s required to warm-up the wax mixture.
5) More frequent wax application on gravel and 1x bikes. This is a key finding that I made during my testing. OZ Cycle stated in his videos that the wax application will remain effective for around 250-300km. This distance recommendation relates to road cycling. I found that with my 1x gravel bike, it’s necessary to re-apply the wax to the chain around the 200km (~120mile) mark. I suspect that this ties in strongly with the additional demands that the 1x drivetrain places on the chain, especially when shifting into the extreme ends of the gear range. On longer gravel adventures, you might need to re-apply a small amount of the liquid wax as covered in the third video suggestion from OZ Cycle. The full wax-bath process will also need to be followed on a more regular basis when you own a gravel bike. Only you can make the call if the additional time that you’ll need can be justified.
Wrap-Up
My experiences with a waxed chain have completely changed the way I look at bike maintenance. I am legitimately impressed with how well this chain lubrication has performed thus far. Both on the road and on gravel, the chain efficiency feels vastly superior to any other chain lubrication method that I’ve used in the past. Some will make the case for a wax chain by looking at the additional performance benefits (claimed watts saved), but in my opinion the biggest reason to make the switch to a wax chain lies in the much-improved experience when it comes to keeping the bike clean. I’ve been pleasantly surprised at how well the wax chain works on gravel rides, even with mud and rain thrown into the mix. Just like all bike maintenance methods, you will need to be aware of a few drawbacks, while weighing up the pros and the cons before you decide to move over to a waxed chain. At the end of the day, my recommendation is that you at least give it a go to test it out for yourself. Sure, there are some costs involved to give this method a try, but I’m sure you will find just as much value in it as I did.
Thanks for reading! Have you tried a waxed chain on your bike yet? Please leave a comment to let us know what you like (or don’t like) about it.
-Wiehan