10 Tools Every Gravel Cyclist Must Have
Disclaimer: This post contains affiliate links, through which we earn a commission.
If you look through some of the other Mountain Road posts that showcase my Gravel Ride of the Week excursions, then it will be easy to tell that I’ve put my equipment through a great deal since buying my gravel bike a year ago. Subjecting a bike to more demanding riding conditions, like gravel, does of course come with a few downsides, none more so than the increased need to perform regular bike maintenance. Since starting along my gravel cycling journey, I’ve learned far more about bike maintenance than I ever did as a regular road cyclist. Things just break and need attention so much more when you take a bike out into the dirt, mud and sand. Throughout this year of riding on gravel, I’ve collected a few gadgets related to bike maintenance. In this blog post, I’m sharing 10 tools every gravel cyclist must have in their toolboxes. You can also watch the video to see more close-up views of the tools that I’ll list below.
If you’re reading this and aren’t yet hooked on the whole gravel cycling thing, then fear not, most of these tools also relate to general bike maintenance, especially if that bike runs tubeless tires and/or disc brakes. Feel free to use this as a wishlist or (super practical) shopping list that can be forwarded to a relative who has no clue what to buy you for Christmas or your next birthday!
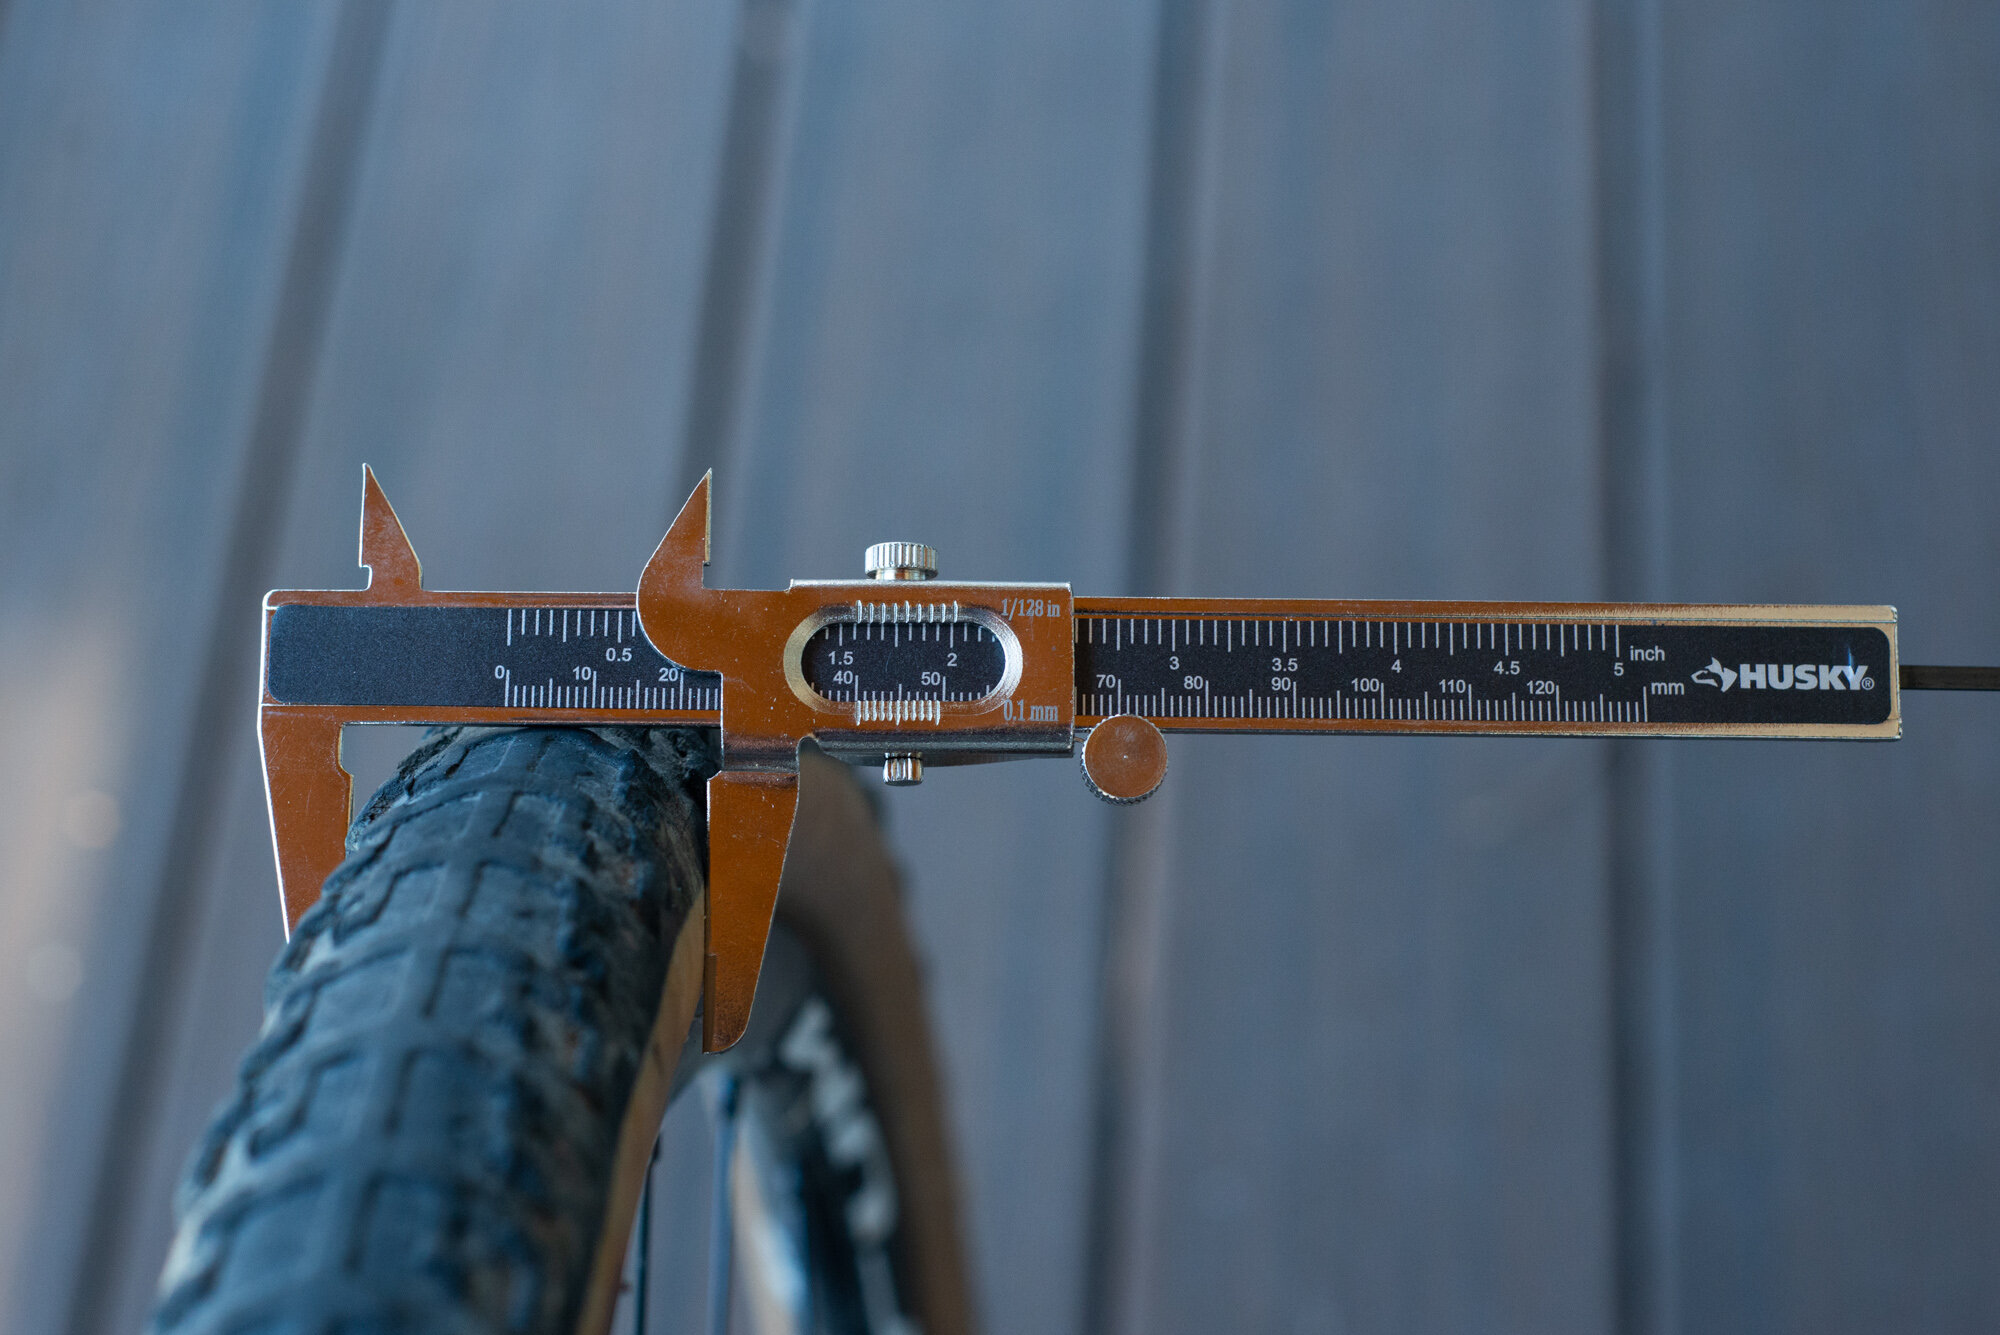
Tool #1: A Measuring Caliper
This might be the least obvious thing on my list, but this inexpensive tool has actually helped me out more than what you might think. So much of gravel cycling relates to the type of tires and wheels fitted to the bike. Lots of thinking goes into finding the optimal tire size that works with a particular bike’s tire clearance and a very important part of that equation comes from the internal width of your wheel’s rim. In general, a wider rim profile will allow the tire to balloon up more, potentially causing the inflated tire to measure in much wider than what the manufacturer states on the packaging.
This is where a trusty caliper can be super useful. Simply use it to measure the frame clearance before you purchase a set of tires. It’s also great for inspecting the actual width of a mounted and inflated tire, to verify if the width will indeed work with your frame’s specifications. Another handy use for your caliper is to measure the remaining life left on your disc brake rotors. Disc brake rotors should normally measure in at no less than 1.5mm thick to ensure its effectiveness. The precise measurements taken with a digital caliper can be really helpful for this purpose, but a good old-fashioned manual caliper can work just as well.


Tool #2: Disc Brake Removal Tool
Spoiler alert - Disc brakes are a pain! There is no denying that disc brakes do a much better job with braking, but the reality is that they require a lot more attention when compared to a standard rim brake. I’m not even referring to the whole mess that comes with the installation of the brake hoses and the braking fluid that runs in them. Even something as simple as the disc rotor can be a complete nightmare to deal with. They get dirty, they bend, go out of alignment and rub - sad, but true. Most road bikes and especially gravel bikes on the market today come with disc brakes as the only option. This means that your only solution to deal with the many shortcomings is to get comfortable with disc brake maintenance. This tool, and the subsequent two tools on my list, will help you get started and hopefully reduce some of the disc brake maintenance frustrations.
From time to time you’ll want to remove the disc rotors completely from your wheels, perhaps to clean them or maybe just to have them out of the way while you fit a tire. In order to remove a disc rotor, you’ll need to first inspect to see what type of rotor is fitted to the bike. If you have a 6-bolt rotor interface (i.e. 6 bolts are used to secure the rotor to the wheel hub), then you’ll simply need the appropriate hex tool or torx tool to remove and reinstall the bolts. An alternative rotor interface comes in the form of a center-lock system, which features notches that slide onto the grooves on your wheel hub. You’ll encounter one of two lockrings when it comes to center-lock rotors; one type that allows for a tool to grip within the ring and another type that requires a tool that grips the outside edge of the lockring.
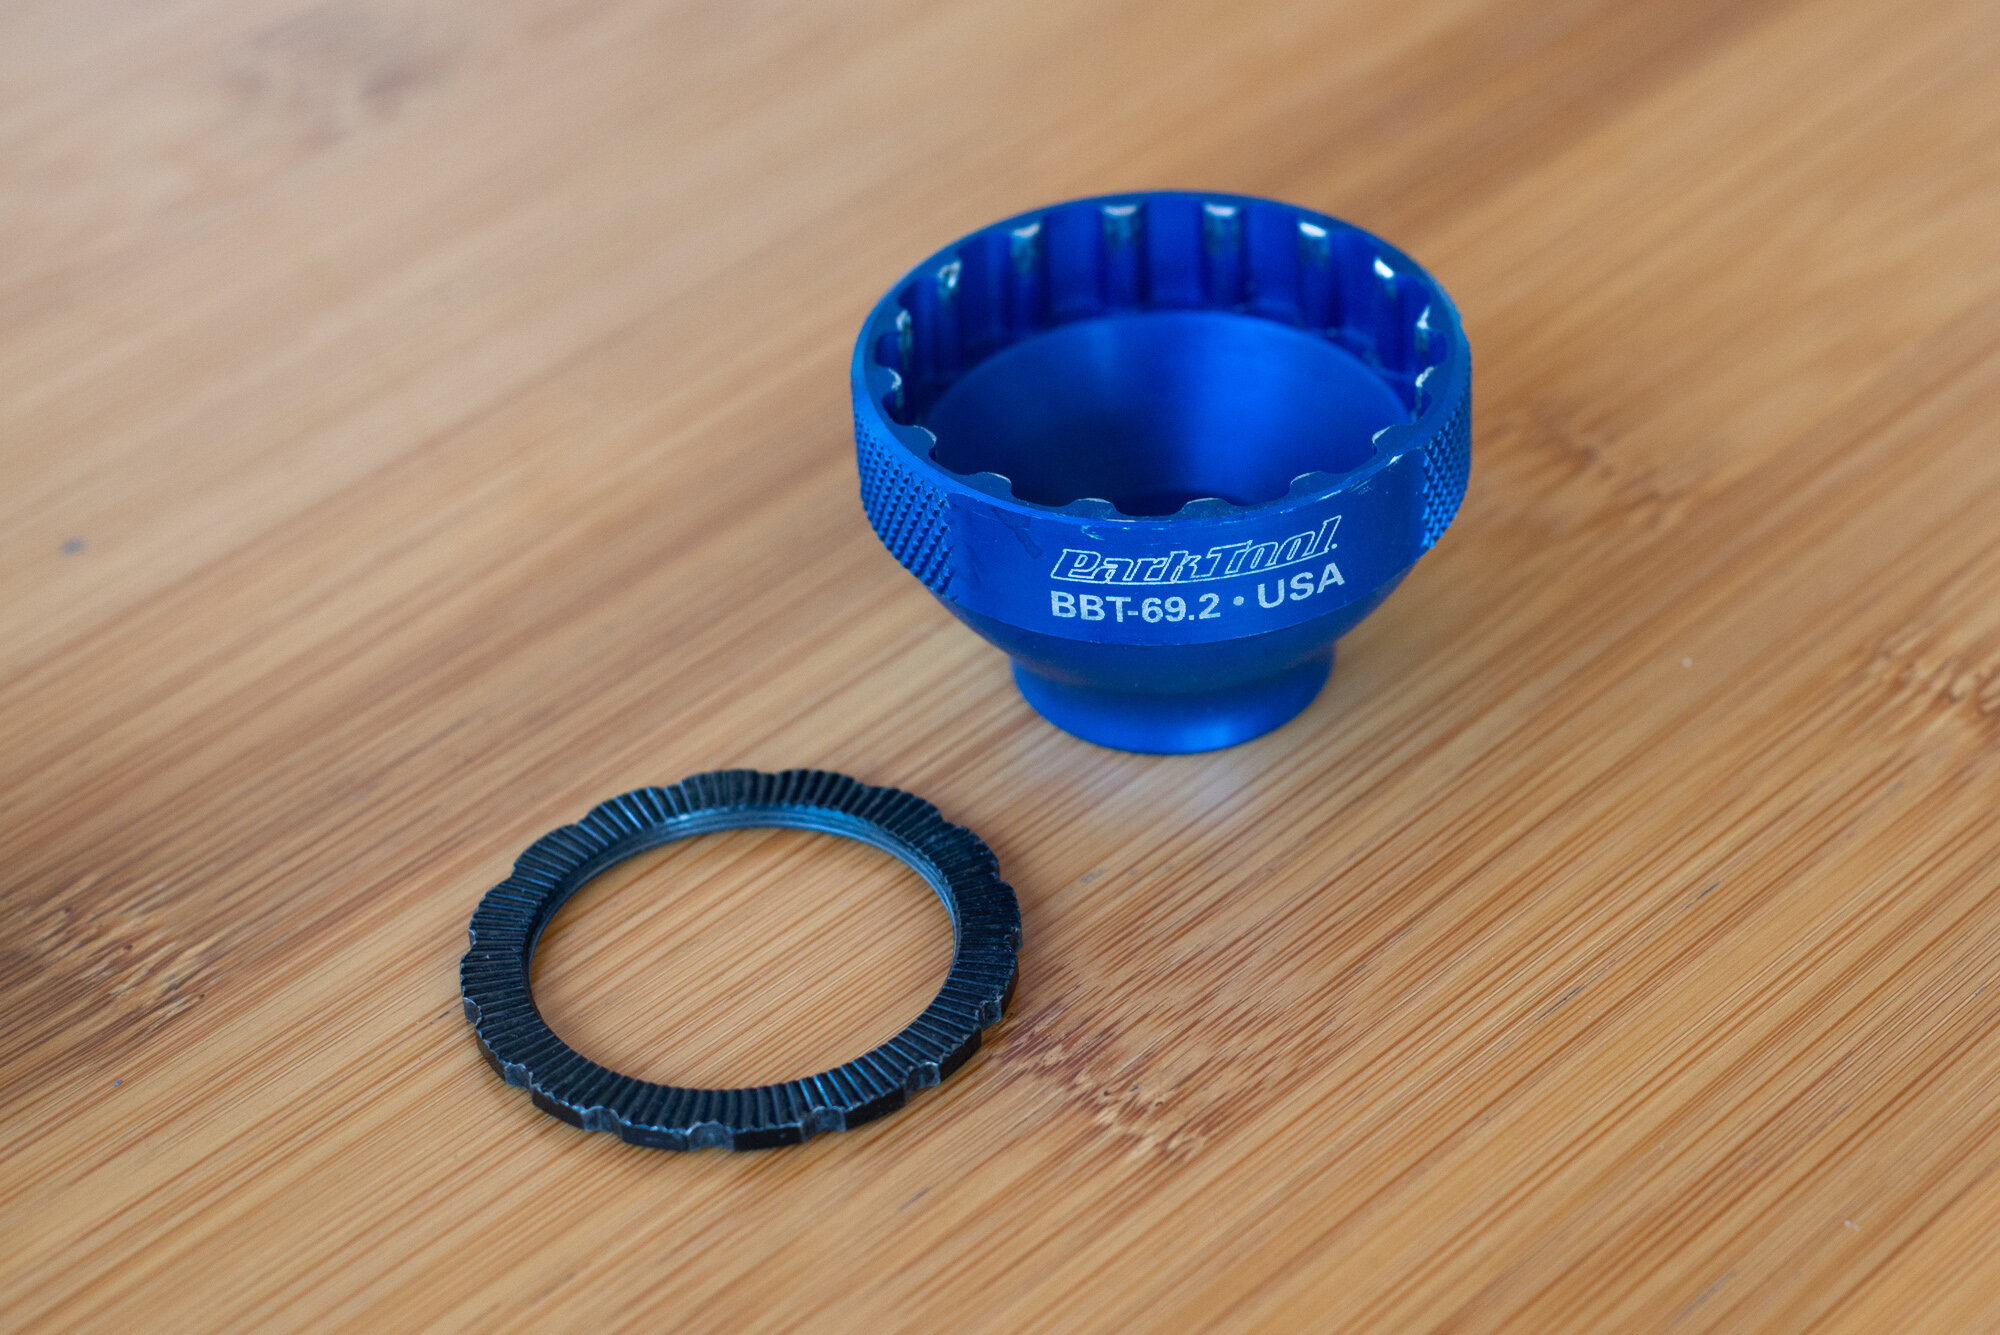


If your rotor lockring fastens within the ring, then you’ll need a cassette lockring tool, with more detail coming up in Tool #5. Lockrings that fasten on the outer edge of the ring will require a tool that’s normally used to install bottom brackets (BBs) to the bike. My gravel bike uses this particular type of lockring and the tool that I’ve chosen for the job is the Bottom Bracket Tool by Park Tools: BBT69.2. Having either the cassette removal tool or the BB tool on hand to remove a disc rotor is extremely handy and definitely worth adding to your toolbox.

Tool #3: Disc Brake Alignment Tool
Sticking to the disc brake maintenance theme, we now turn towards the disc brake calipers. These pesky things operate with very tight tolerance for clearance, which means that the calipers need to be perfectly aligned to ensure that your disc rotors aren’t rubbing up against it. Aligning a brake caliper isn’t always the easiest thing to do and while the process itself does not require all that much, the execution can be a whole other story. In theory it sounds simple; loosen the bolts holding the caliper in place, ensure that the caliper is correctly aligned, then tighten the caliper back down. If only!


There are a few methods that people use to ensure that calipers are properly aligned, this includes squeezing the brakes while the caliper bolts are loose; using a business card to ensure correct spacing; or simply just eyeballing it until the caliper is in position. While most of these methods have their time and place, the process can be sped up significantly through the use of a disc brake alignment tool. This tool essentially copies the business card method and ensures that the spacing on either side of the rotor is consistent before tightening the caliper into place. The alignment tool makes this method much easier and provides a higher success rate since you don’t need to mess around with a business card that might get torn or stuck. This handy tool is also super compact and can be taken with you in a saddle bag should you feel the need to adjust your calipers while out for a ride. If you ride with disc brakes on your bike, then this is absolutely a must have tool!
Tool #4: Disc Rotor Truing Tool
One can never have enough tools, right? Well, there is one more tool that can make disc brake maintenance just a little easier. If, after performing the caliper alignment, you still experience rubbing from the disc rotors, then chances are that you might have a bent rotor. To fix this issue, you need a tool that can help you bend it back to be as straight as possible. While some DIYers will use a standard wrench (and great caution), I’ve instead opted to purchase the correct tool for the job - a disc rotor truing tool. Park tools and Feedback Sports both manufacture a tool that is perfect for this job, since their tools slide fully over the rotor to ensure that you don’t accidentally cause any damage while trying to straighten it back up.

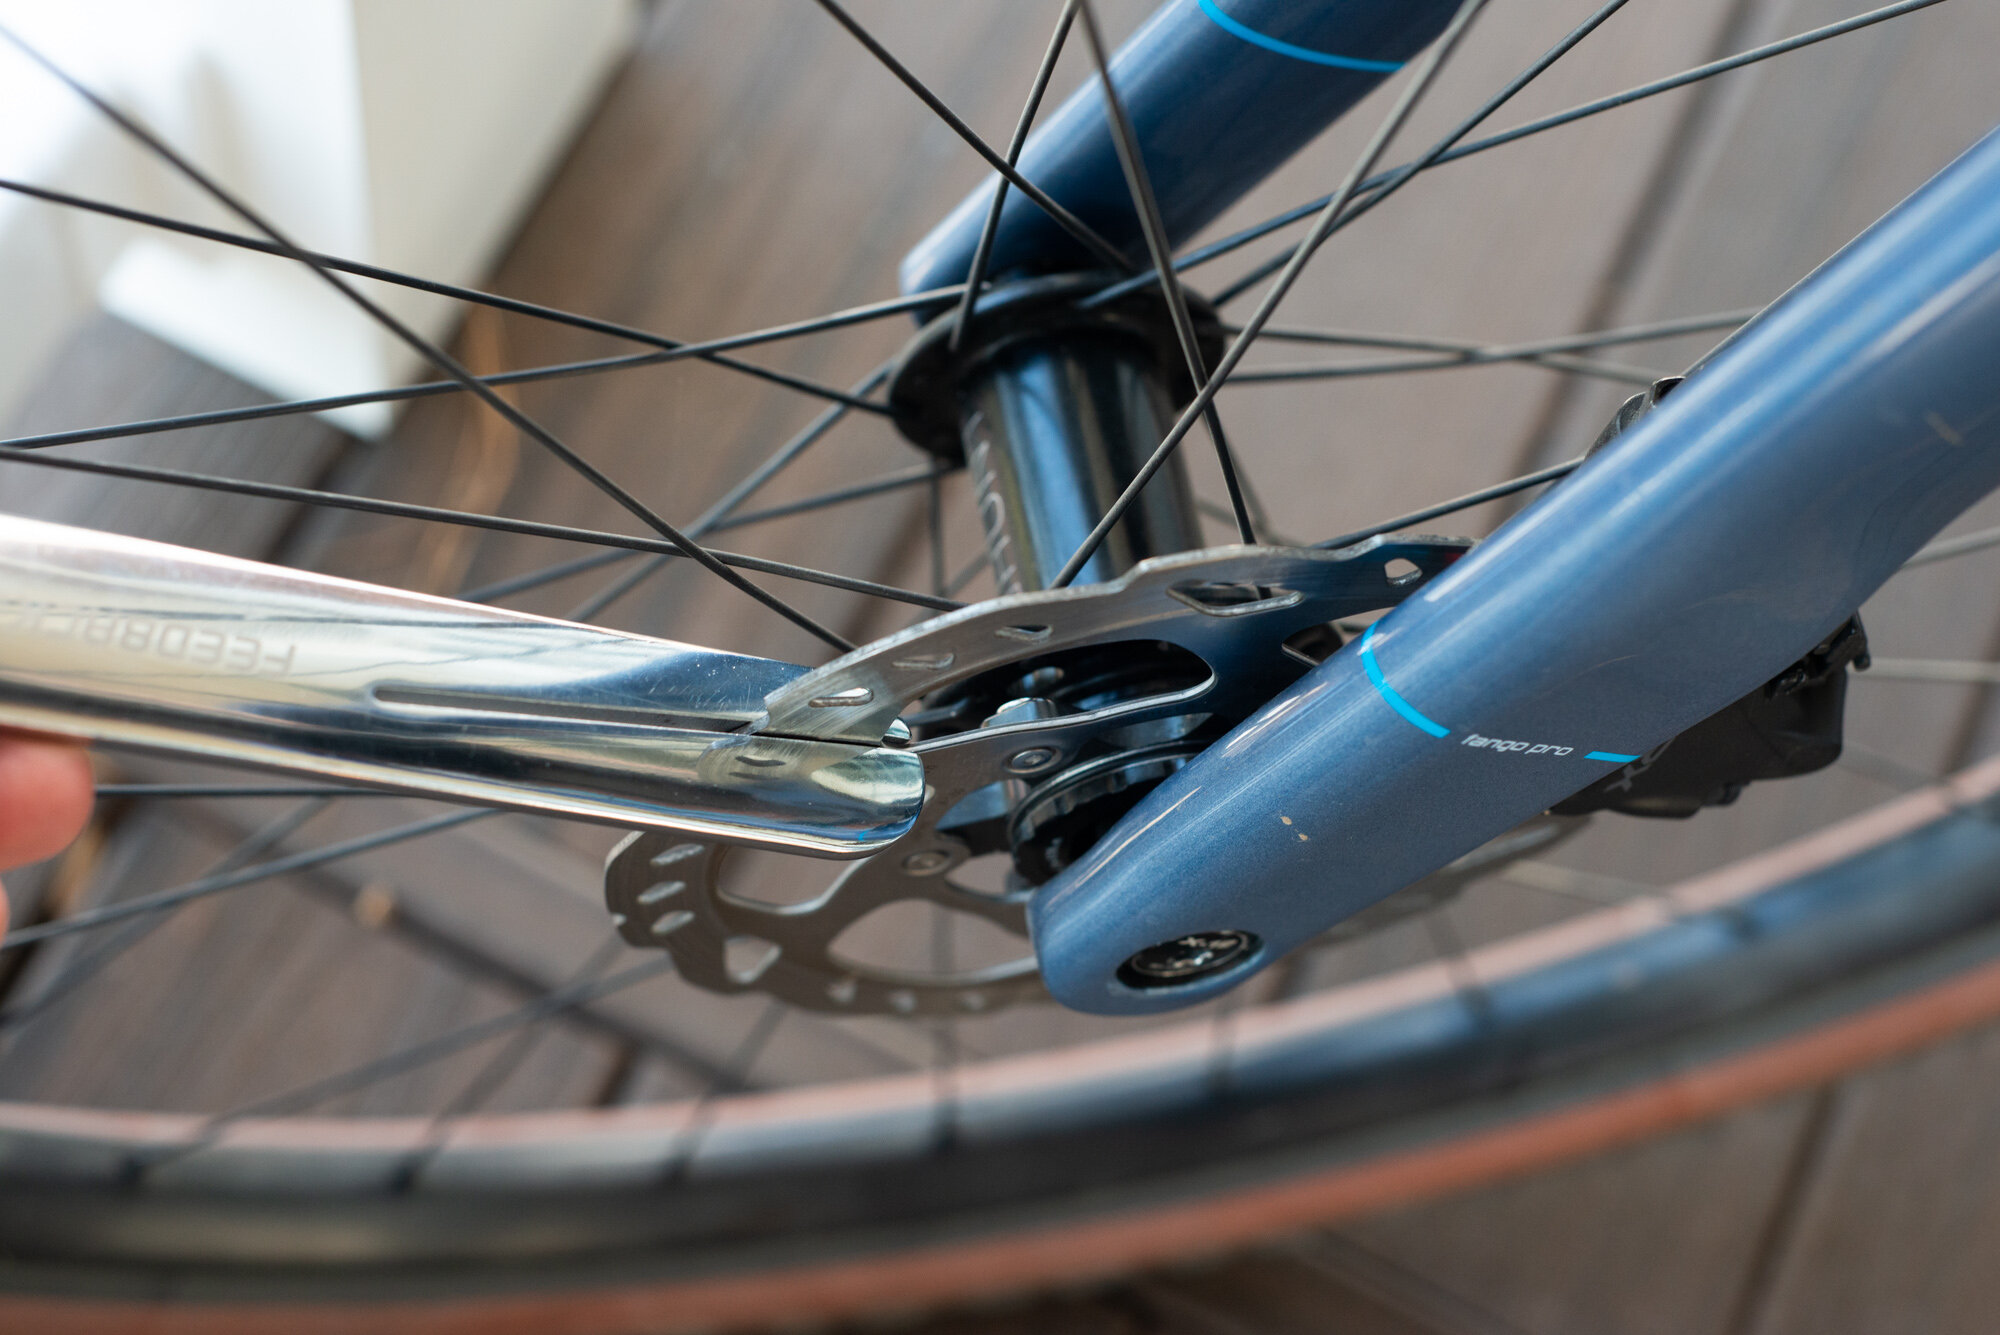

With this tool in hand you can now simply spin the wheel (while observing the caliper closely) to see where the rotor hits the caliper. Use the tool to straighten out the part of the rotor that is causing the rub. If you want to go one step further, then you might even want to invest in a wheel truing stand that can be used to true the rotor while the wheel is not fitted to the bike. Regardless if you use a truing stand or keep the wheel fitted to the bike, you’ll be super pleased with your own mechanic skills once you have eliminated the much-dreaded ticking noise that a rubbing disc brake rotor can make.
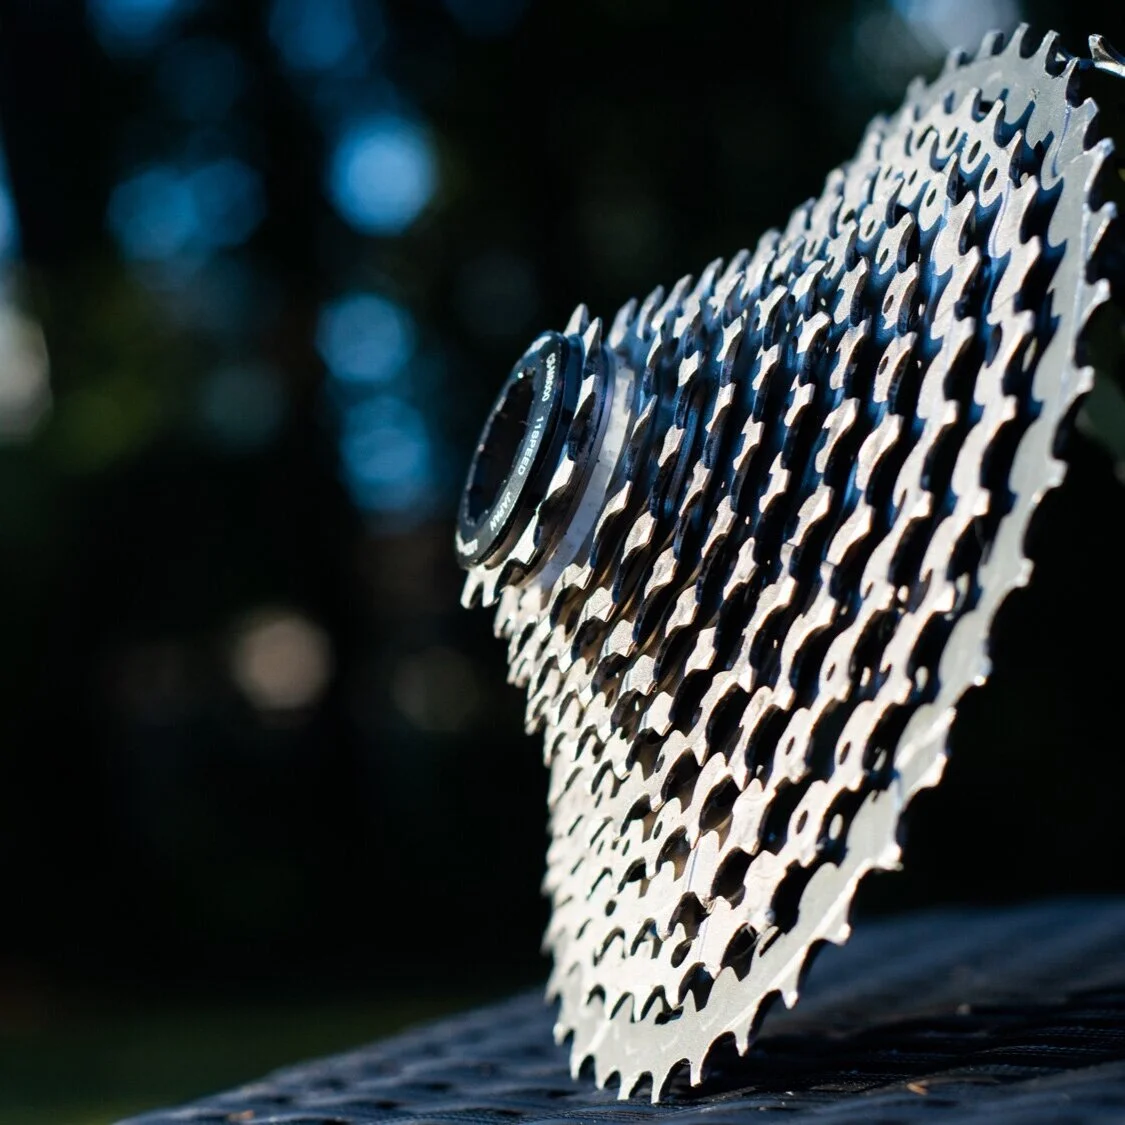
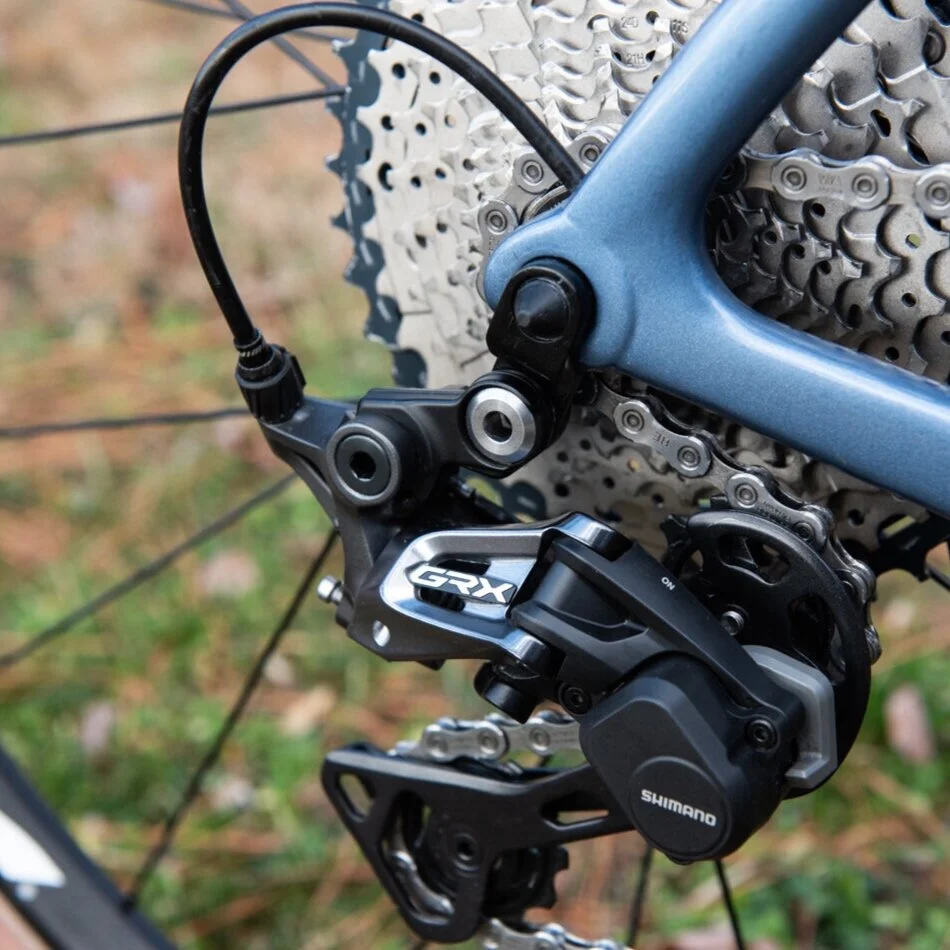
Tool #5: Cassette Removal Tools
I mentioned how a cassette lockring tool can come in handy to remove certain types of disc brake rotors, but the main purpose of the tool is of course to remove a cassette from the rear wheel. You get a few variations of this tool and for the best explanation of the differences between them, I would suggest that you watch this video from Park tools that can help explain which cassette lockring tool will work best for your type of setup.


The lockring tool is however not the only thing that you’ll need to get the job done. Due to the way that a freehub system works, it will spin around when trying to loosen the cassette. This means that you’ll need a tool to prevent the freehub from spinning - a chain wip tool does this perfectly. The short piece of chain wraps around your cassette teeth and allows you to grip the cassette, keeping it in place, while you loosen the cassette lockring. Removing your cassette from the wheel altogether makes it super easy to clean the individual cogs of the cassette and also allows you to wipe down all the dirt and grit that got lodged onto your wheel’s hub. Gravel riding has certainly taught me that dirt surely does have a way of getting into all the spaces on a bike and having the correct tools to clean those places is key.
Tool #6: Torque Wrenches
Raise your hand if you’ve ever stripped a bolt because you over tightened it. I have! Indeed, those small numbers printed on things like stem bolts, handlebar bolts and seat post clamps are there for a reason. You are stronger than you think when it comes to tightening a bolt. It’s very easy to over tighten a bolt and damage not only the bolt, but also the surface area on which you are clamping down. This issue becomes extremely important when dealing with the many carbon products that we find on bikes today. Simply stated you need to have this next tool in your toolbox, especially if you have a carbon stem, carbon seatpost, carbon handlebar and/or steerer tube. I am of course referring to a trusty torque wrench. Using this tool to tighten down all bolts to the specified newton-meter (nm) ranges will ensure that you most likely won’t run into any unplanned component damage.
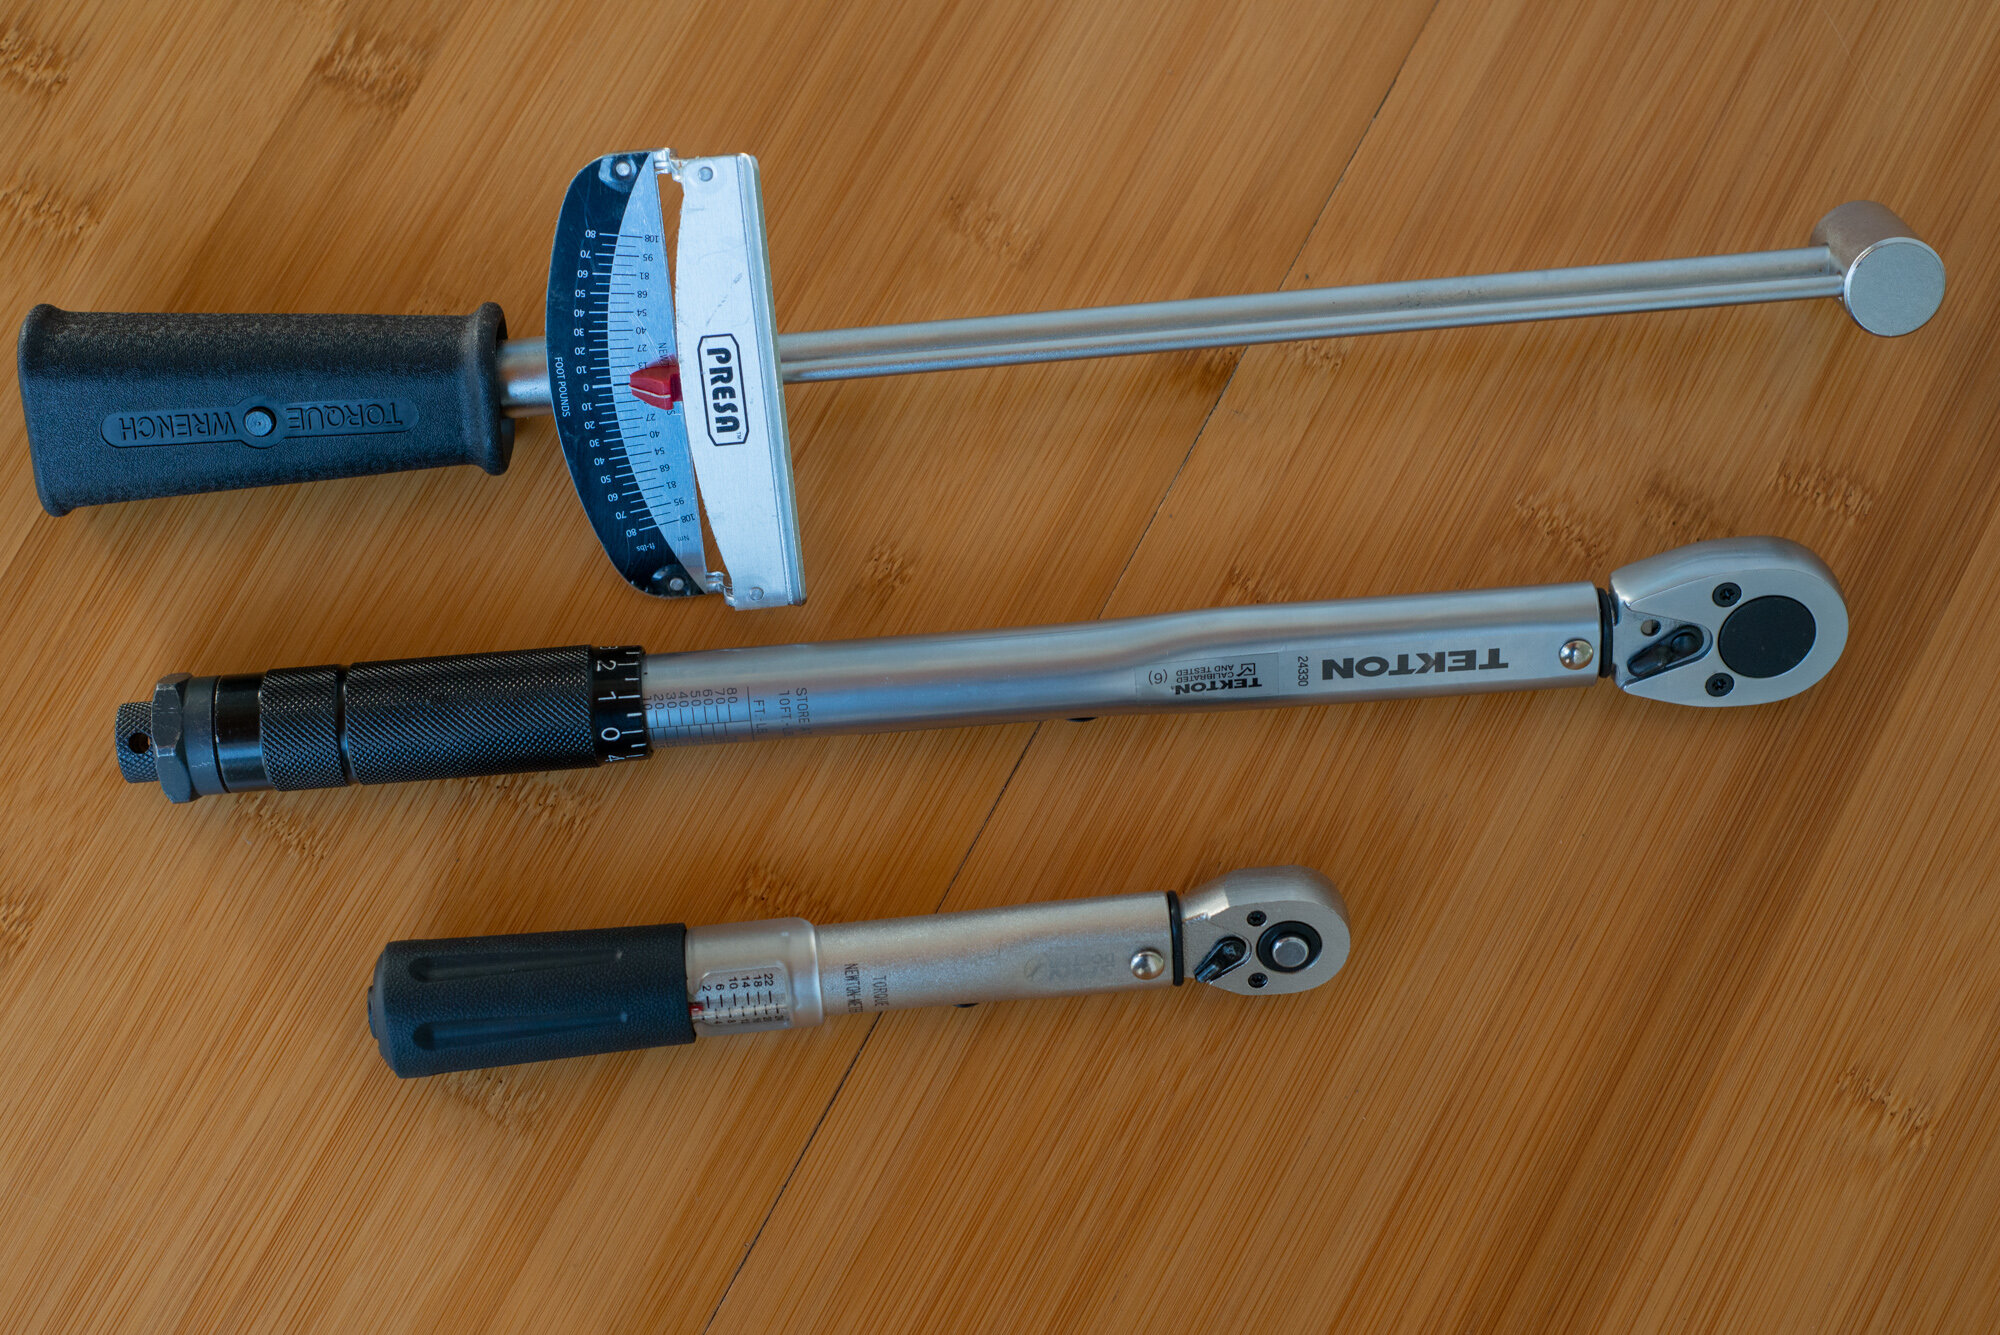

If you plan on extending your bike maintenance to larger components, like the cranks (~50nm) and even the cassette (~40nm), then the required torque adjustments usually exceed what can be achieved with a regular torque wrench. Tightening down these components correctly will require a heavy-duty torque wrench, which can deliver higher torque readings. Keep in mind that you don’t necessarily have to go with a very expensive brand. Even an old-fashioned beam style torque wrench can get you within +-8% of your desired reading.
Tool #7: Different Types of Grease

Once you get into gravel cycling, you learn that washing and cleaning your bike becomes a fairly frequent event. While cleaning off the dirt and grime from your gravel bike is all good and well, you will definitely want to replace any grease that washed away during the cleaning process. I know that this isn’t technically a “tool,” but grease does protect our components and ensures that the bike is properly working in a variety of ways. Don’t, however, make the mistake of thinking that all types of greases are created equally and that you can just squeeze whatever you like onto your components. You might want to shop around and research more about what type of grease works best with your specific components, but I’ll try to give you a quick breakdown of what I use and where on the bike I use that particular type of grease.
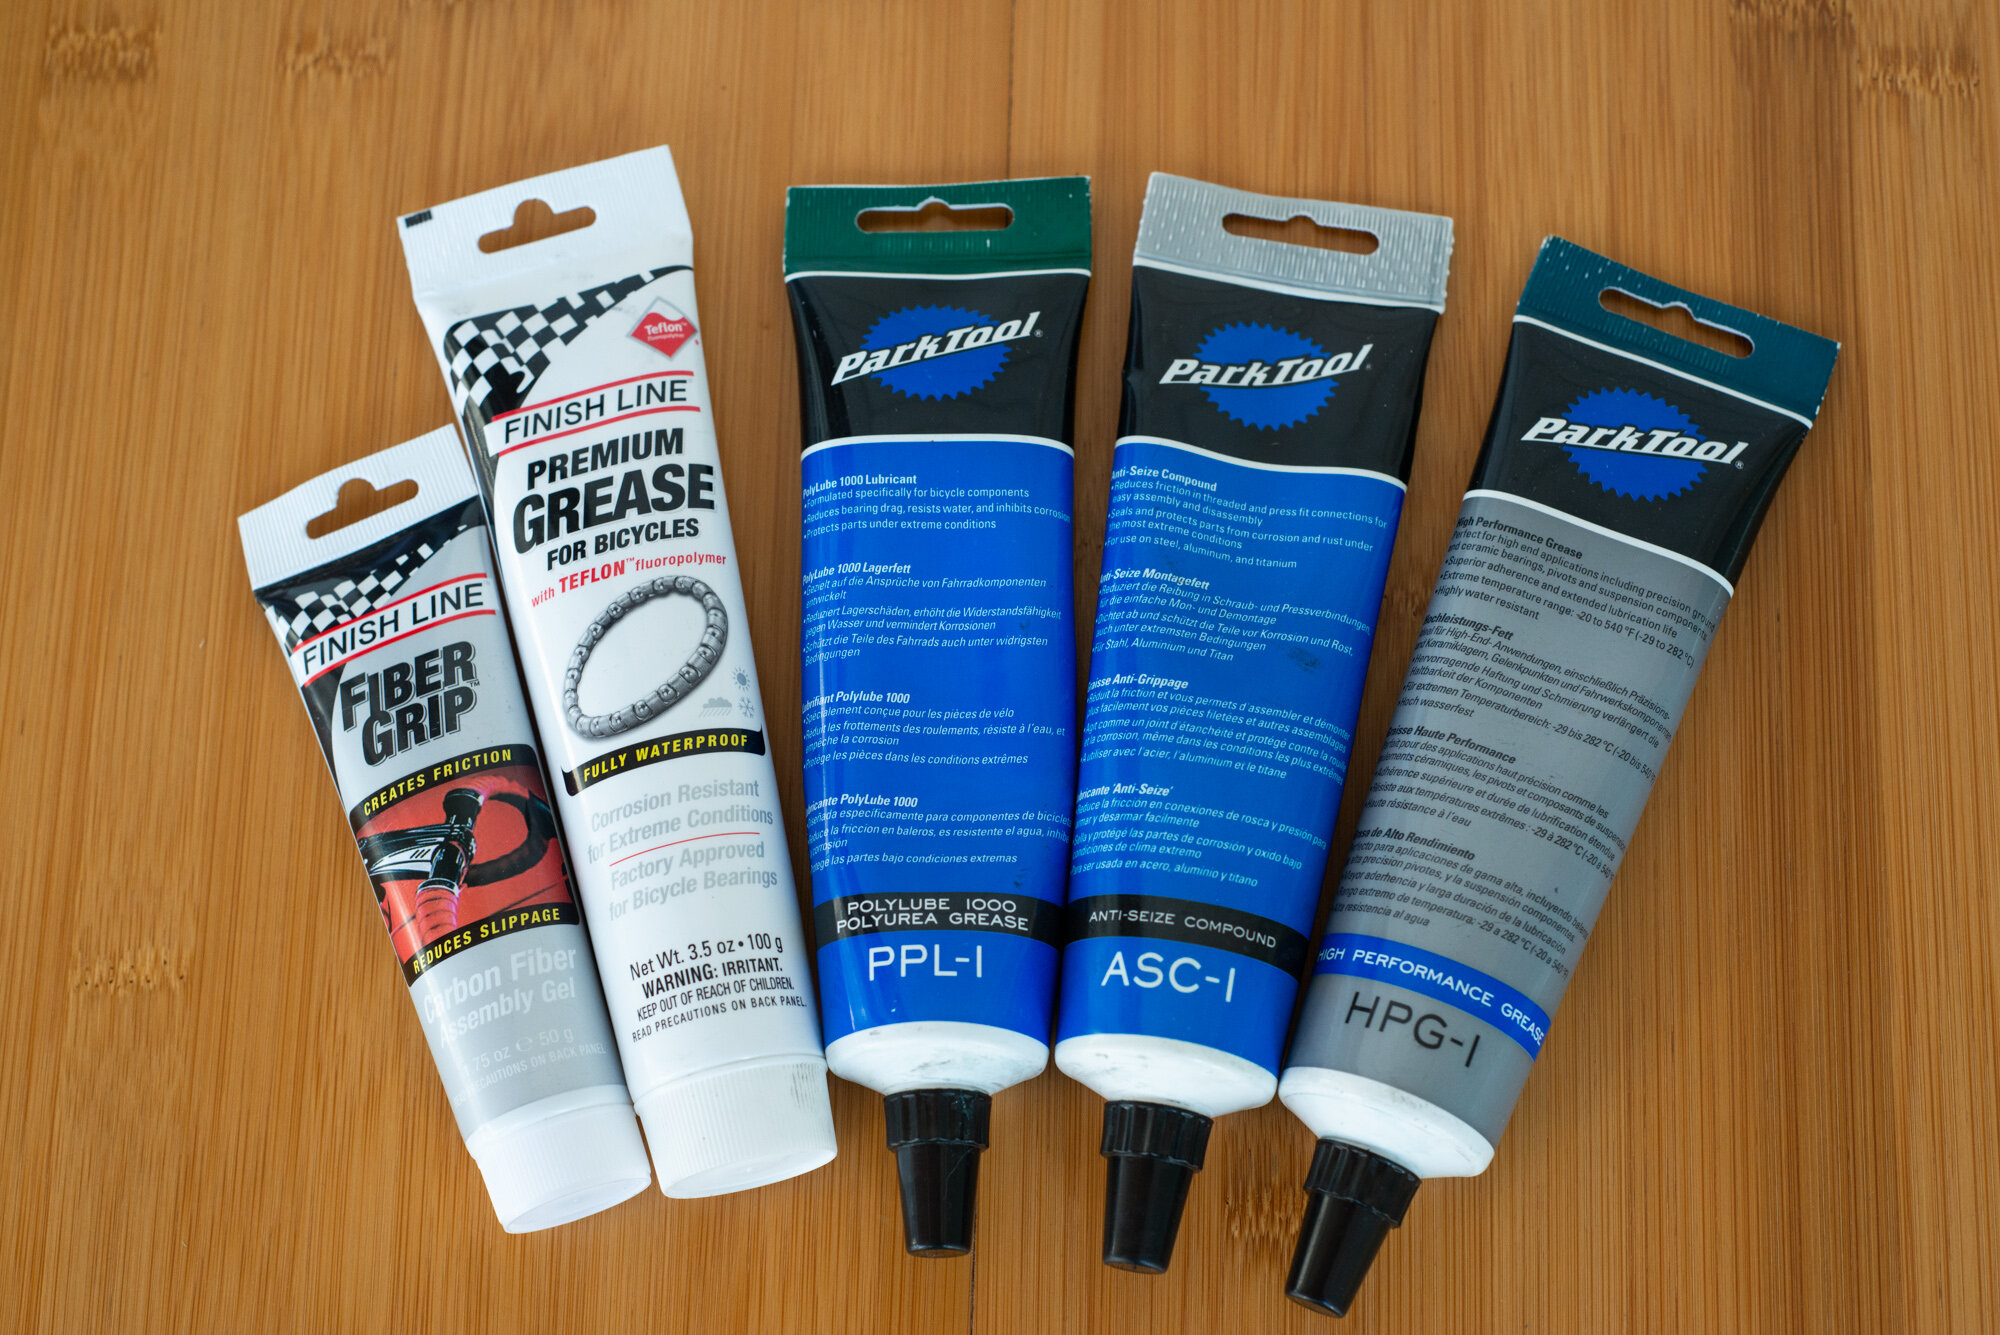
The first grease on my list, anti seize compound, can be used on all threaded surfaces that need to be undone at some point. Pedal threads, seat post or stem bolts and even lockring threads are some of the key areas where a small amount of anti-seize can go a long way to ensure that the threads don’t get so stuck down that you can’t undo it after it’s tightened into place.
Another speciality grease comes in the form of carbon grip or assembly compound. This particular grease is perfect for the clamping areas where the stem and handlebar join or where the seatpost goes into the frame. The assembly compound offers some additional grip to the clamping area and prevents the handlebar and seatpost from slipping. Keep in mind that when you wash your bike regularly, this compound can wash out, which means that you might have to reapply this kind of grease from time to time.
There is also another type of grease better suited for something like bearings and suspension components. This is one particular area where a bit of research might be worthwhile, since certain bearings can only accept specific types of grease. A good general starting point might be the Park Tools High performance grease or Finish Line’s Ceramic Grease.
There is, of course, also a more general purpose, all-round bike grease that can be used in a variety of places on the bike. I’ve used the Park Tools PolyLube 1000 Bicycle Grease for this purpose with great success. By now, you should be able to tell that there are quite a few options available when it comes to grease. By selecting the right type, you can help get your gravel (or any other) bike back to running smoothly and efficiently.
Tool #8: Valve Core Removal Tool
The last 3 tools on my list will be especially helpful to those riders who make use of tubeless tires. If you are a gravel rider, then I can highly recommend that you make the switch to the world of tubeless tires. The three tools on my list will help make the transition to tubeless much easier and when it comes to installing and removing tubeless tires, your life will be just a bit less complicated.

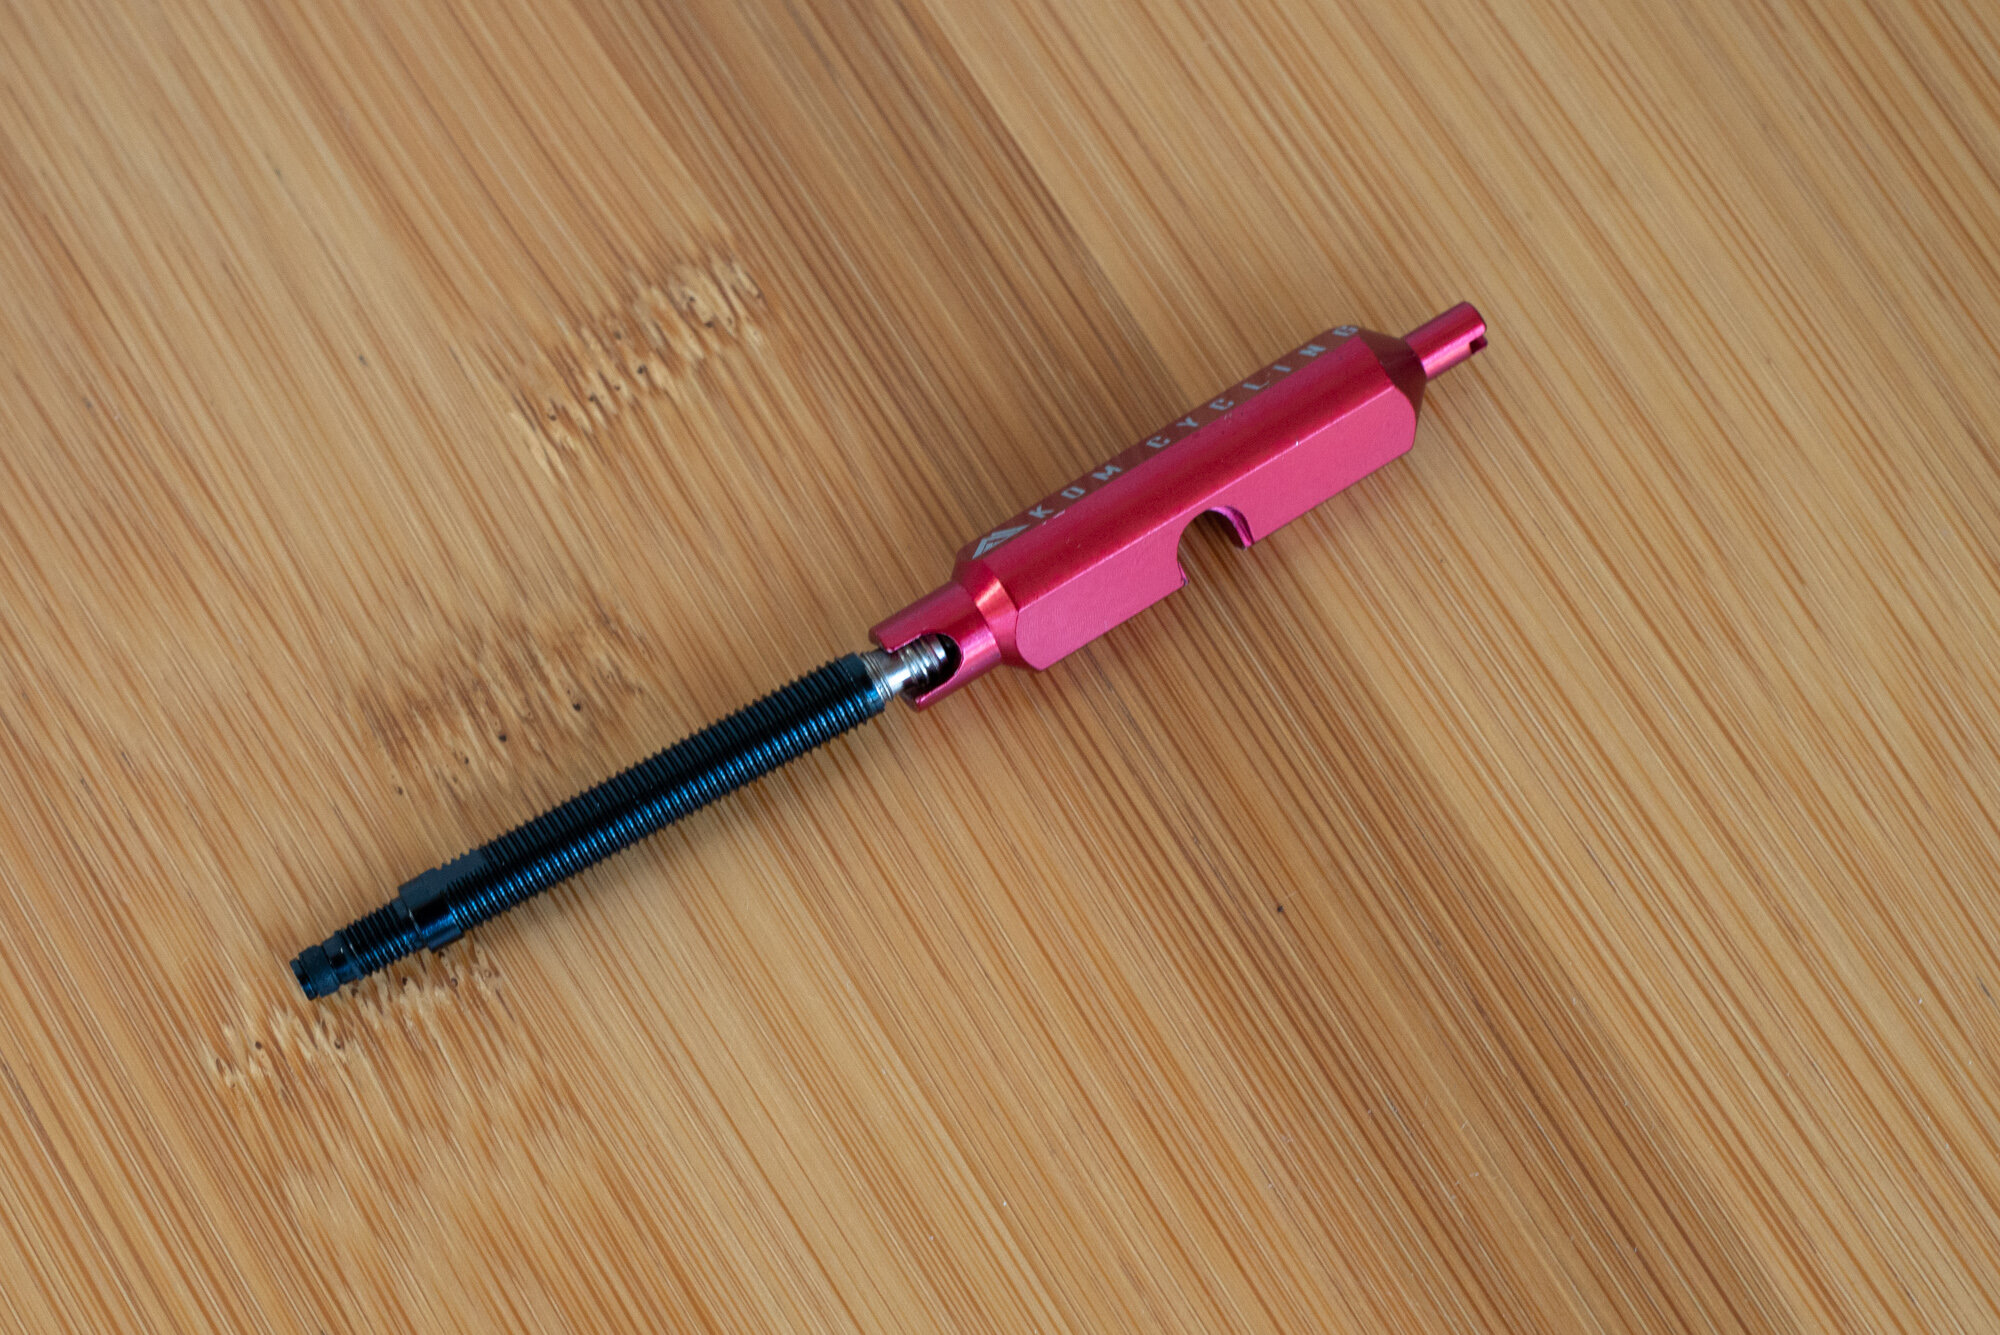
Let’s kick things off with a small, yet incredibly useful tool - the valve core removal tool. All tubeless setups make use of a special tubeless value, which also features a removable valve core. When attempting to seat tubeless tires onto the rim for the first time, you will need a good amount of air to flow instantly into the tire, forcing the tire to pop into place. Sometimes a tire can be particularly stubborn to pop into place, which might require an even stronger flow of air to get the job done. Removing the valve core can help to get that instant burst of air into the tire to help push it into place.
The valve core removal tool does exactly what it states, but an added bonus of this tool is the ability to use it to install valve extenders. If you have a very deep rim profile (>45mm deep), then you may have to extend your value to fit through the rim by way of an extender. The valve core removal tool is perfect to help tighten up the valve extenders. The valve core removal tool definitely comes in handy when working on tubeless tires, but before you rush to add one to your shopping cart, check out the next tool on list that offers a great package deal.
Tool #9: Sealant Installation and Removal Syringe
The next piece to the tubeless tire toolkit relates to the sealant that you will need to insert into your tires. Getting the sealant in the tire is the easy part, since all you need to do is squirt it through the value (without the valve core installed). The tricky part with tubeless sealant comes when you need to remove the tires and also the sealant still floating around in the tire. You have one of two choices really: waste all the sealant in the tire by wiping it out with a rag / paper towel or alternatively you can try to salvage the sealant still left in the tire by capturing it in some way. This is where the next tool comes in super handy...
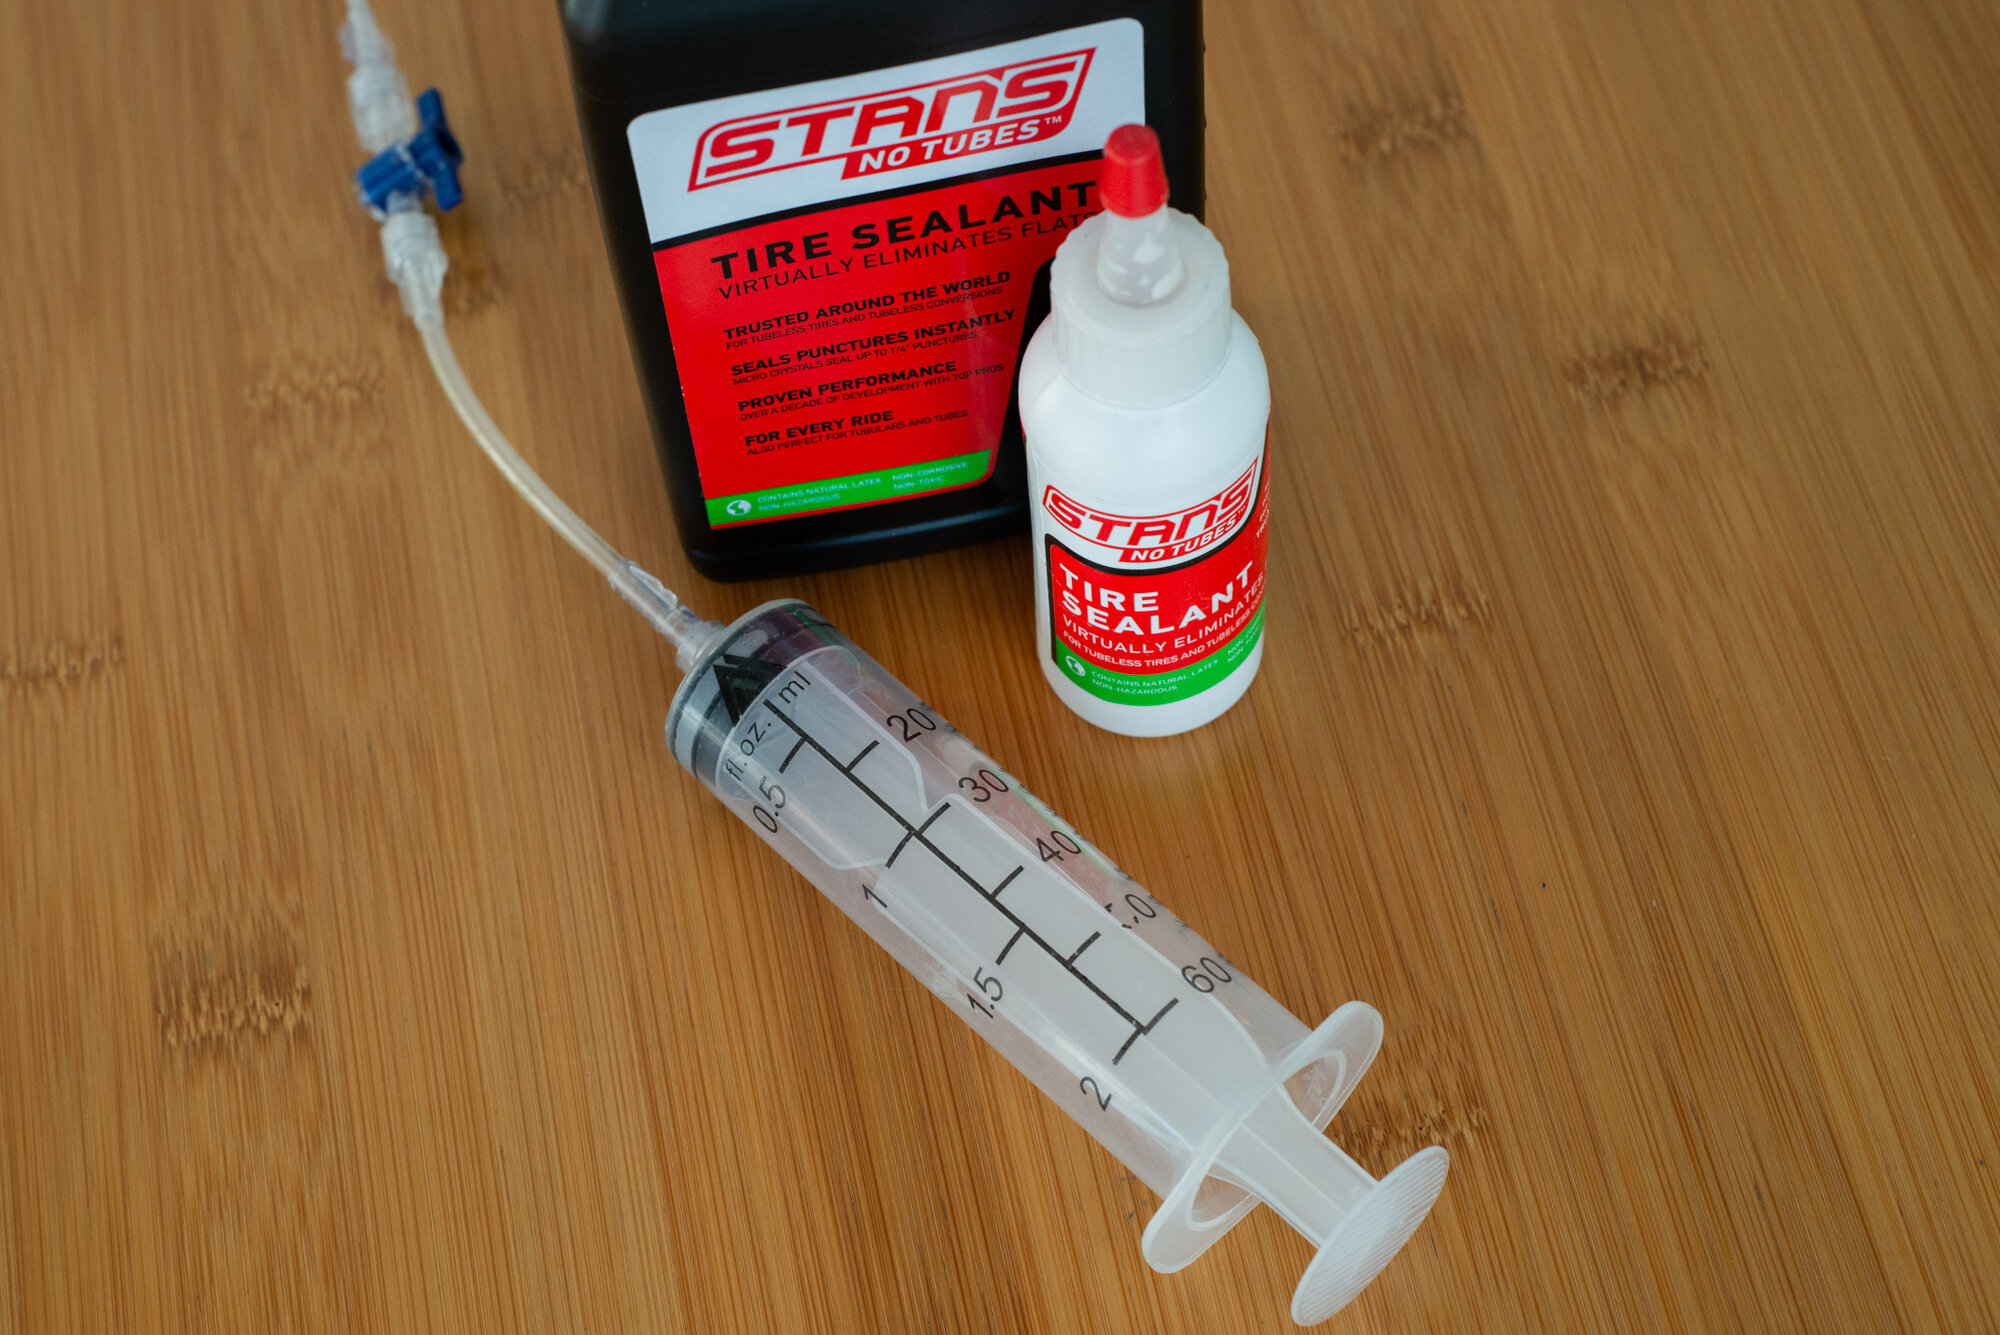

A tubeless sealant syringe allows you to simply suck up the sealant that might still be floating around in the tire. I’ve even seen some people use a turkey baster to achieve the same result. Clearly a bit of creativity can go a long way when it comes to being resourceful with tire sealant. The sealant that you suck up in this way can then be stored in a dedicated bottle and reused in the next round of tubeless tires that you fit. The sealant syringe that I purchased came with a valve core removal tool included in the box, making this option a great package deal to grab two really useful tubeless tools in one go. Be sure to check it out for yourself.
Tool #10: Air Compressor
The last tool on the list is actually a bit of a nice-to-have and something that you probably don’t need to have, but it sure makes fitting tubeless tires so much easier. I’m referring to using an air compressor to pop tubeless tires onto the rim. The instant blast of high-pressure air that you get with an air compressor makes fitting tubeless tires a breeze (no pun intended). Yes, they can be a bit pricey and this is surely the most expensive tool on my list. There are, of course, some other (cheaper) options available that can get this job done just as well and my suggestion would be to have either a reliable tubeless specific pump or tubeless Airshot canister on hand if you can’t follow the air compressor route.


Keep in mind that an air compressor can also be extremely valuable for other uses that relate to bike maintenance. I’ve used an air compressor numerous times while washing my bike to help dry it off afterwards. The high-intensity air works wonders to push out water that might have drained into hard to reach places. Things like bolt heads can easily accumulate water drops which, if left untreated, can lead to rust. You can also use the air compressor to dry off your chain after a wash, with the added bonus that the strong airflow could even help drive out some of the dirt still left in-between the chain rollers. I think you get the picture by now - an air compressor might be an expensive tool to add to your collection, but its many uses make it a true value-for-money purchase.
Wrap-up
That brings us to the end of my top 10 gravel tools checklist! At a high level, it might seem like a lot of money to spend on bike maintenance, but over the long run, it will definitely help safe money to have all of these tools in your toolbox, since you won’t need to rush to a bike shop each time you have a small mechanical issue. I can also say that the satisfaction of fixing something on your bike by yourself really is a very rewarding feeling and something that makes each of these tools totally worth having. Now all you need to do is to go get your bike dirty on a gravel ride, so you can get back to cleaning and maintaining it. Ride, Wash, Repeat!
-Wiehan
Leave a comment and let us know how you scored on this tool checklist: 7, 8, 9 or 10 out of 10?