NPE Runn… Smart Treadmill Sensor Review
Disclaimer: This post contains affiliate links, through which we earn a commission.
Over the last few months, I’ve started doing more and more of my running on a treadmill, and thanks in large part to Zwift, the experience has been really enjoyable. The controlled indoor environment allows for far greater precision to hit particular running paces and this helps someone like me to actually stay in the recovery zone on days when the training schedule says I’m supposed to take it easy, even if I want to push the pace. Treadmill running does not, however, come without its shortcomings and the speed accuracy is certainly the issue that I’ve bumped into most often. I’ve been a competitive runner for most of my life and have developed a rather good feel for the level of exertion that’s required at different running paces. This in turn means that I can fairly easily detect when a treadmill displays incorrect speed readings, taking away from the overall enjoyment of the workout experience.
The annoyance with incorrect treadmill readings led me along a path to search for a solution to capture my running speed more accurately. After experimenting with a number of different setups, I decided that I needed to try out North Pole Engineering’s (NPE) “Runn smart treadmill sensor.” I reached out to the company and they were kind enough to supply me with a unit to test. In today’s post I’d like to walk you through my experience with the Runn and discuss how this sensor ranks in terms of measuring treadmill speed.
The backstory
I don’t want to dwell too much on all the other ways in which I tried to capture my indoor running speed, but perhaps a quick mention might be worthwhile to someone facing the same issues.
My main go-to for measuring my run speed in the past has been a Garmin foot pod. The Garmin foot pod can only broadcast running speed through an ANT+ signal, and this makes use with an iPad (which requires a Bluetooth sensor) a bit trickier. To get this setup to work, I had to rely on an ANT+ to Bluetooth bridge which can convert the signal from one format to the other. NPE manufactures a device called “CABLE” that can do exactly this. I already had a similar device on hand (in the form of the Viiiiva HR monitor) and used this to get my Garmin foot pod connected to my iPad. So how did this setup perform? Ok(ish). The Garmin foot pod is certainly not the most accurate option when it comes to foot pods. I especially found that at lower speeds, everything worked just fine, but whenever I really picked up the pace, things went haywire. During running races on Zwift, I would consistently find that at paces of 4:00min/km or faster, my displayed pace within Zwift would sky-rocket to olympic quality (2:50min/km) pace and then get stuck there for minutes on end. No amount of calibration within Zwift seemed to solve this issue and I needed to look elsewhere for a solution.
I explored the Treadmill Smart Speed (TSS) app as another solution to get my running speed transmitted into Zwift. I truly have high praise for this app and even wrote a separate post dedicated to its features. The only shortcoming with this app is that you rely entirely on the accuracy of your treadmill speed. If your treadmill isn’t reading the correct speed, then you are still going to be off in terms of the distance/speed displayed in the virtual world.
Getting a different foot pod was an option, but my feeling was that they all fall victim to the exact same flaw as my Garmin foot pod, i.e. calibrating your speed to a treadmill which is most likely incorrect to begin with. There had to be a product that was based on a different design that could capture my treadmill running speed. Enter the Runn Smart Treadmill Sensor!
Why the Runn is different from the rest
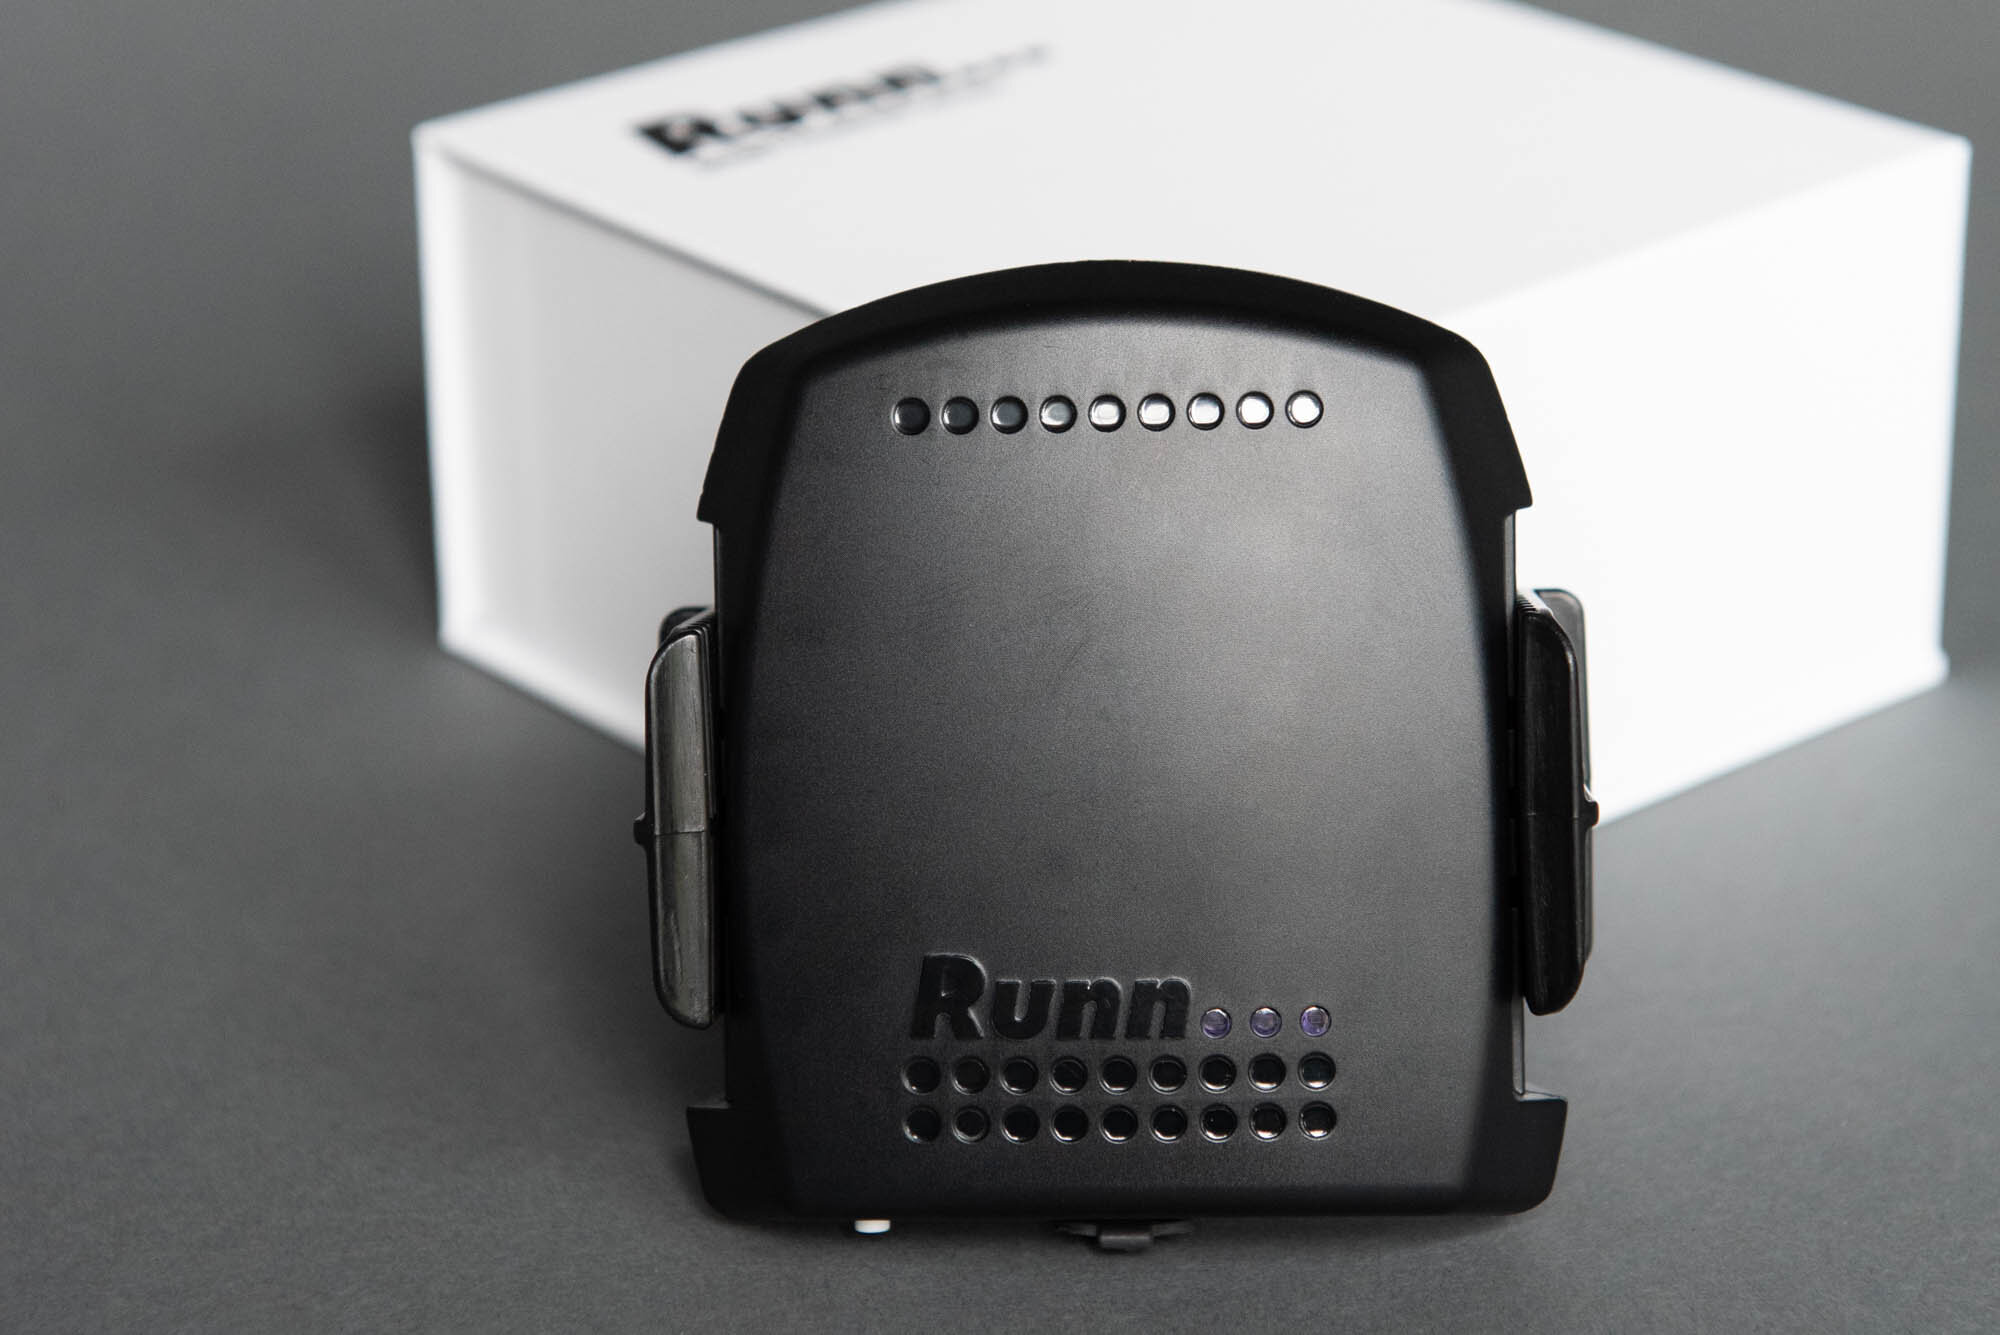
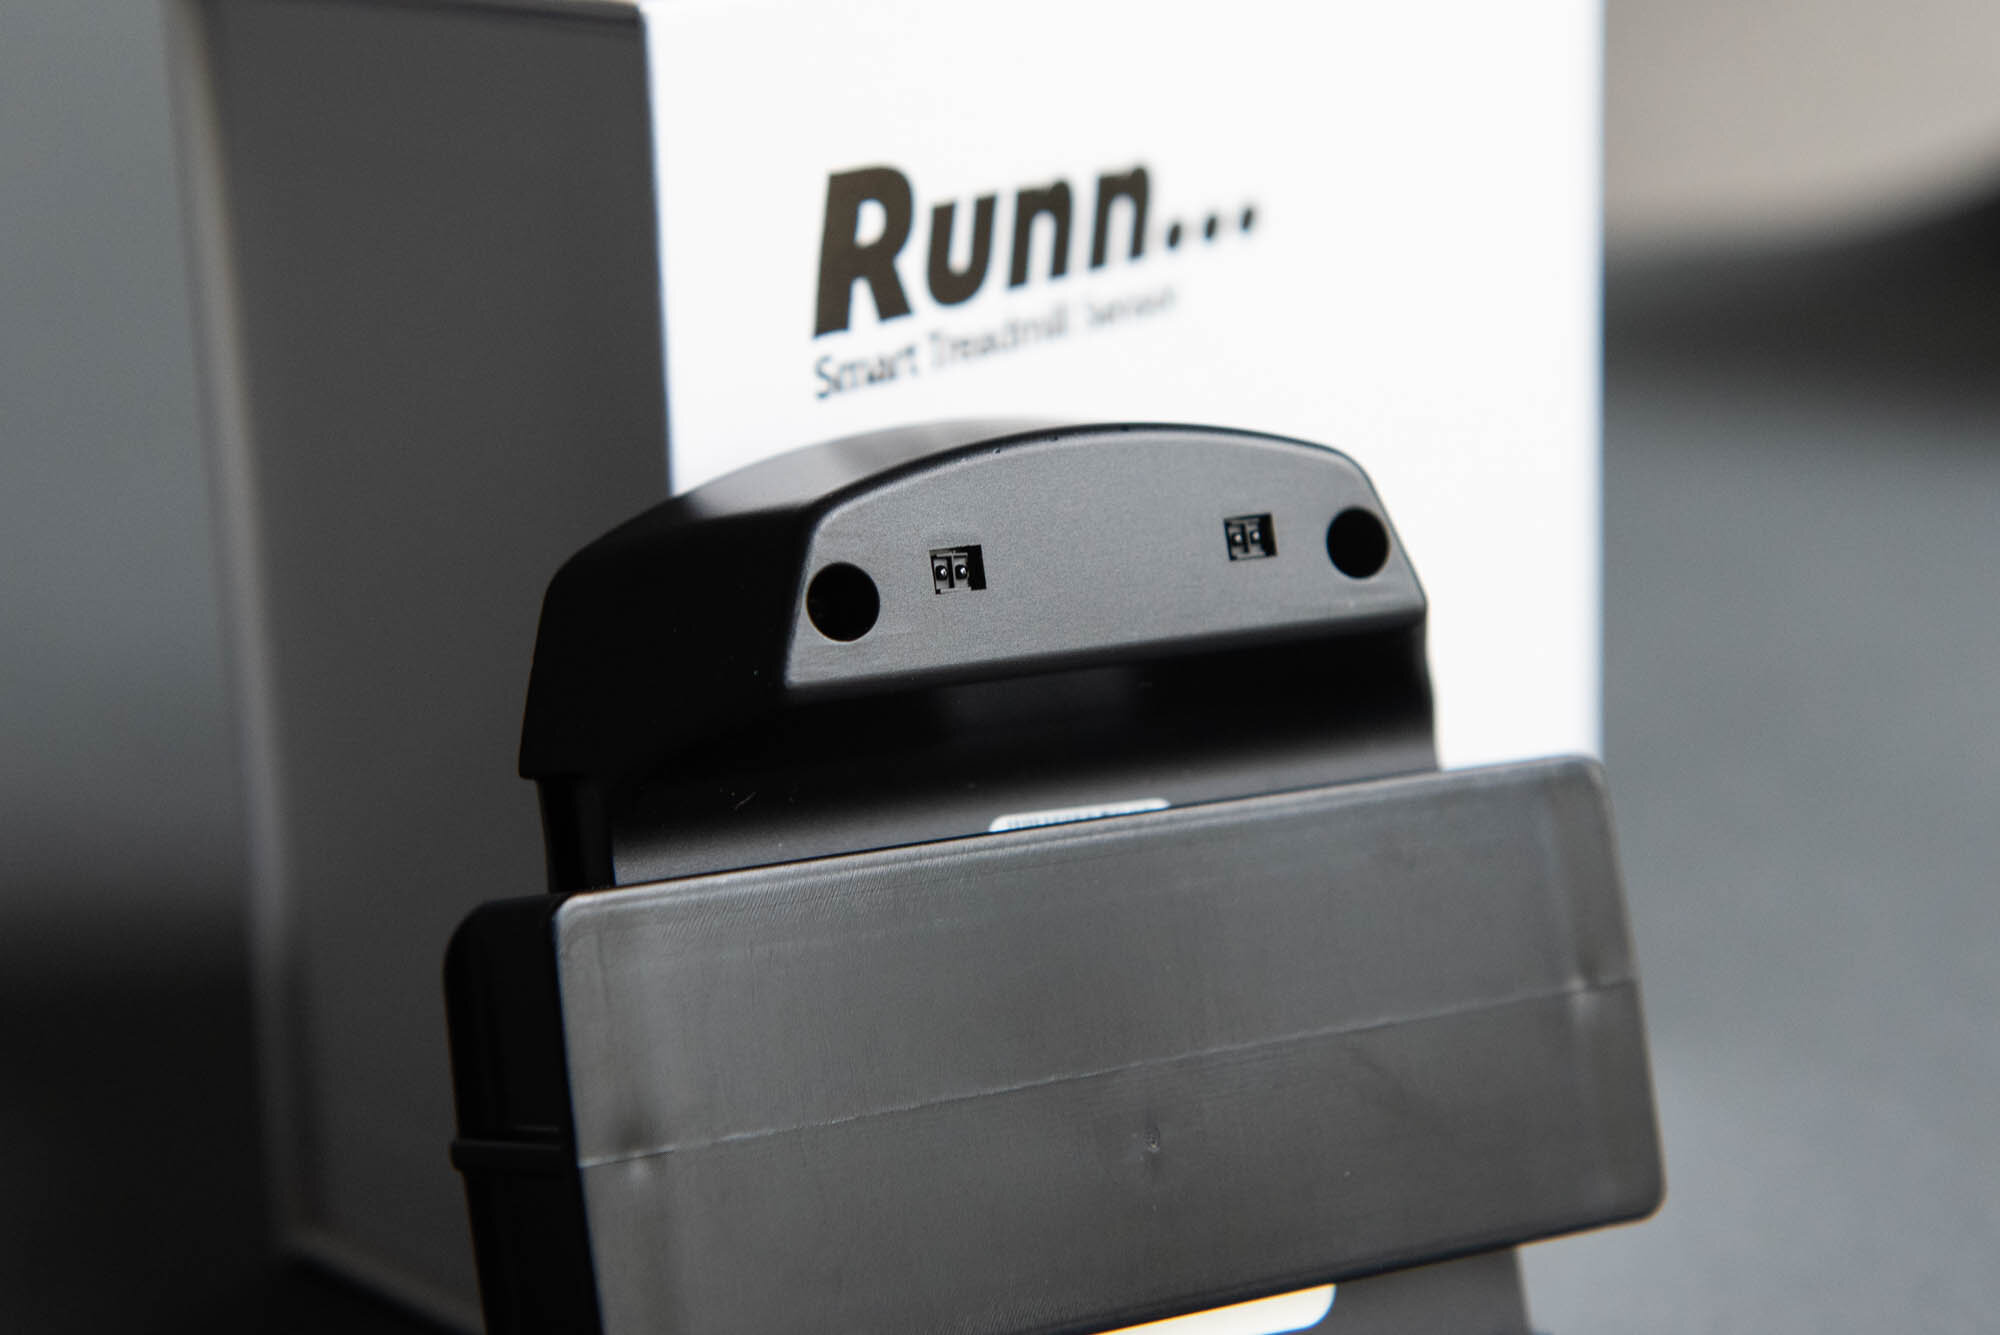
I am no industrial engineer, but I certainly appreciate innovative product design that looks to solve a particular problem in a new way. The Runn clearly ticks that box since it captures treadmill running speed in an entirely different way when compared to the competitors. Runn does not rely on foot stride length like a foot pod, but instead measures the actual treadmill belt speed. That would be equivalent to measuring how quickly the ground moves beneath you when you run outside. The Runn can do this through a design that relies on two optical sensors on the bottom of the sensor body. These optical sensors measure the time it takes for a single reflective sticker (stuck to the treadmill belt) to move between the two points on either side of the sensor. I assume it then becomes a simple physics calculation with the distance and time between the two points as known variables, which allows the speed to be calculated. Very clever if you ask me!
On paper, this design stands out head and shoulders above the rest and this is also why I was so keen to get my hands on a unit to put it to the test. Over the last few weeks, I’ve put the Runn to the test and I’m happy to share my experiences about how it performed. I’ll break this up into two parts; installation and performance.
Installation:
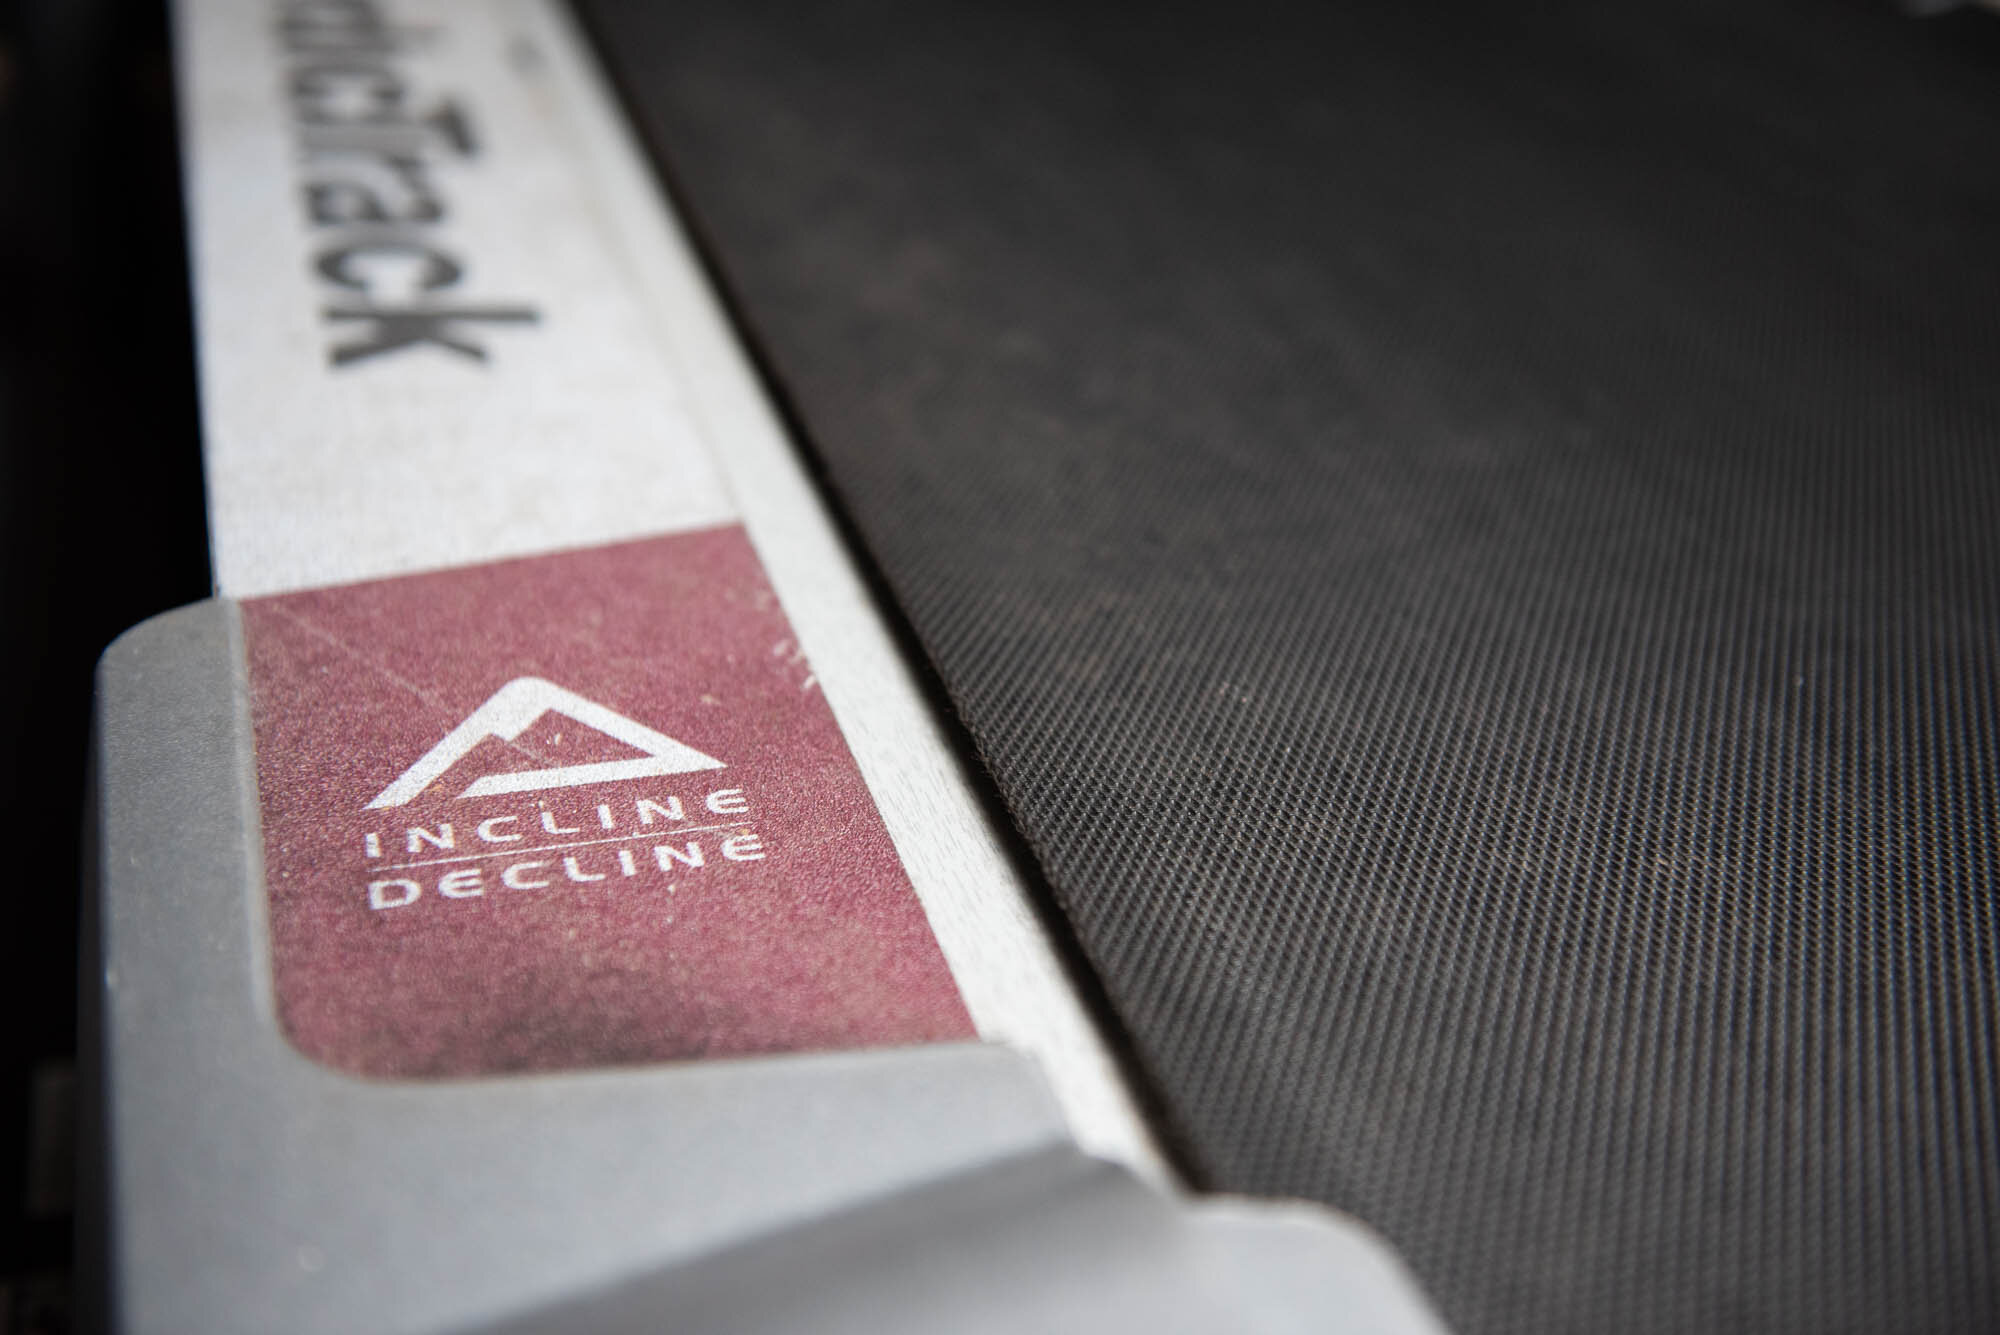
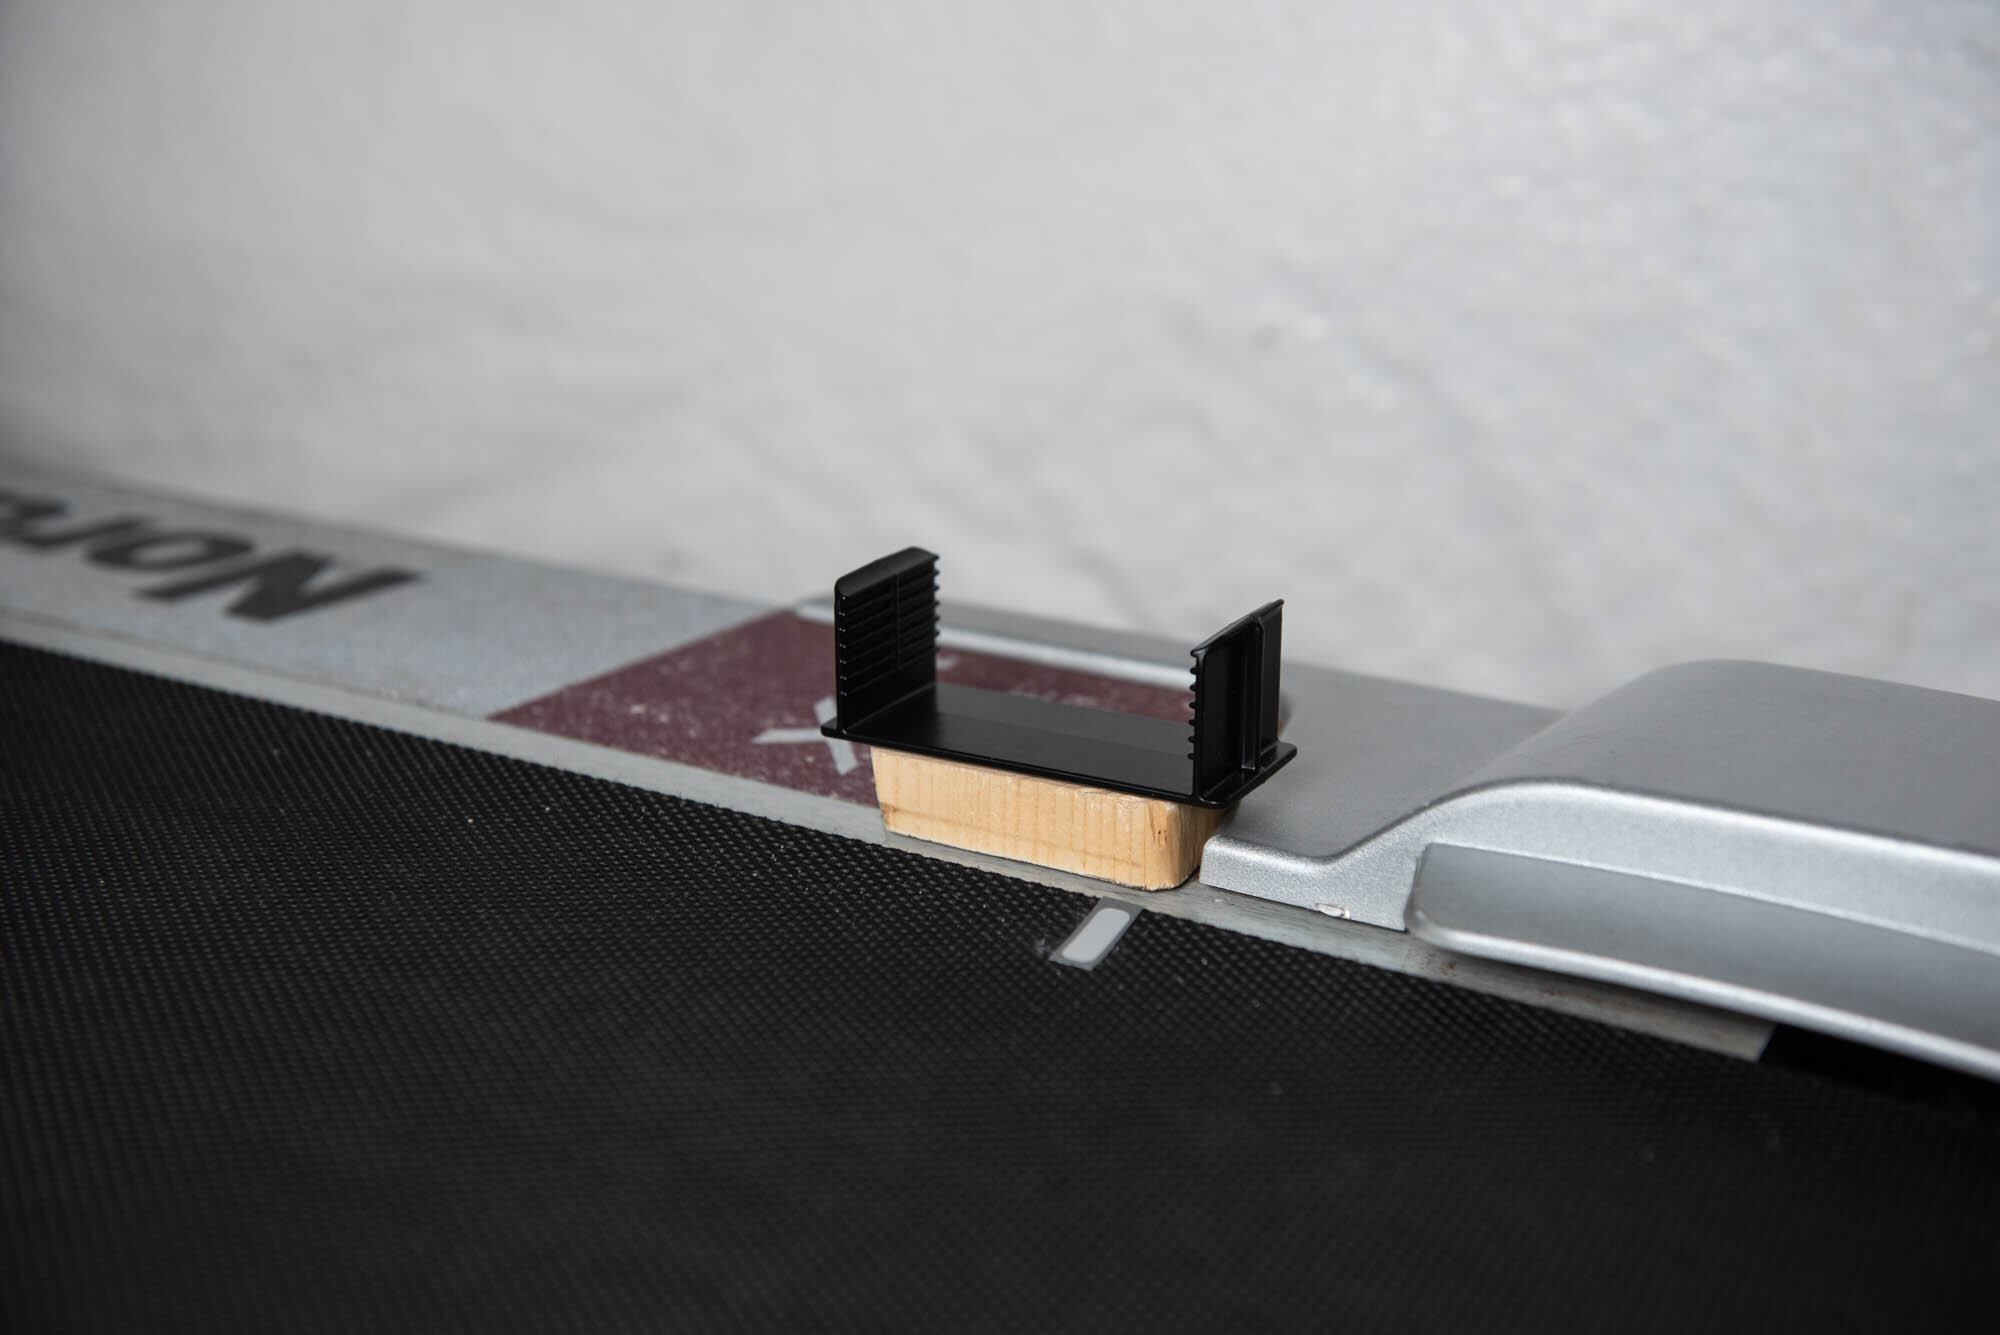
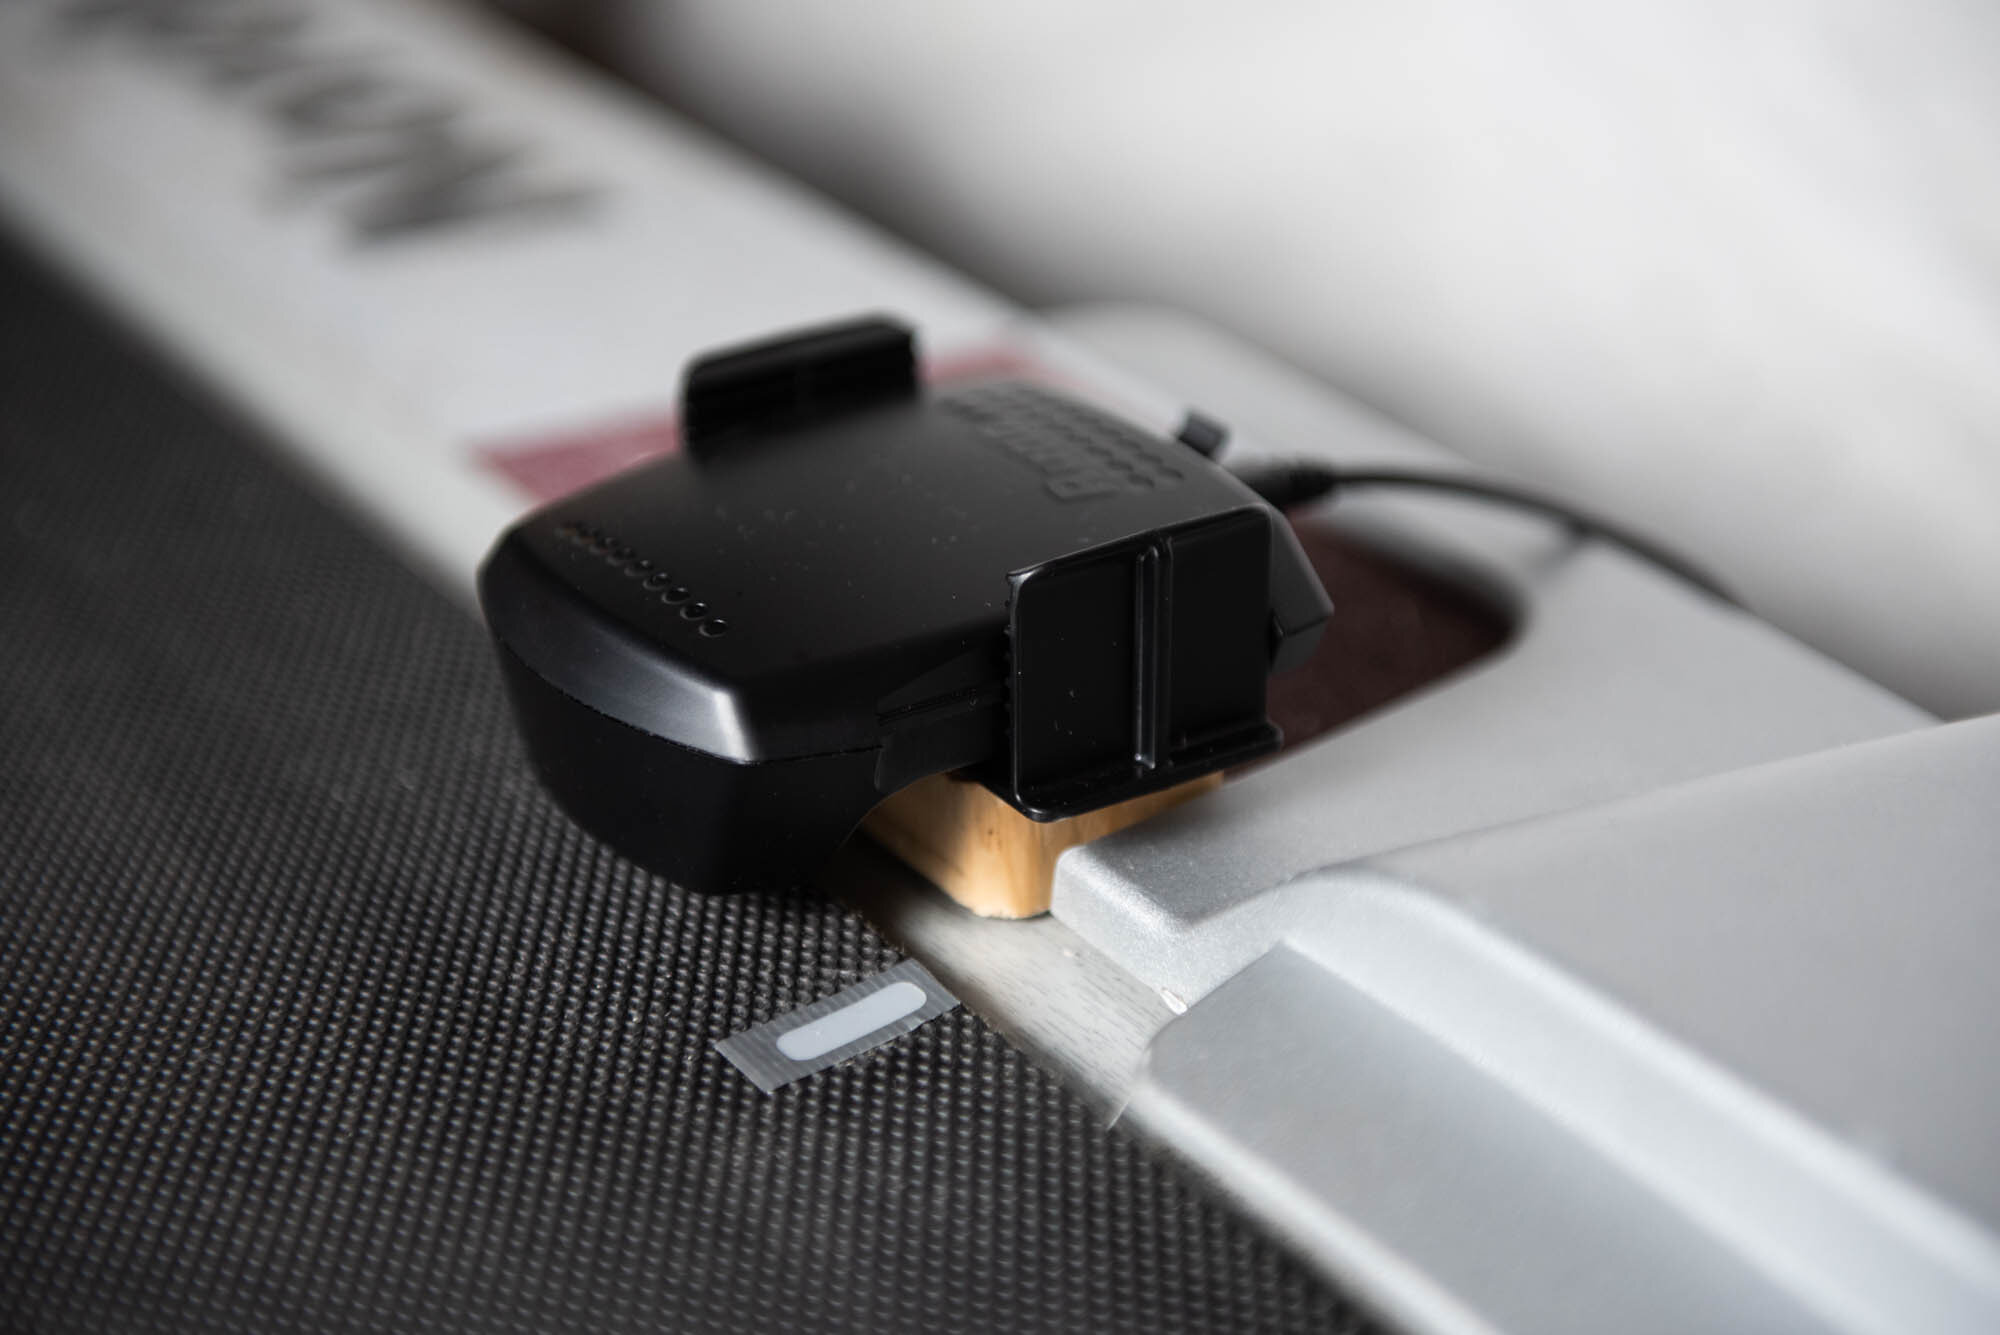
My experience with the Runn is definitely a two-sided story. During-installation and post-installation feelings vary quite a bit. Let’s get the less enjoyable part out of the way, so we can get to the good part. To set the stage for my installation frustrations, it’s worth pointing out that I probably threw a near worst-case scenario at the Runn when it comes to the type of treadmill that I was using. The NordicTrack X7i Incline that I have access to must be close to a decade old by now. This treadmill has had some good use over its lifetime and the belt is fairly greasy from years of sweat. The belt also warps slightly upward at the edges further showing its age. One last noteworthy point is the lack of a ledge on the sides of the treadmill belt, only a small (sloping) cover near the back edge.
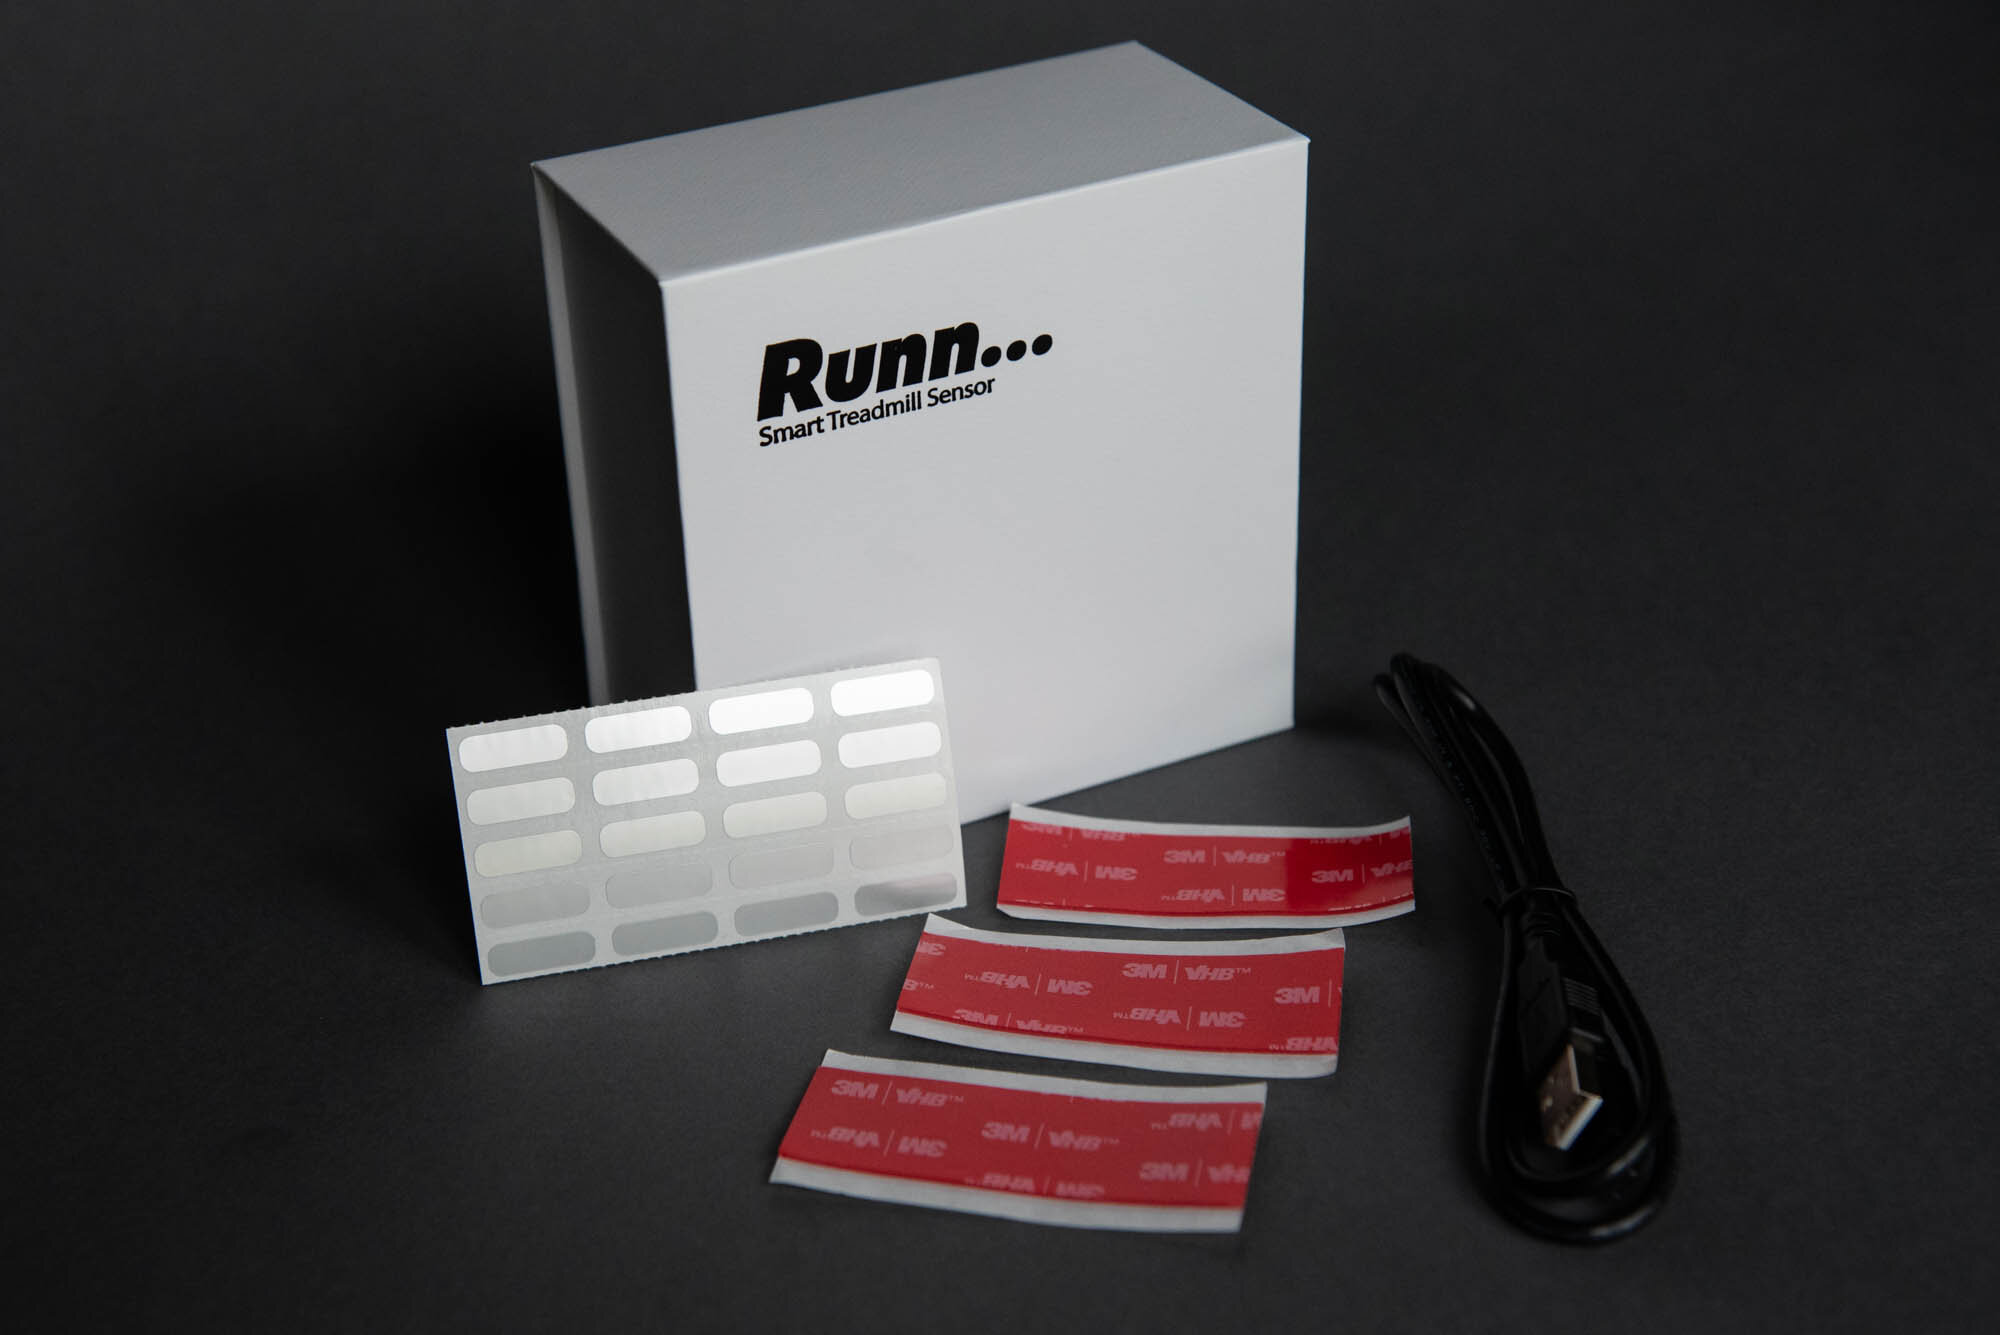
Normal installation should be a fairly straightforward process for the Runn sensor. It comes with a plastic holder that can attach to the side of the treadmill with the use of the supplied double-sided tape. The Runn can then be adjusted within this holder to lift or lower it to get it closer or further away from the belt. It should then be a simple case of sticking 3 or 4 of the reflective stickers to the belt at about 12-18 inches apart and the setup would be complete. Not so in my case.
Due to the treadmill restrictions as explained above, I had a few issues when trying to attach not only the Runn holder, but also the reflective stickers. Let’s start with the holder. The lack of a ledge meant that I would be limited to attaching the Runn onto the base layer of the treadmill board. However, with the holder attached at that level, no amount of rising or lowering of the unit would get the sensors at the correct height above the treadmill belt. NPE recommends about a pencil thickness of space between the belt and the sensor. The belt’s warped edges certainly did not help. Because of the sloping angle of back cover this was not a potential mounting point. I had to resort to using a small wooden block to lift the Runn holder to a height that would resemble the ledge that you find on most treadmills today. I used some of the additional double-sided tape to stick the block to the treadmill base and then stuck the holder onto the block. First problem solved! The Runn unit was finally in the perfect position to read the stickers as they moved beneath the sensors.
Speaking of the stickers. In theory it sounds like the simplest thing in the world to place a sticker on the treadmill belt. However, in reality, a treadmill belt isn’t the best place to paste stickers, since the surface isn’t completely flat. Almost all treadmill belts will have some kind of a dimple-like surface that provides less than ideal grip for stickers. My worn out and somewhat greasy treadmill belt made things even more complicated. No matter how intensely I stuck down the stickers, a few minutes of running ultimately led to the stickers flying off. This is where the real fun begins. Below is a list of things I tried to get the sensor to work:
• A known work-around for the sticker problem, is to paint a small strip of white-out (correction fluid) onto the treadmill belt to act as a substitute for the stickers. However, my Runn would not detect this marking on the belt.
• I brought out the strong stuff and tried to stick down the stickers with some super glue. This held up a bit longer, but ultimately this method also failed, and my unsuccessful sticker pile kept growing.
• Maybe a silver metallic permanent marker (Sharpie pen) could create a drawing that was reflective enough to replace the need for a sticker. Nope, no luck!
• The duct tape that I had laying around was of a silver color and so I tried this as a replacement for the stickers. This also wasn’t being detected by the Runn.
It was at this point that I realized that the only sticker staying in place was the one I had stuck over the the part where I used the white-out. It finally dawned on me that the dimple-like texture of the treadmill belt needed to be filled in to allow for a better surface to place the stickers. I also realized that the duct tape, although not a substitute for the stickers did a great job of staying on the belt. This is where I finally got to a solution that worked.
First put down a small strip of duct tape (to fill in the dimples) and then place the Runn stickers on top of the duct tape. Boom! Works like a charm. I’ve put this to the test and haven’t lost a single sticker yet. I really hope that my sticker hack as described can help someone else to get straight to the solution and avoid the trial and error that I had to deal with.
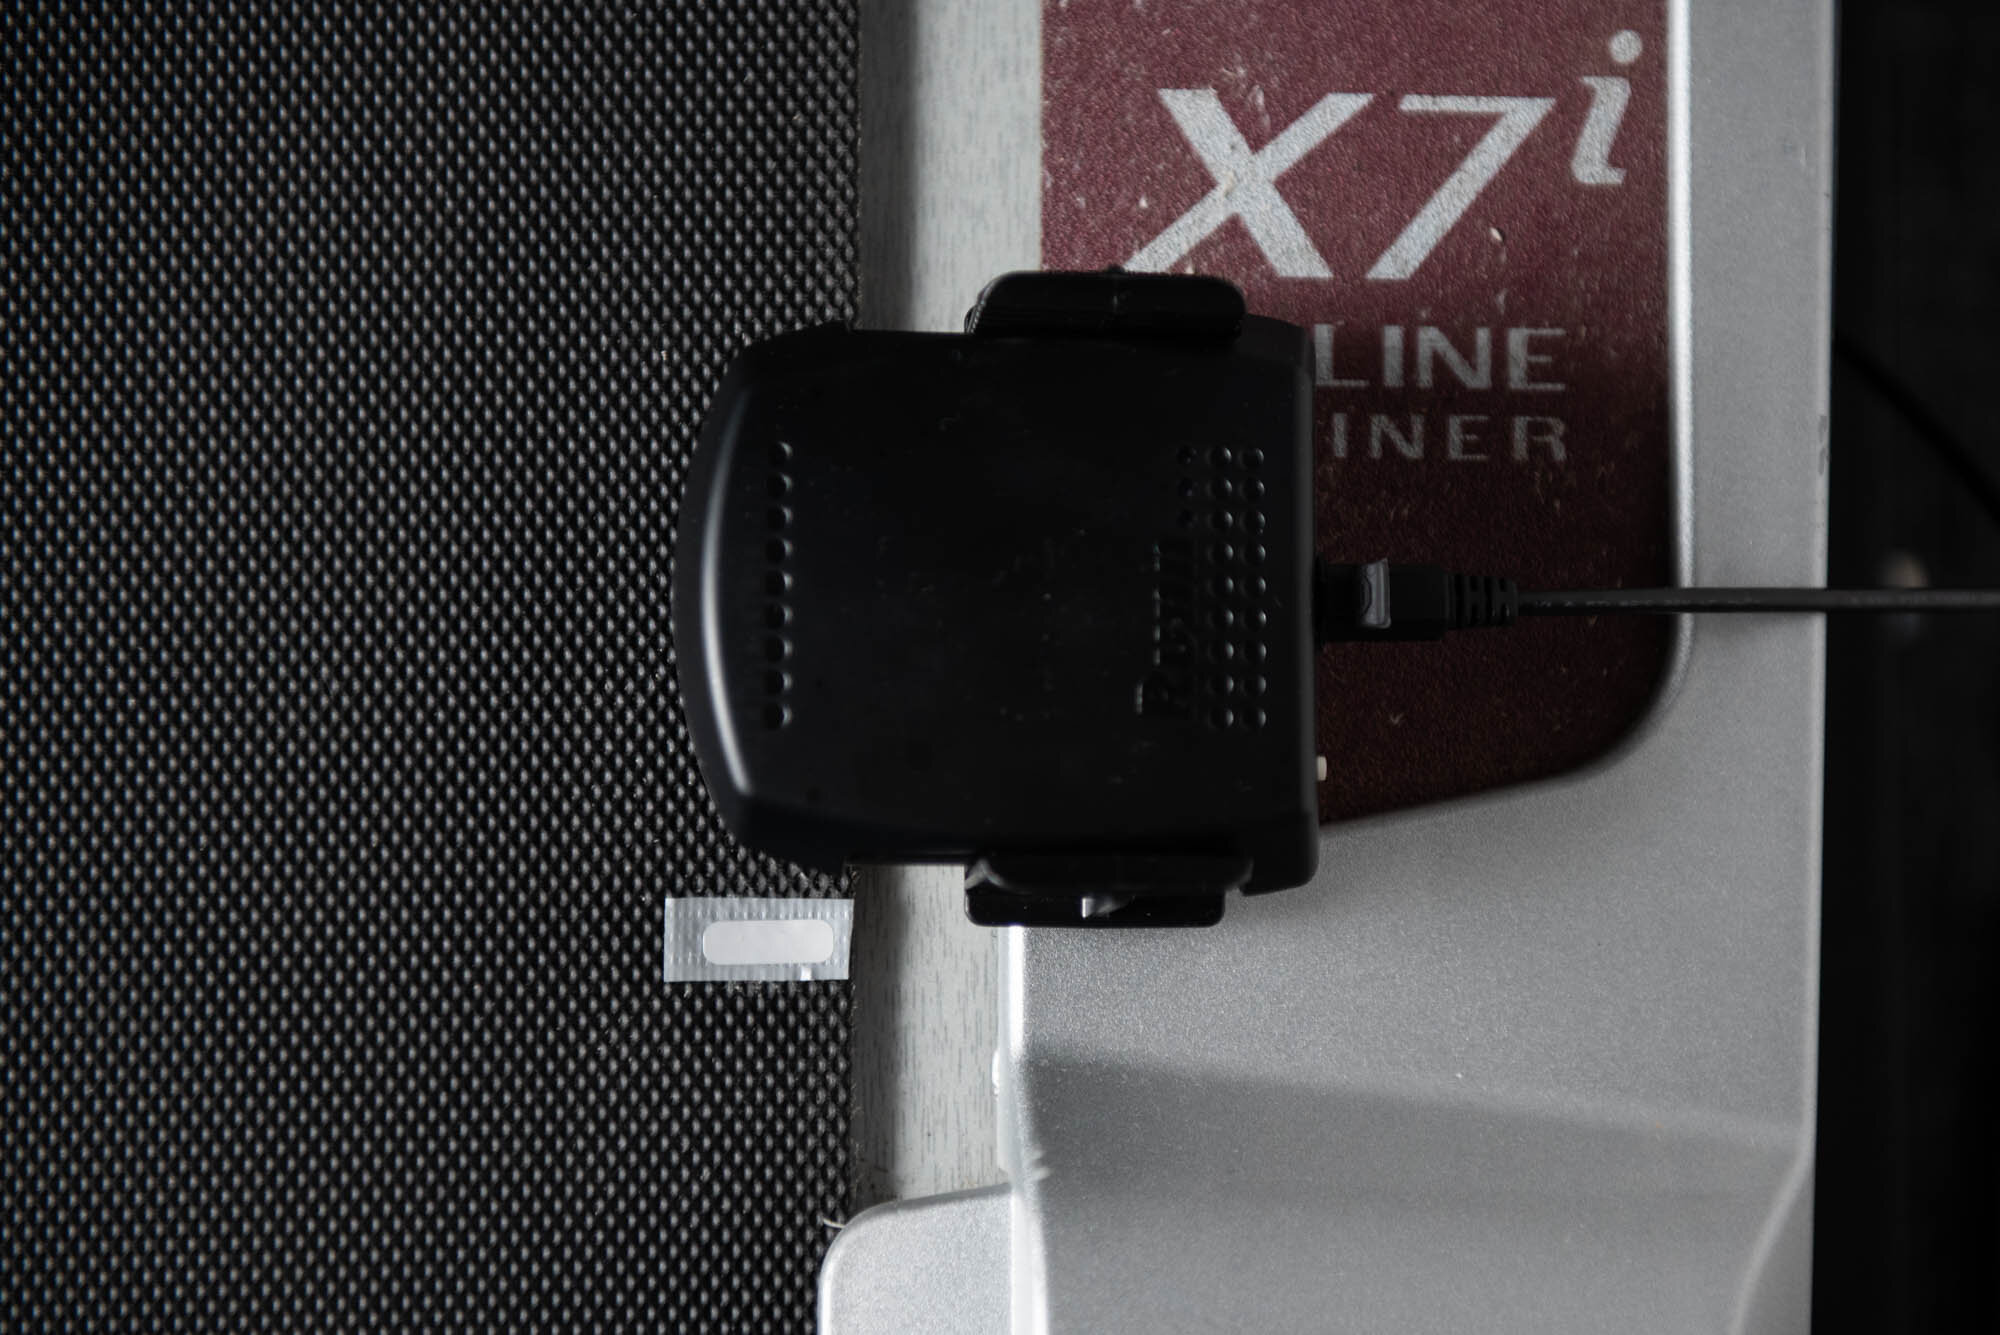
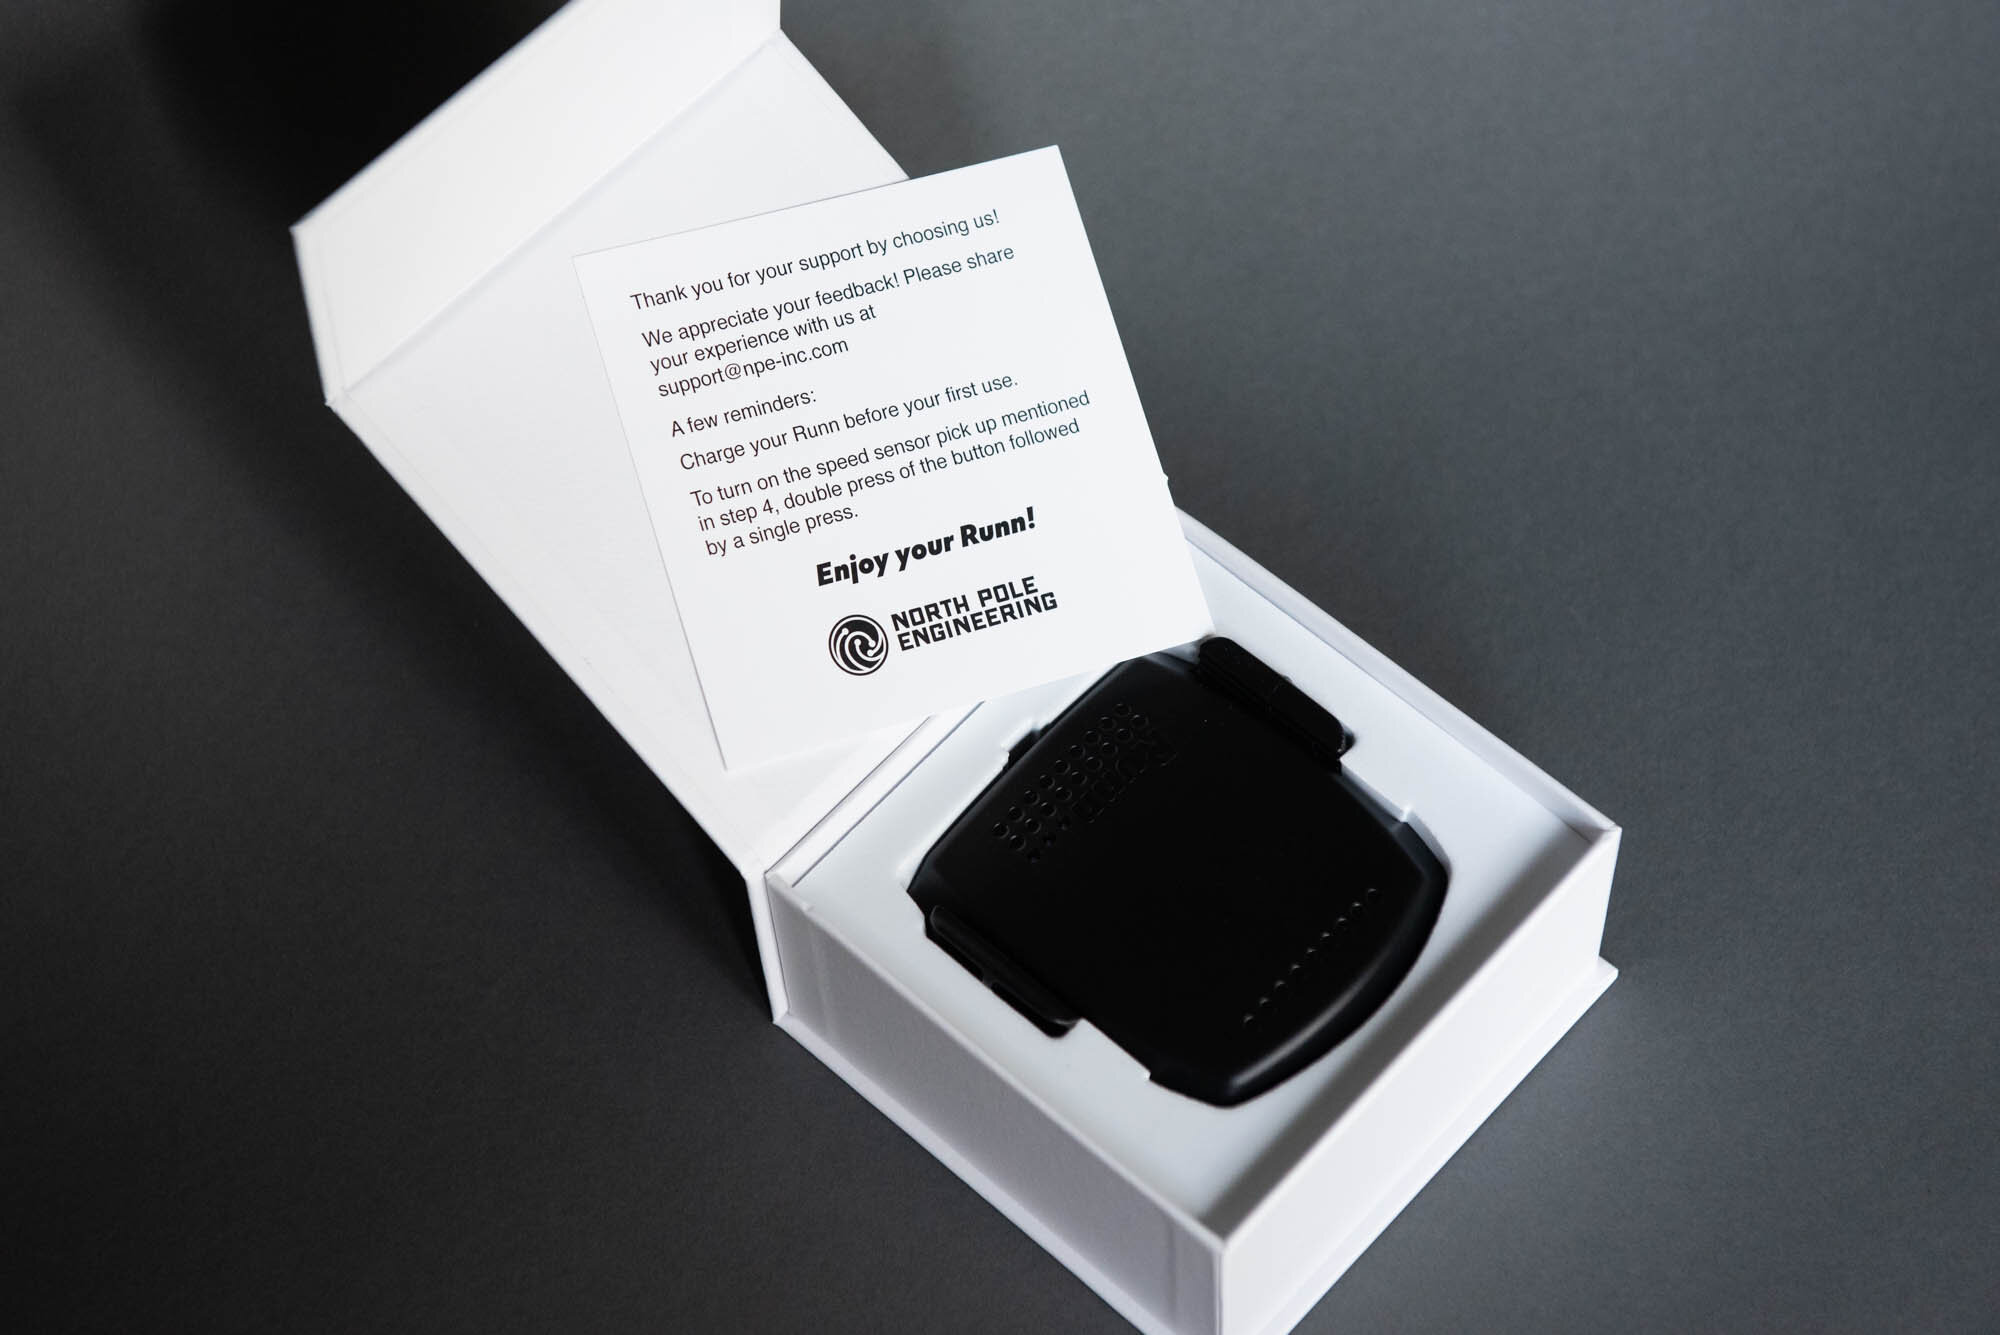
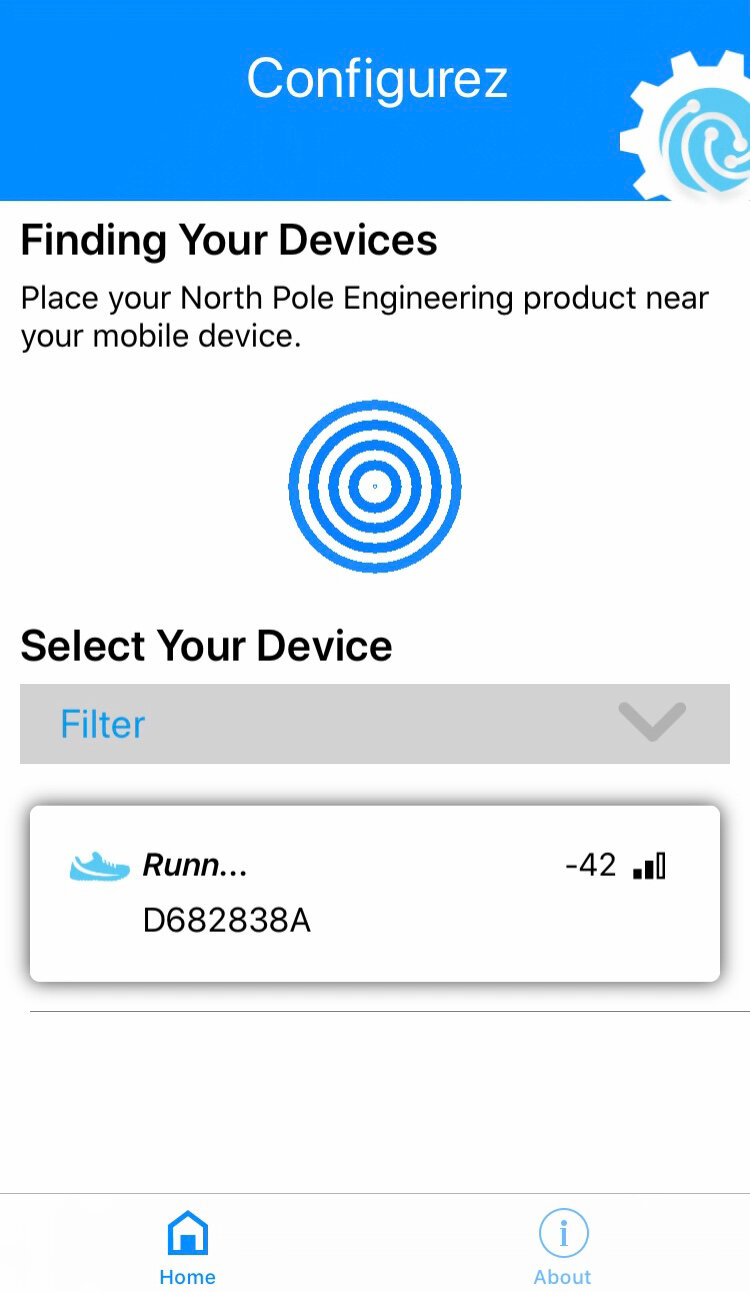
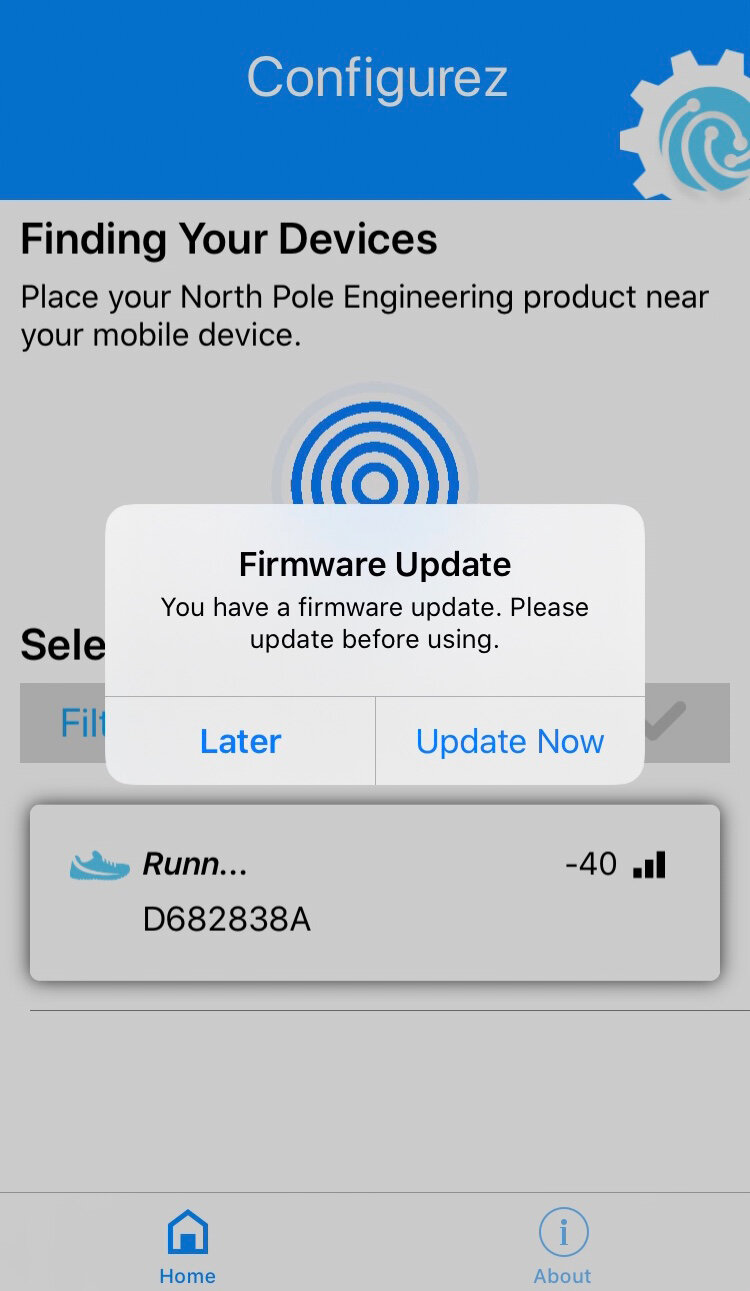
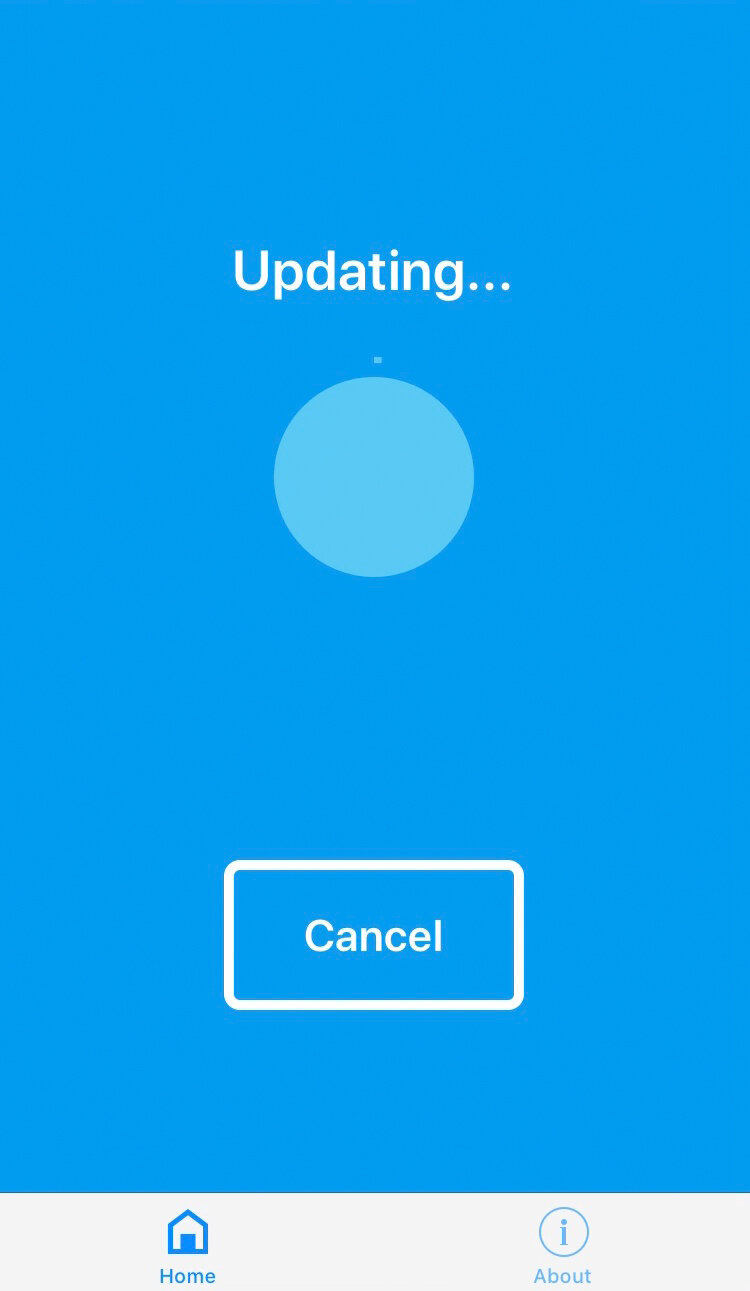
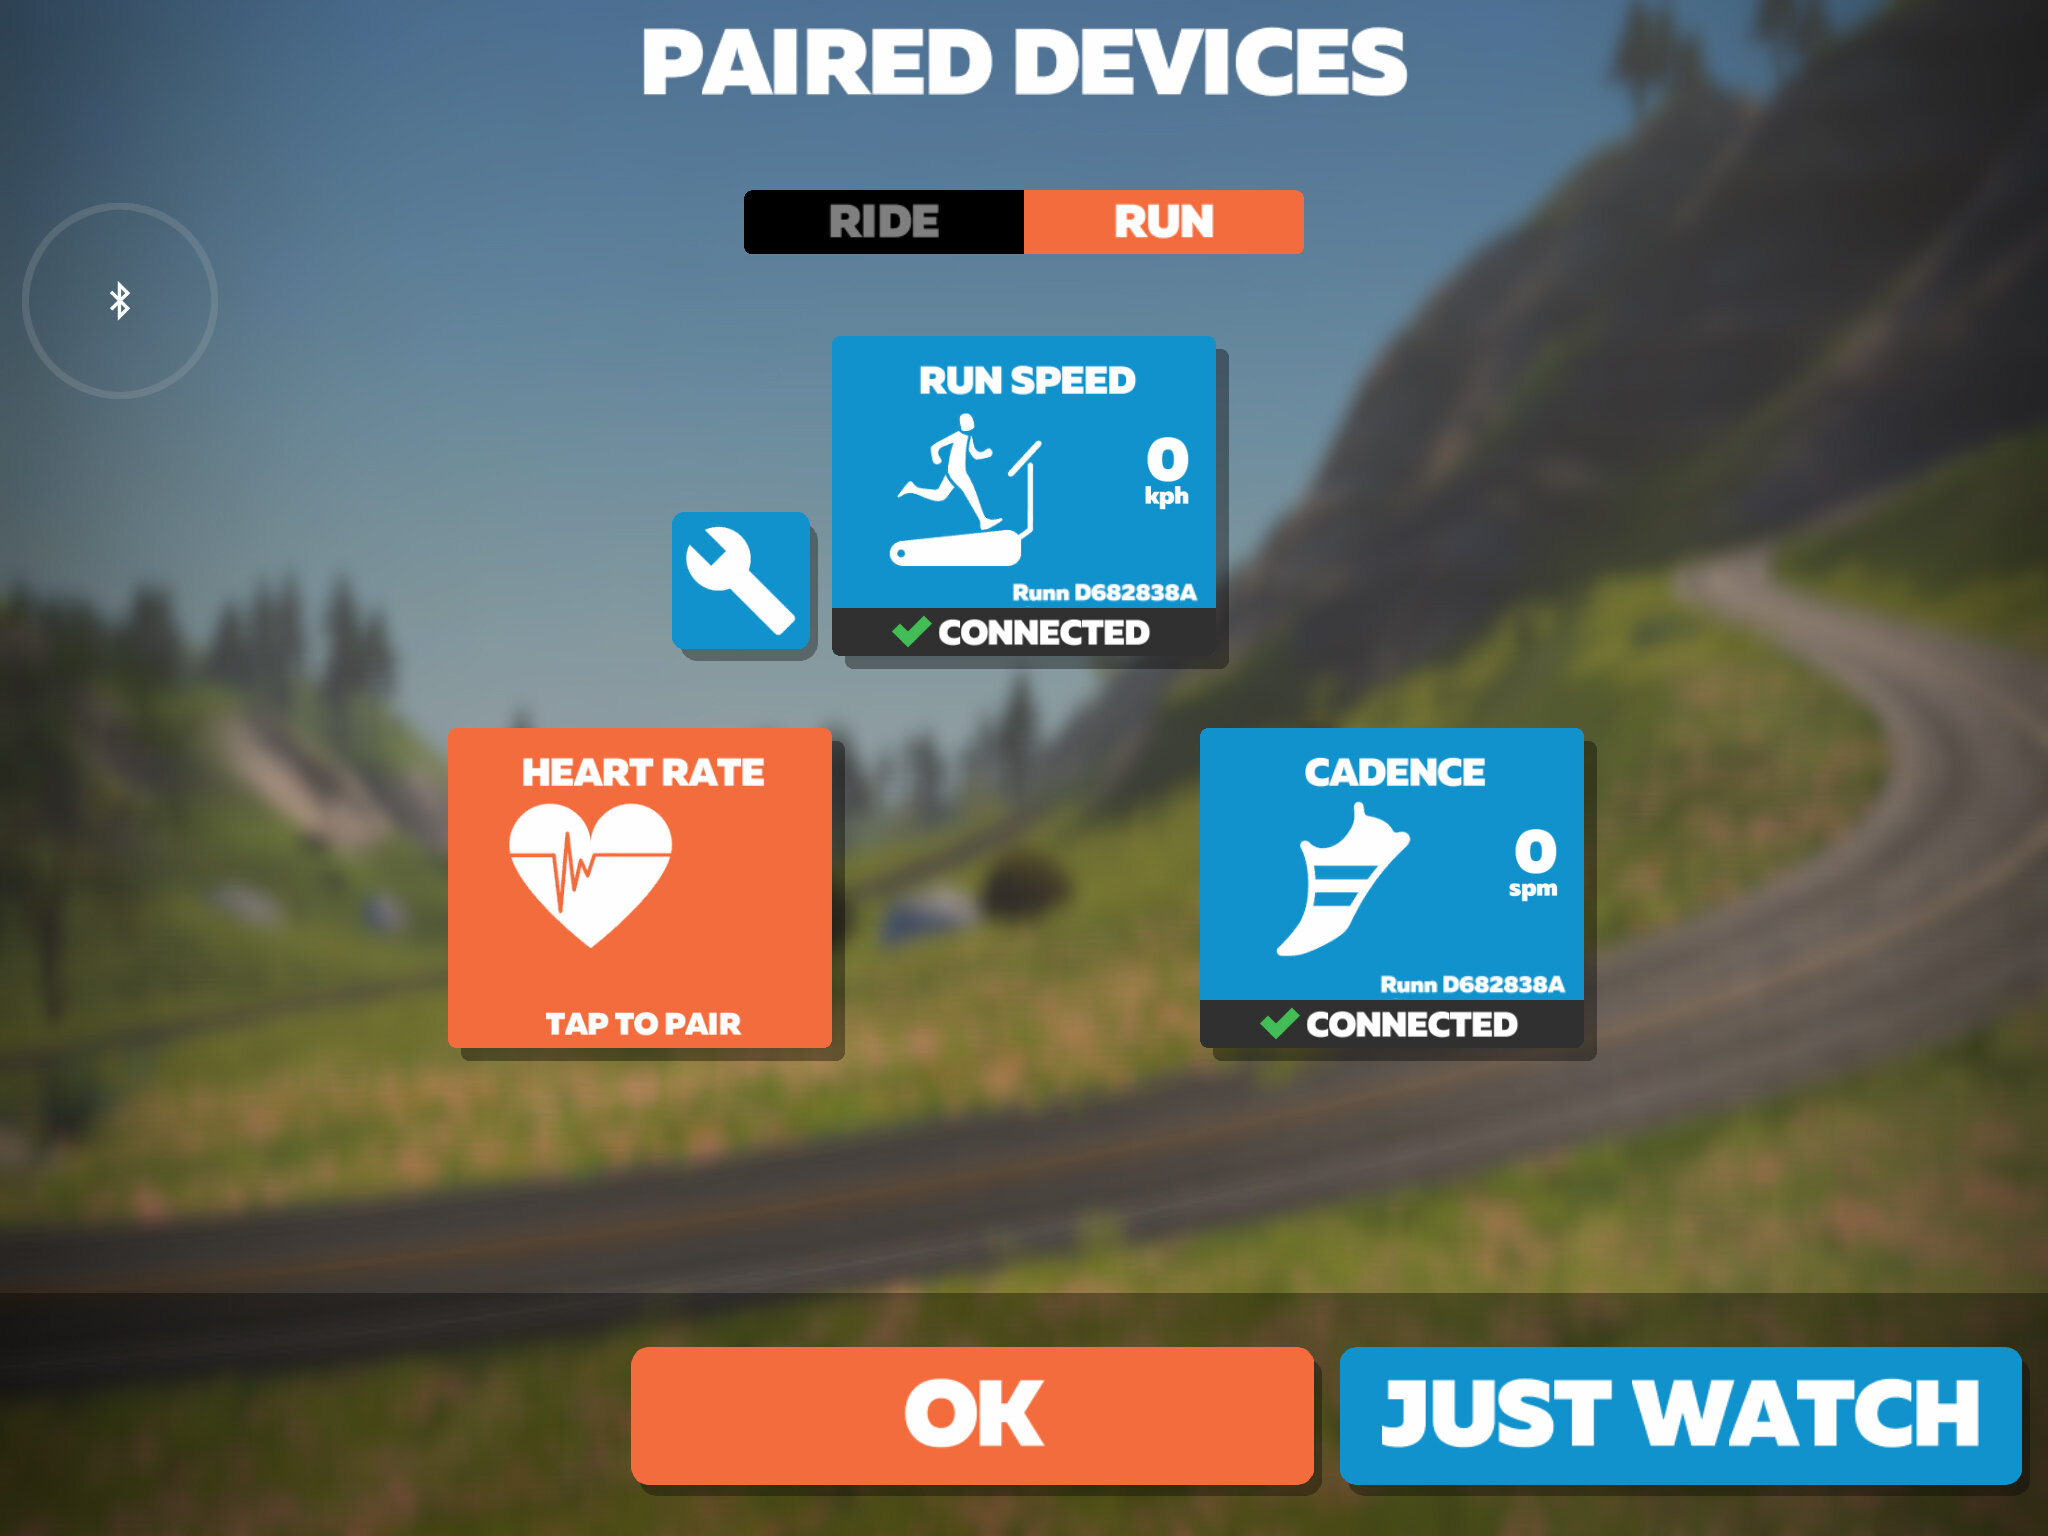
I finally found a solution to get the Runn sensor up and running! The stickers were staying attached to the treadmill belt and the sensors were successfully picking up the stickers. For the sake of covering the complete setup, I will also briefly mention the two last aspects (firmware updates & charging) that formed the remainder of my installation process. NPE informed me of a new app that they launched more recently. The app is called “Configurez” and it allows you to make firmware updates to your Runn device. This process went smoothly, and I could easily connect to my Runn unit via the app to install the latest version (3.0.2) of the firmware.
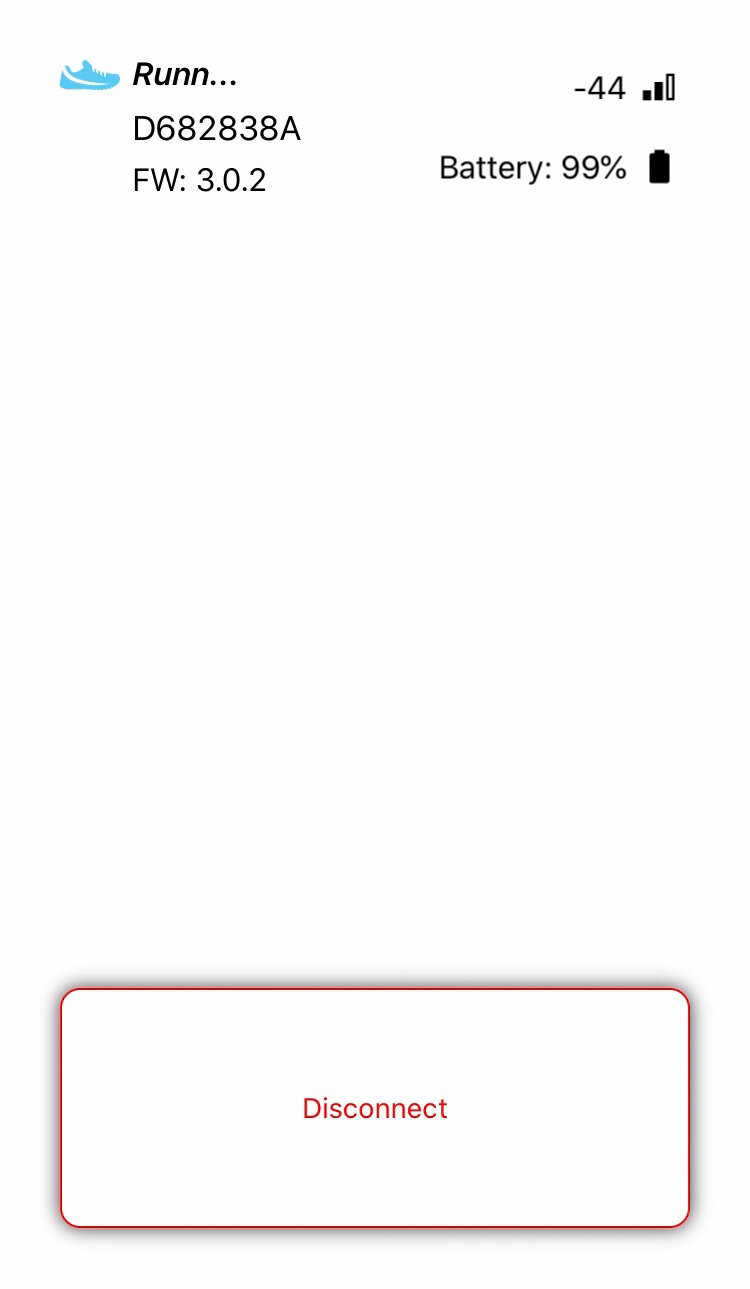
The Runn comes with a built-in battery that, if fully charged, should last through about 10-12 hours of use. This is another place where the Configurez app comes in super handy, since it can display the current battery level of the unit. This is a very welcome addition for sure. I found that having the unit plugged into a power source was far easier and to my surprise I discovered that the USB port that I have on my treadmill (originally designed for plugging in a music device) works great to keep the Runn powered up. No need for a separate power cord in this case. Bonus!

Performance:
Now that the less enjoyable installation process is out of the way I can finally get to the fun part - testing it. My feelings of frustration from the installation process quickly turned into a “This thing is awesome!” feeling, once I got it working well. There are a quite a few things to cover when it come to the performance of the Runn unit, and I’ll break it down into a few key areas.
Speed Accuracy:
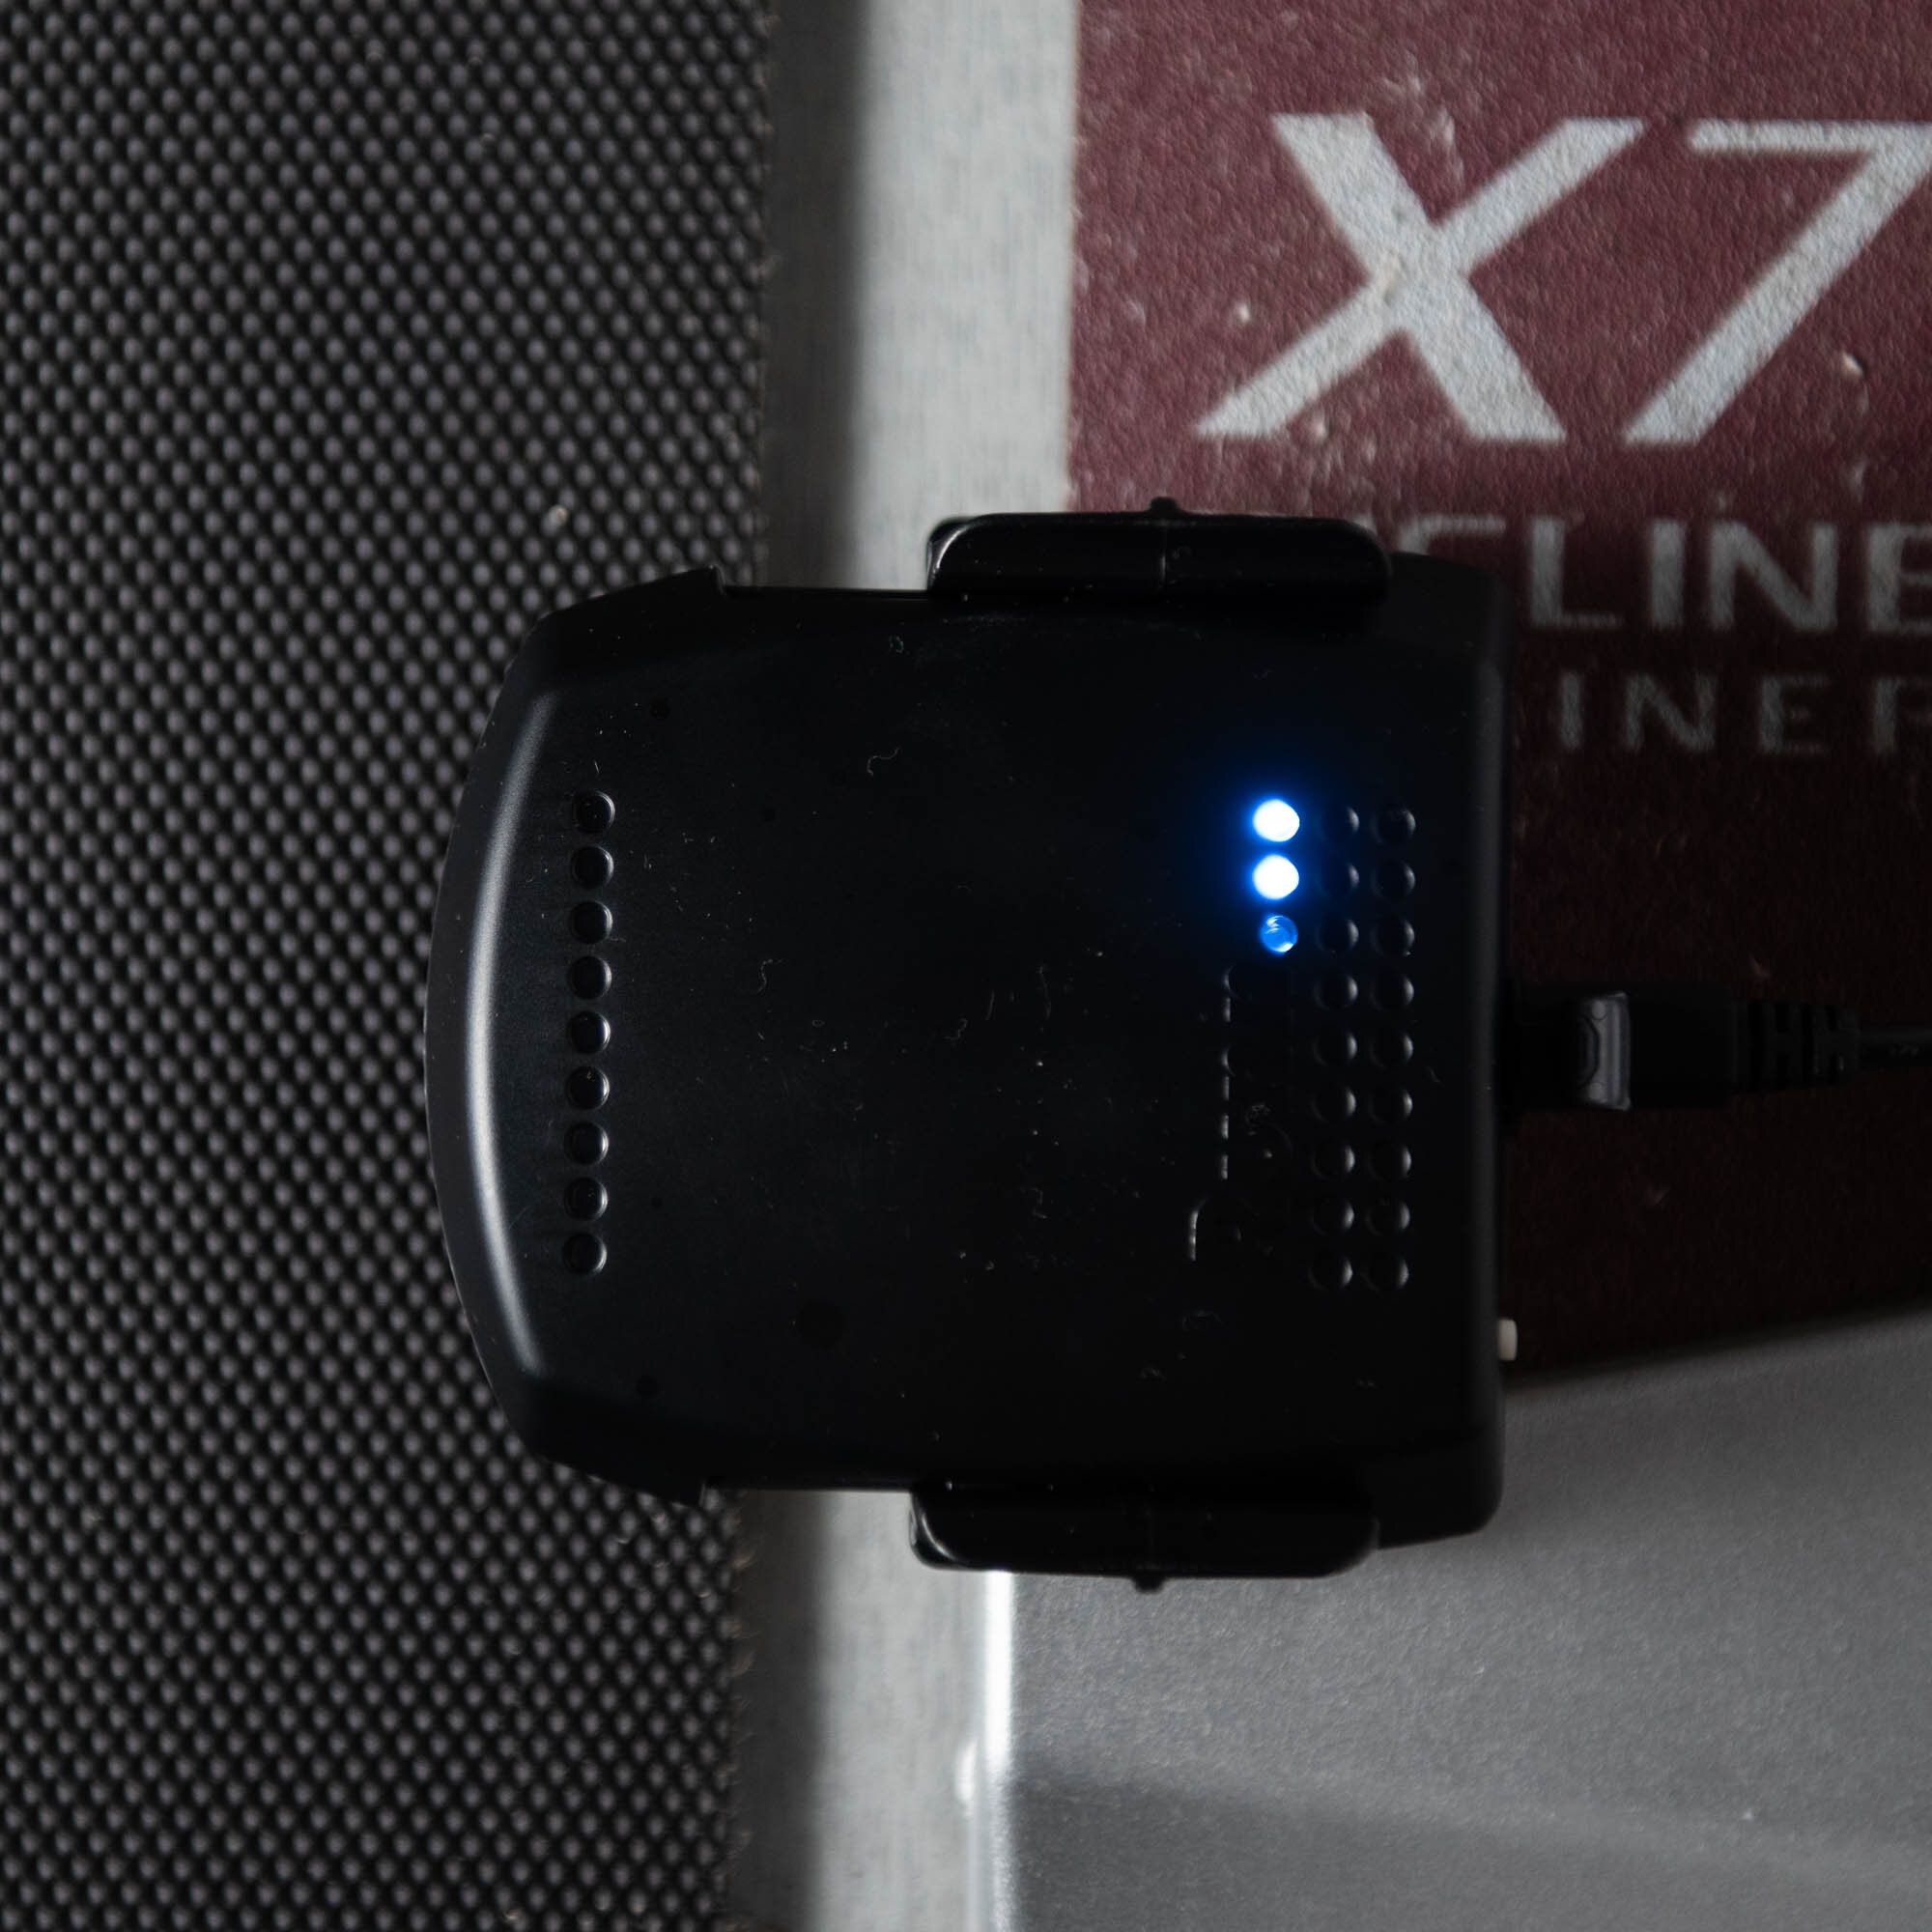
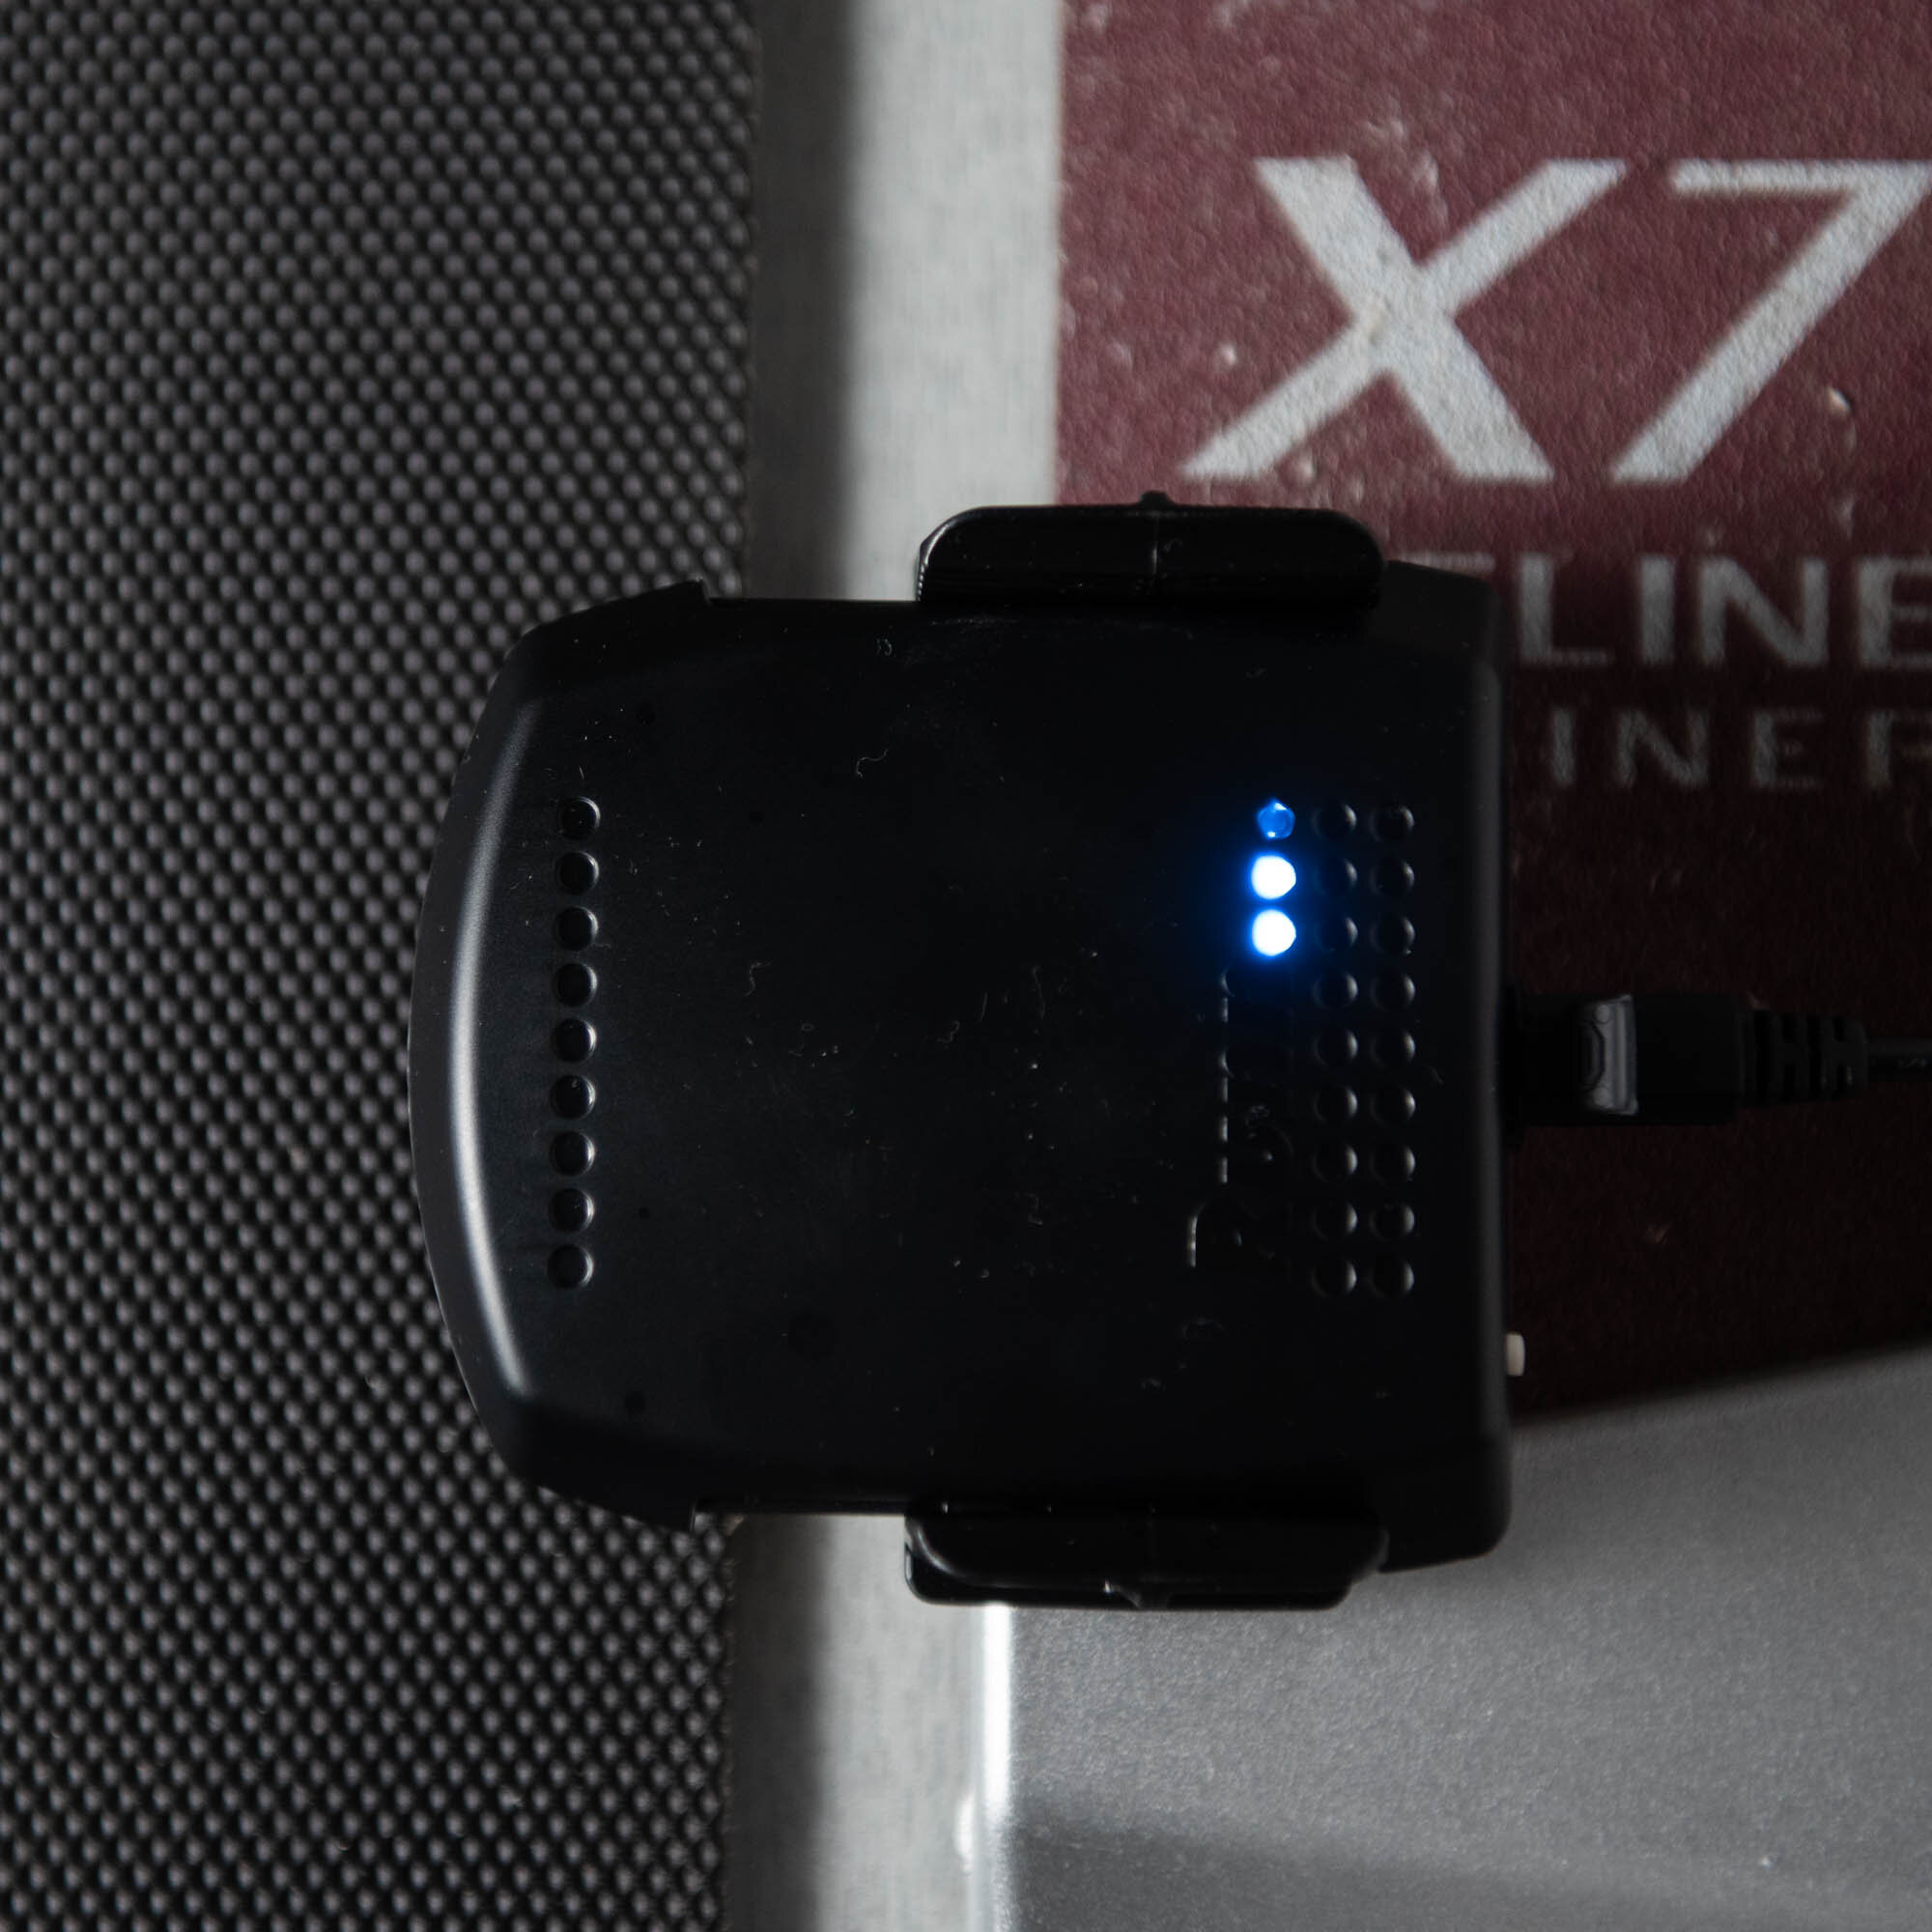
This is by far the main reason why I wanted to test out the Runn. Could the design live up to my expectation and provide a more accurate speed reading than other gadgets that I’ve tried? Yes, it can! I am extremely impressed with how well the Runn performs when it comes to measuring treadmill speed. The optical sensors really do a great job of detecting the reflective stickers as they pass beneath the two optical sensors. I placed 4 stickers on my treadmill belt and each of them registers very well. It’s important to note that the speed is not measured by the time between different stickers, but rather by the time that it takes for a single sticker to pass through the two sensor points. The Runn also has a specific mode that allows you to tell if a particular sticker is being detected or not. The way to access this mode is to first double press the white button on the unit (to turn it on) and then single press the button once more. When the Runn is placed in this mode, the three lights on top of the unit will light up in alternating fashion to indicate that the particular sticker passing beneath it registered correctly. I found this particularly helpful during my installation process, to help determine if my sticker substitutes were in fact working.
The speed measurements from the Runn confirmed what I had always believed to be the case – my treadmill’s speed was incorrect. My running intuition had long told me that the efforts exerted on the treadmill were far too easy. There was no way that I was holding my threshold pace of 3:50min/km that comfortably while running indoors. Finally, I had a way to confirm this feeling. The Runn provided me, for the first time, with a way to measure the speed independently from what the treadmill was displaying on its console. My instinct was correct, and the treadmill consistently measured 0.5km/h faster than the Runn. The Runn’s measurements provide a far more realistic pacing guide to what I experience when running outdoors. I am super impressed with the consistency of the discrepancy, which stays locked in at 0.5km/h throughout a wide spectrum of speeds. Whether I have the treadmill set to 10km/h or 17km/h, the Runn will always measure exactly 0.5km/h slower than the treadmill. The fact that it stays this consistent really gives me a great deal of confidence that I can rely on Runn as a valid source of speed. The design of the product and the method of capturing run speed come together really well, such that the speed accuracy of indoor can finally be obtained.
Dual channel signal broadcasting:
The Runn will broadcast your running speed in both ANT+ as well as in a Bluetooth format, making it compatible with all the different types of devices that can run the Zwift application. This means that I can connect the Runn to either my laptop (with ANT+ USB stick) or iOS devices (Bluetooth). In my testing, I had some significant signal dropouts when using the ANT+ connection with my computer. Since an ANT+ signal is much more prone to signal interferences, my recommendation would be to stick to a Bluetooth connection whenever possible. I had absolutely no issues when connecting to my iPad, enjoying the uninterrupted indoor running experience.
Another bonus that comes with dual channel support is that the signal is actually broadcasted in both ANT+ & Bluetooth at the same time. This meant that I could connect to Zwift on my iPad, but at the same time also add the Runn as a sensor on my Garmin watch (I have an older model that requires an ANT+ signal). Unlike with the computer, there were no issues when connecting my watch to Runn via ANT+. I liked how this allowed me to feel the watch vibrations on my arm as I hit specific distance markers (I programmed mine to buzz each kilometer). This acted as a bit of a reminder to check my stats on the Zwift screen, which was perfectly in sync with my watch data, since both relied on the same speed source. Neat!
Cadence measurement:
Thus far I’ve raved about the Runn’s ability to measure your running speed, but it can actually measure running cadence as well. The Runn can detect your running cadence through the use of the built-in accelerometers that detect footfalls on the treadmill belt. The vibrations that your foot strikes create are detected and your cadence can be calculated accordingly. I had some really good results with this specific measurement. I have a fairly consistent running cadence and know from my past experience with the Garmin Running Dynamics Pod what my average run cadence normally looks like. The Runn cadence measurements were spot-on and within the range that I usually see. The only outlier here was when it came to a fairly slow walking speed. The graph below illustrates a few drops to a zero cadence when my specific workout called for 30sec walking pace recoveries. This is to be expected, since the footfalls on the treadmill become far less intense and the accelerometers might not detect them as easily at that point. Overall, I’m still impressed with the cadence data that I collected. In Zwift, all you need to do is select the Runn as not only the speed source, but also the cadence source and you’re good to go.

Incline measurement:
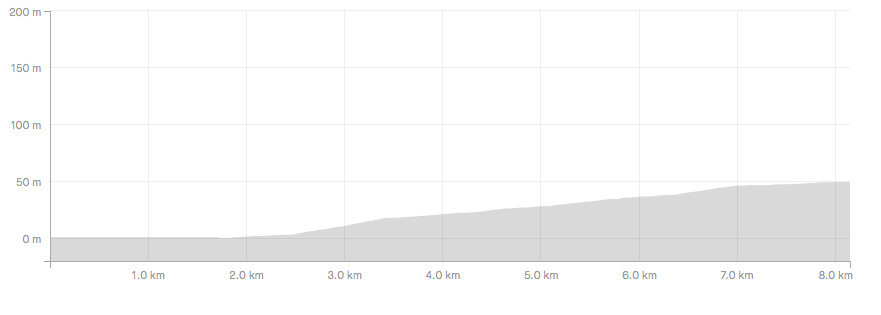
Another metric that the Runn unit can collect is the incline to which your treadmill is set. There are a few things to note about the incline data. Zwift (and other training apps) does not currently offer the ability to display the treadmill’s incline setting. You have the virtual terrain incline number on Zwift, but that’s as far as it goes. What will happen with the Runn unit however is that your incline data will be collected in the .fit file that Zwift generates each time you run. When you upload your Zwift runs to a service like Strava, the elevation gain data as collected in the .fit file will actually display. It provides at least some method to capture your run elevation data. In my testing, the incline data wasn’t entirely what I expected to see. In the graph below, you will see how my elevation profile only kicked upwards after about 2kms of running, this while my treadmill was set to a 1.5% slope through my entire run. Therefore, under perfect conditions, the graph should have shown a 1.5% upward-sloping line. The activity below is also not an outlier and I’ve seen similar readings with other runs. I’m not too bothered by this and don’t really look back at my elevation data that I generate on a treadmill all that much. It’s neat that with the Runn there is at least some back-up way of capturing this data should I feel the need to review it.
No need for calibration:
It’s highly recommended that you calibrate your foot pod within Zwift before the first use, but with the Runn I don’t see the need to take this step. Why calibrate something that can measure the speed correctly to an incorrect measurement? I’ve seen reviews where others have suggested to still take this step, but as I explained earlier the speed accuracy is finally at a level that I’ve desired (without any calibration). If you calibrated your Runn unit to Zwift and want to revert to the factory calibration, then you can hold down the button on the Runn for 10 sec to reset calibration. My recommendation would be to stick with the factory calibration since firmware updates (via the Configurez app) will only improve the accuracy of the Runn going forward. Not many treadmills on the market can make that claim!
Convenience factor:
My final point about the Runn relates to the convenience that you get once you have it all set up and working correctly. There is no need to make any adjustments when you want to switch between different users. If Christin, my wife, wants to use the treadmill to run on Zwift, then there will be no other requirements. She can simply log into her Zwift profile and start running with the Runn as a speed source right away. It truly gives you that “set and forget” experience that you want from technology working in the background. I basically just turn on the treadmill and the speed sensor is ready to be used.

Wrap up:
I think it’s clear from my difficulties with the installation process that the Runn is not a treadmill sensor that can be easily fitted and transferred to all treadmills. Although it might be possible, using this sensor on a gym treadmill will certainly come with a few installation challenges. If the intent is instead to use the Runn on a personal (home) treadmill, then I can absolutely see it as a viable option. My experience with the setup was far from ideal, but hopefully if you own a newer treadmill and follow my sticker-hack it might be much easier to get the Runn operational. Once the upfront hard work is done, the story changes considerably and the Runn truly comes into its own. The speed accuracy that I obtained from the unit finally meets my need for a reliable way to measure indoor running. The Runn has given me far greater confidence that my workout paces are in line with real world experiences and my running-intuition-exertion-gage is certainly much happier for it.
If you have had any issues with other running sensors and are considering the Runn as an alternative, then please leave a comment and let us know what you think of this review.
-Wiehan