New Strava Route Builder: How-to & Top Tips
Disclaimer: This post contains affiliate links, through which we earn a commission.
Strava has been getting lots of airtime lately, as the sports technology company underwent some far-reaching changes in the past few months. This largely began in late 2019 when Strava saw a significant executive shake-up after James Quarles departed as CEO and Michael Horvath and Mark Gainey, both original founders of the company, made a return in executive roles. Horvath currently heads up the company as CEO, while Gainey serves as executive chairman. The influence of these two founders was immediately felt by members of the Strava community, as feature after feature was introduced throughout the first quarter of 2020. Strava’s marketing campaign even boasted about the 50+ new features now available on their platform. Strava was finally appeasing the community and addressing shortcomings on the platform at a rapid rate, leaving many with renewed hopes that the company was taking the correct steps towards future success. Turns out there was a much bigger picture in the works.
While most of the initial feature launches were available to the whole Strava community (both subscribers and non-subscribers), a major strategic directional shift came into affect in mid-May, placing a much stronger focus on feature launches geared towards the subscribers (previously known as premium members) of the Strava community. Strava’s new-found customer satisfaction approval rating was somewhat short-lived as the latest shift has left many feeling frustrated about the latest changes and the reduced functionality now available to non-subscribers. Instead of rehashing the same arguments, today’s post won’t focus on features that were taken away, but instead we’ll concentrate on one of the main features that was added as part of the platform’s move towards a more subscriber-centric service. This new feature is, of course, the new and improved Strava Route Builder.
Overview
I can honestly say that the Route Builder is hands-down the part of the Strava web-portal that I use most often. Whenever an idea for a new route pops into my head, this is the first place that I go to jot it down. I’ve long been surprised that this powerful tool is made available free of charge, while other platforms, such as Ride with GPS and Komoot, charge for the same functionality. I even mentioned the power of Strava's Route Builder in a previous post about planning out the perfect gravel route. It, therefore, comes as no surprise that Strava opted to make this feature available only to the paying members on their platform. Let’s dig into the changes that were brought about with the latest updates.
There is a lot to uncover in order to showcase this tool and the many ways in which it can be used to plan out the perfect cycling or running route. This blog post will serve as a basic overview to highlight many of the new functionalities that have been added to Strava's Route Builder. But should you really want to see a step-by-step guide and a more detailed view of this tool, then be sure to check out the video that goes along with this post.
Strava Web Route Builder: New & Improved
Follow these steps to find the Route Builder tool on Strava’s website:
-Hover over the “Dashboard” drop-down menu on your main Strava page.
-Select “My Routes” from the drop-down menu.
-Click on the “Create new route” box.
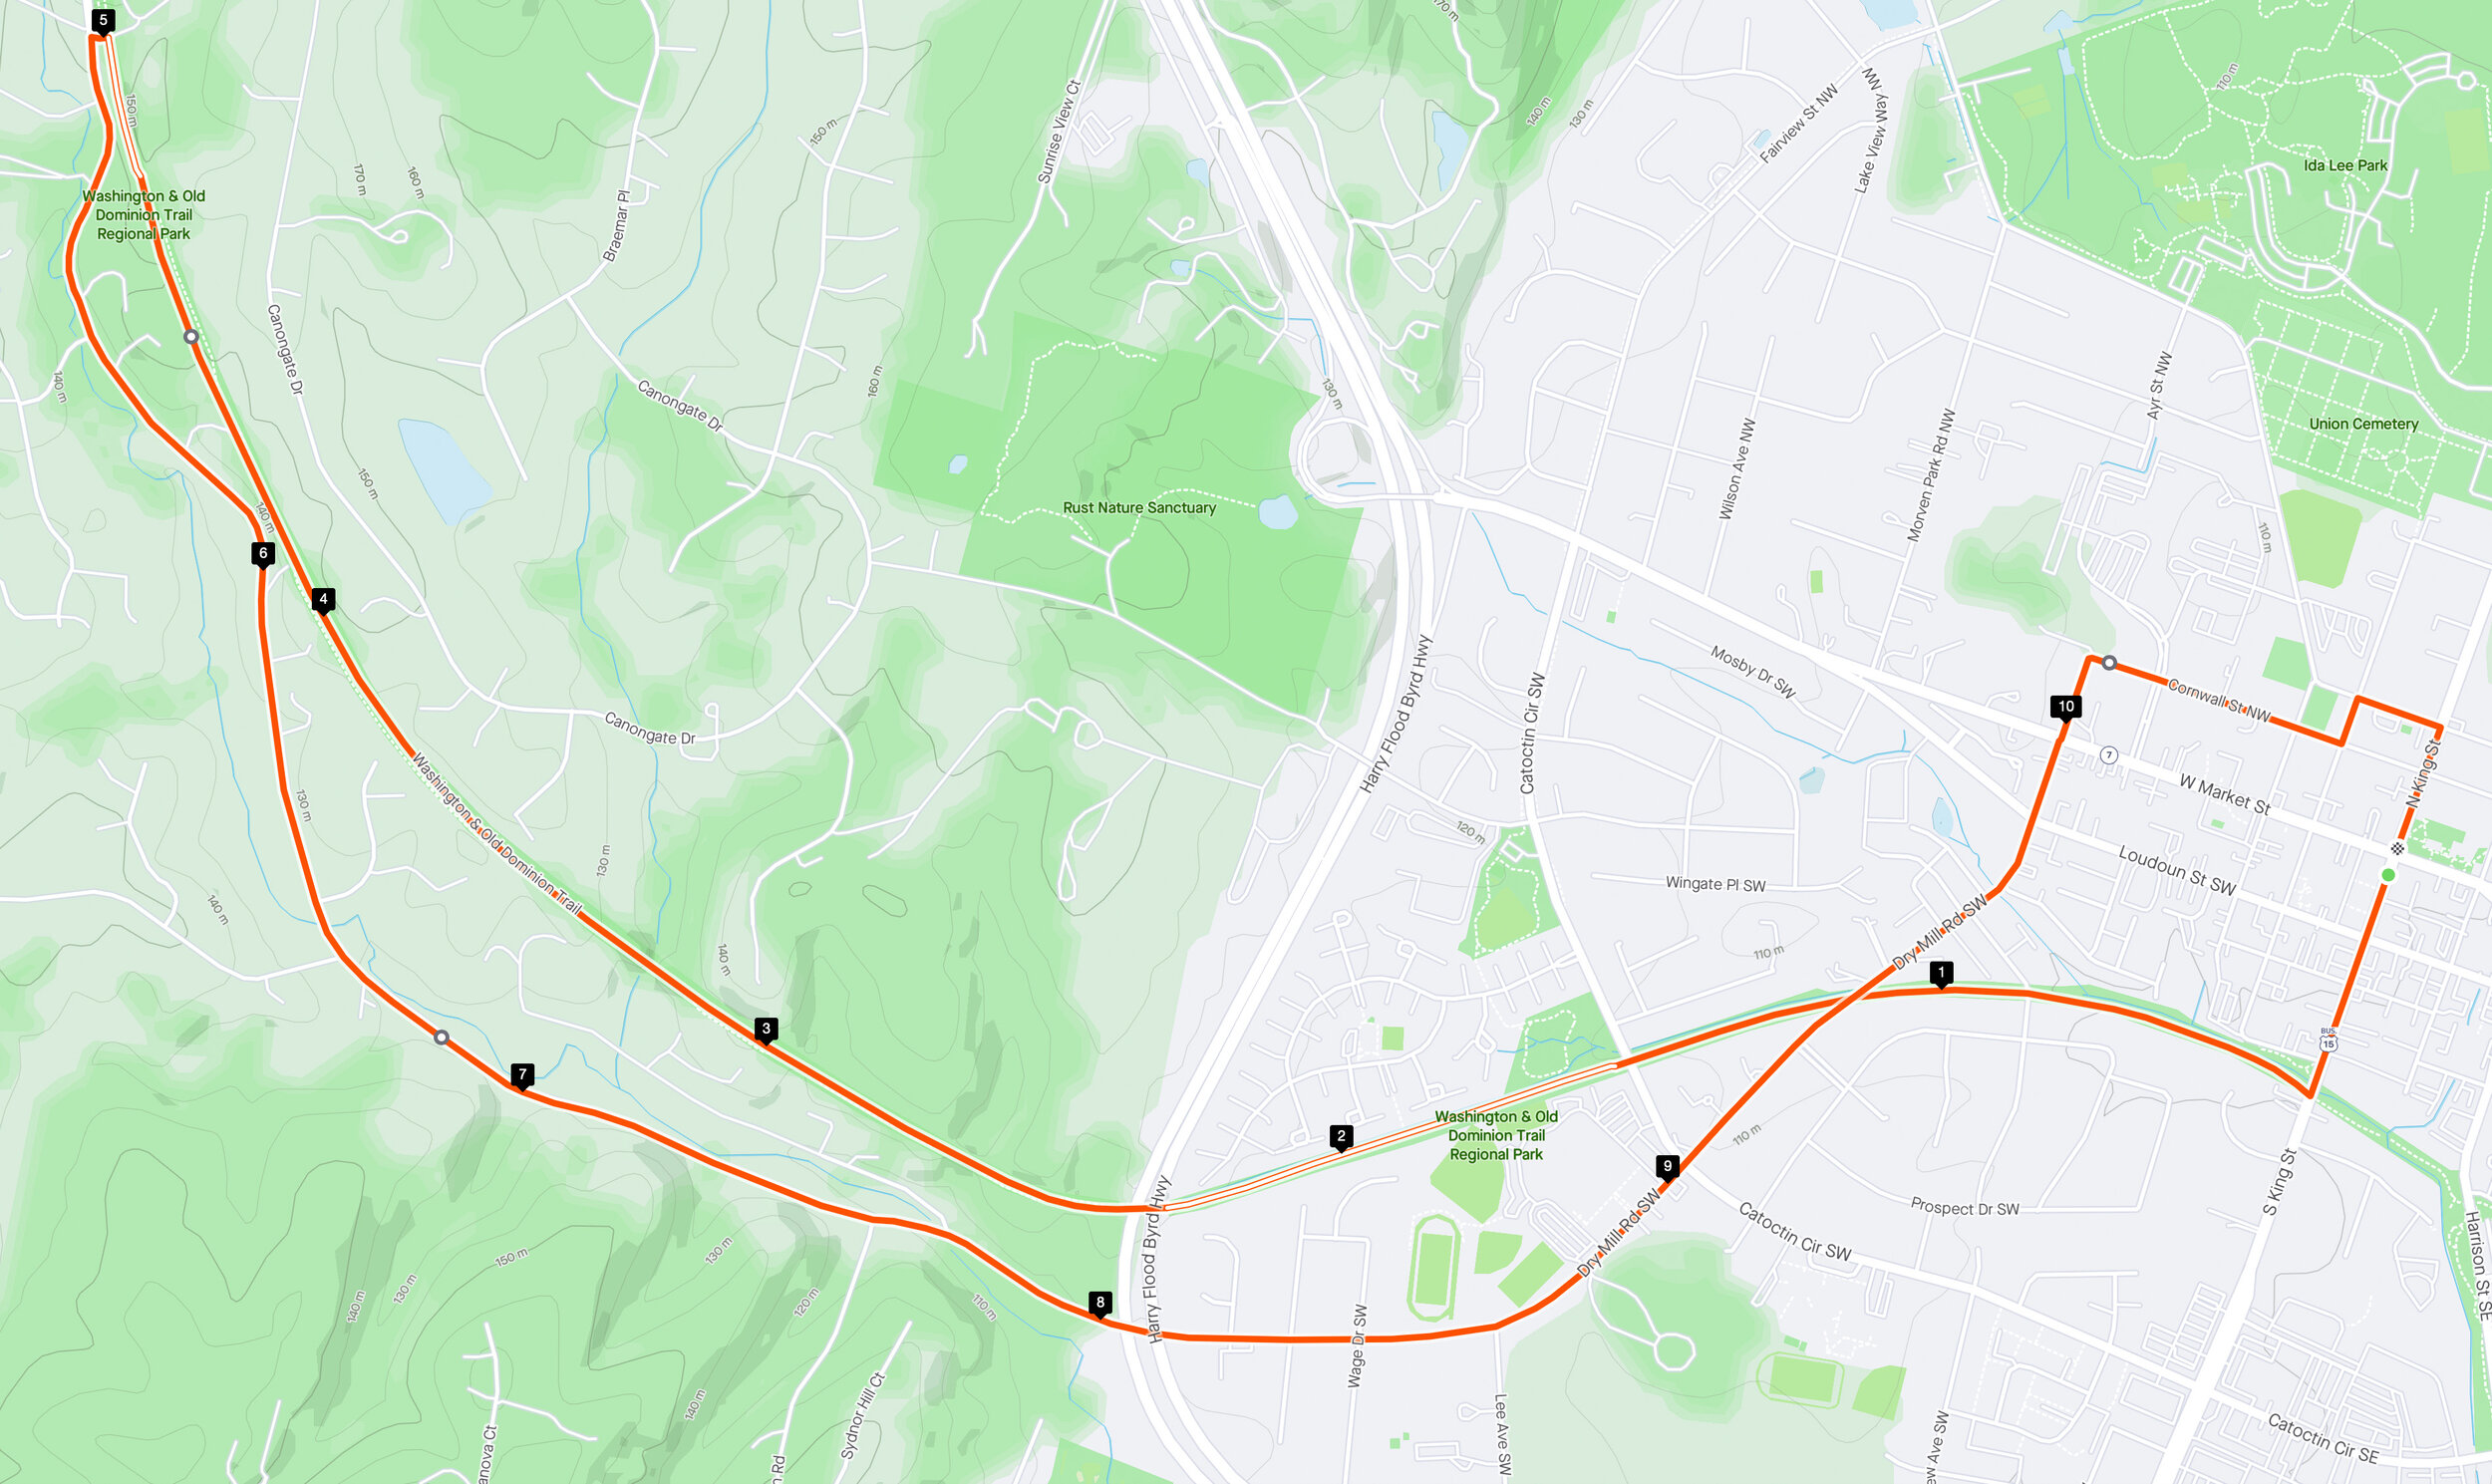
The basic use of this tool is very intuitive and anyone starting off should find it fairly easy to pick up. You simply select a point on the map where you want your route to begin (green dot) and then start adding some waypoints (white dots) along your course that will all connect up to populate your route. It’s like a grown-up’s version of connect the dots!
There are lots of neat ways in which runners and cyclist can harness this simple tool to set up the perfect route for training. Strava added a bunch of new features to the original route builder tool that allow you to get even more customized when setting up the perfect route. I’ll describe them briefly before taking a deeper look at my top tips when building the perfect route.
1. Elevation Preferences
A new feature available on the web route builder is the ability to specify the elevation profile of your ride. If you like to ride hilly routes, then you have the option to toggle the “Maximize elevation” switch on. Likewise, you can also opt for a flatter route by selecting the “Minimize elevation” option. Making these selections will dictate how the Route Builder considers which roads to follow when joining up your selected waypoints.

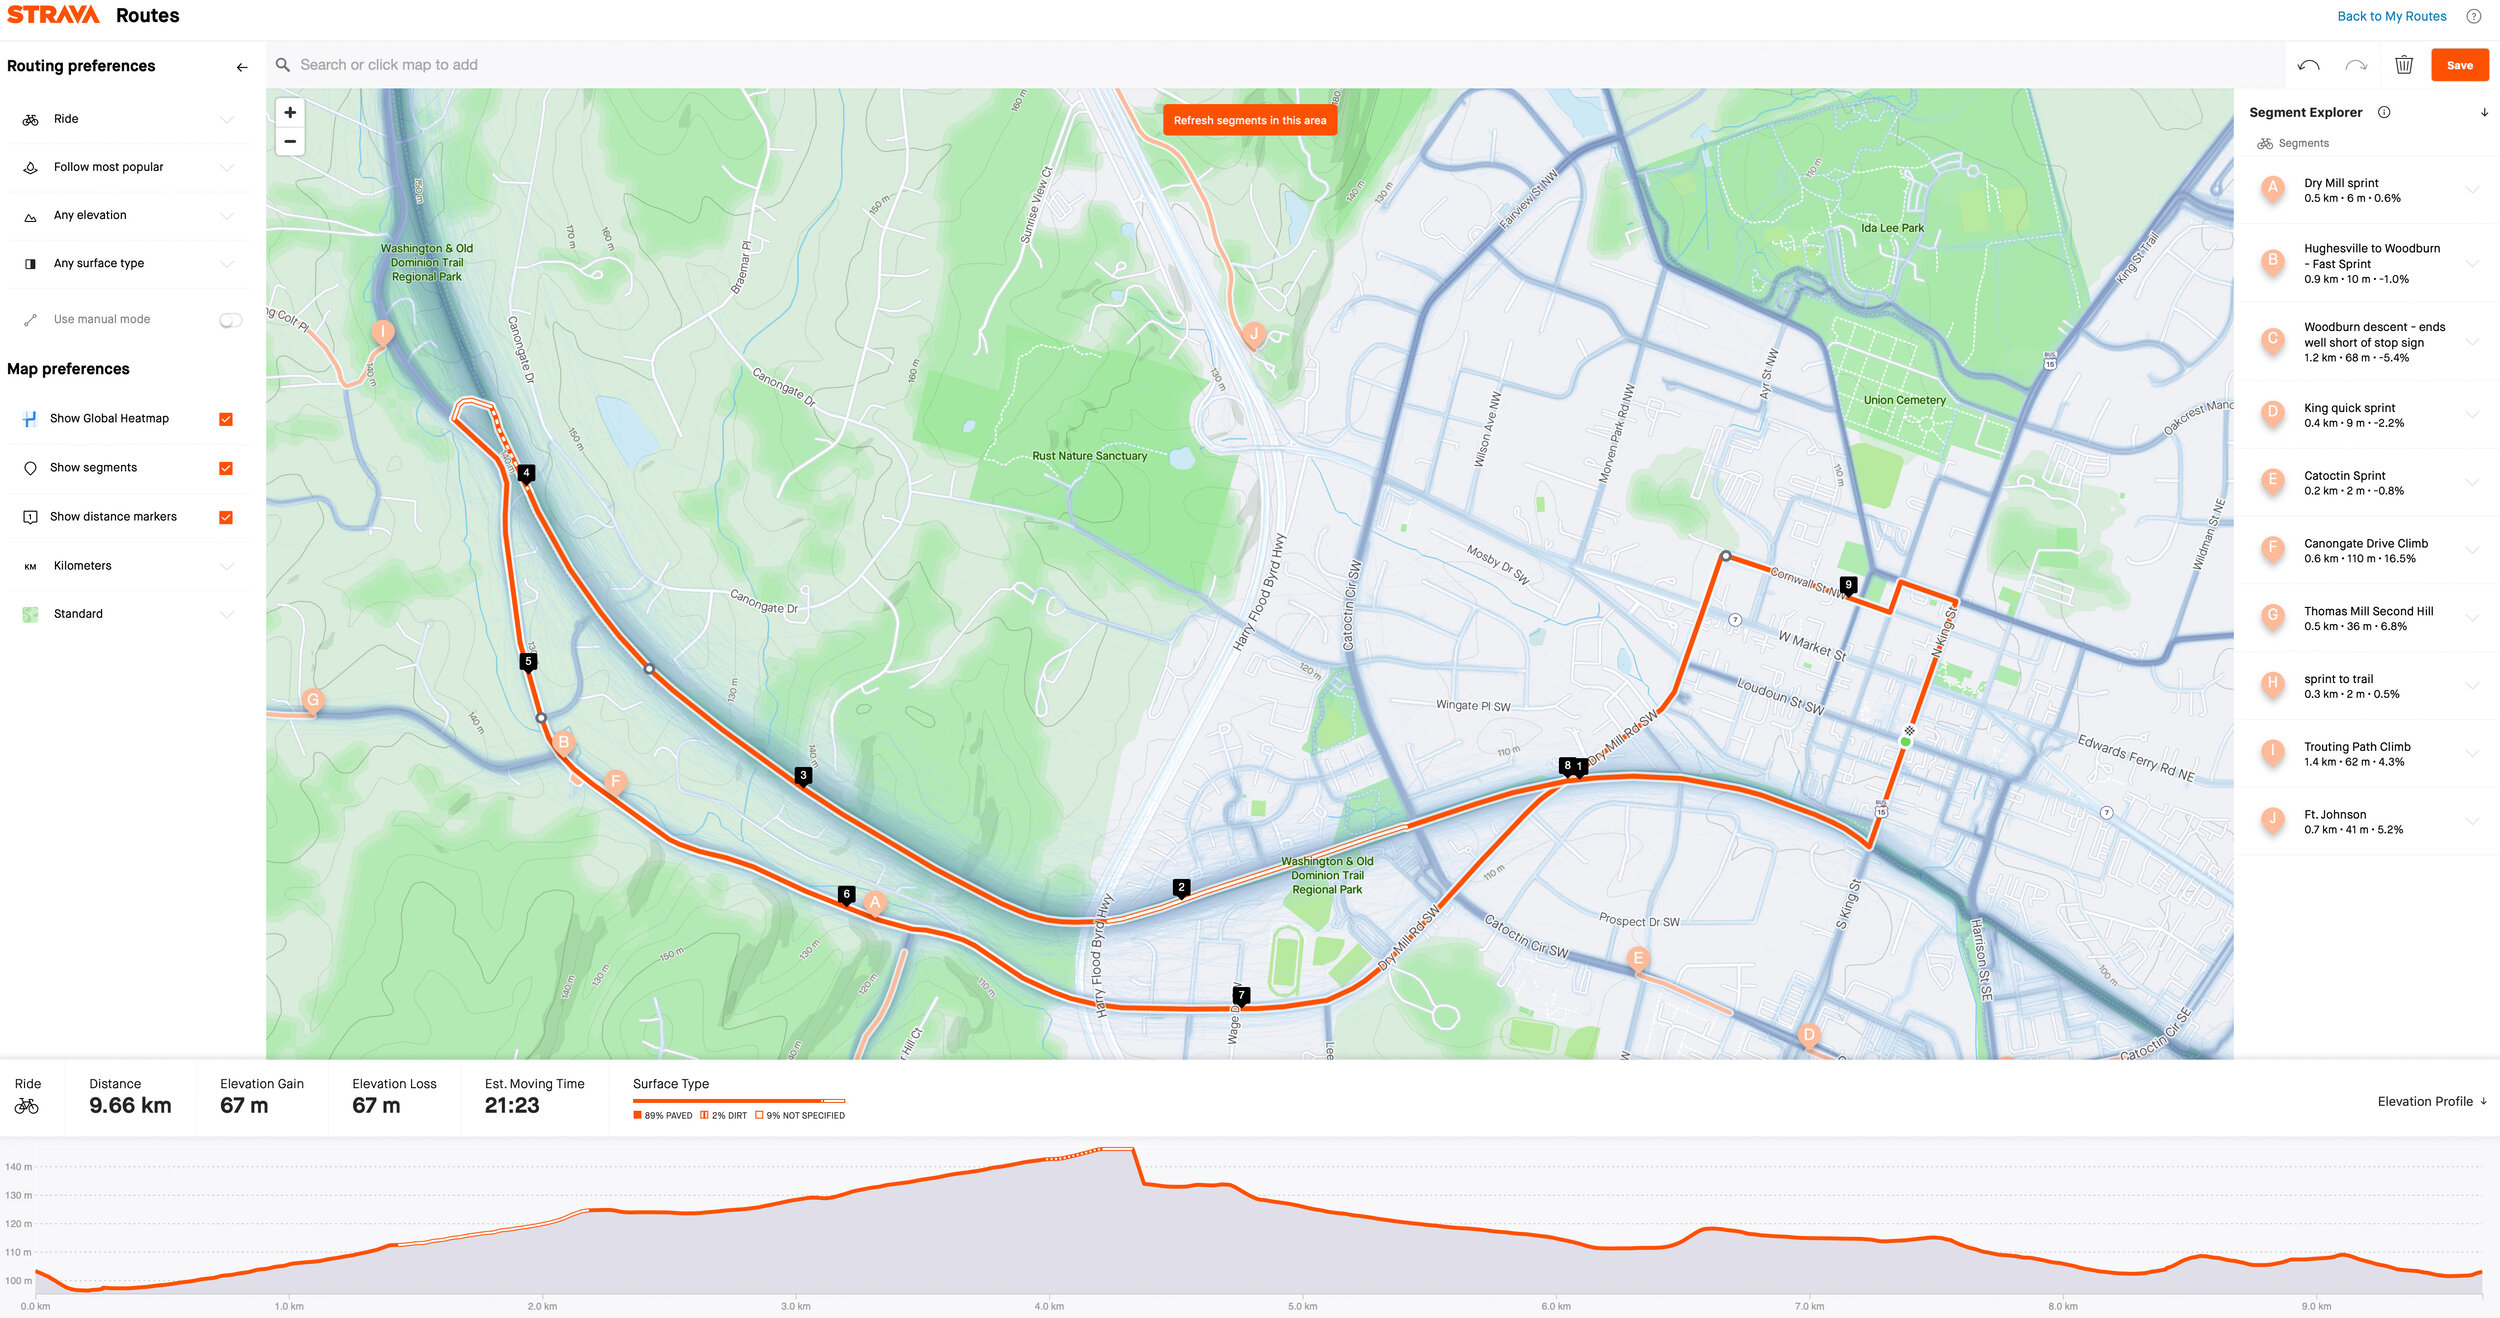
Another feature that relates to the elevation profile is the elevation graph that displays along the bottom of the screen as you design a route. You have the option to toggle the elevation profile graph on/off to better utilize the screen space as you plot out your route. Simply click on the “Elevation Profile” button in the lower right-hand corner to expand the view as shown below.

2. Route Surface Preferences
One feature that goes along with the elevation preference is the ability to select your preferred surface type (Dirt vs Paved). If you are planning a day out on your fancy high-end carbon road bike and don’t want to risk running into a dirt road, then you can simply tell the Route Builder that you “prefer paved surfaces.” Similarly, you can also force the Route Builder to consider dirt roads whenever your gravel/mountain bike is in need of some attention. When making this selection, you have a greater say in the types of roads that the builder will consider when drawing out a connection between your waypoints. You can also simply opt for “any surface type” if you really don’t care.

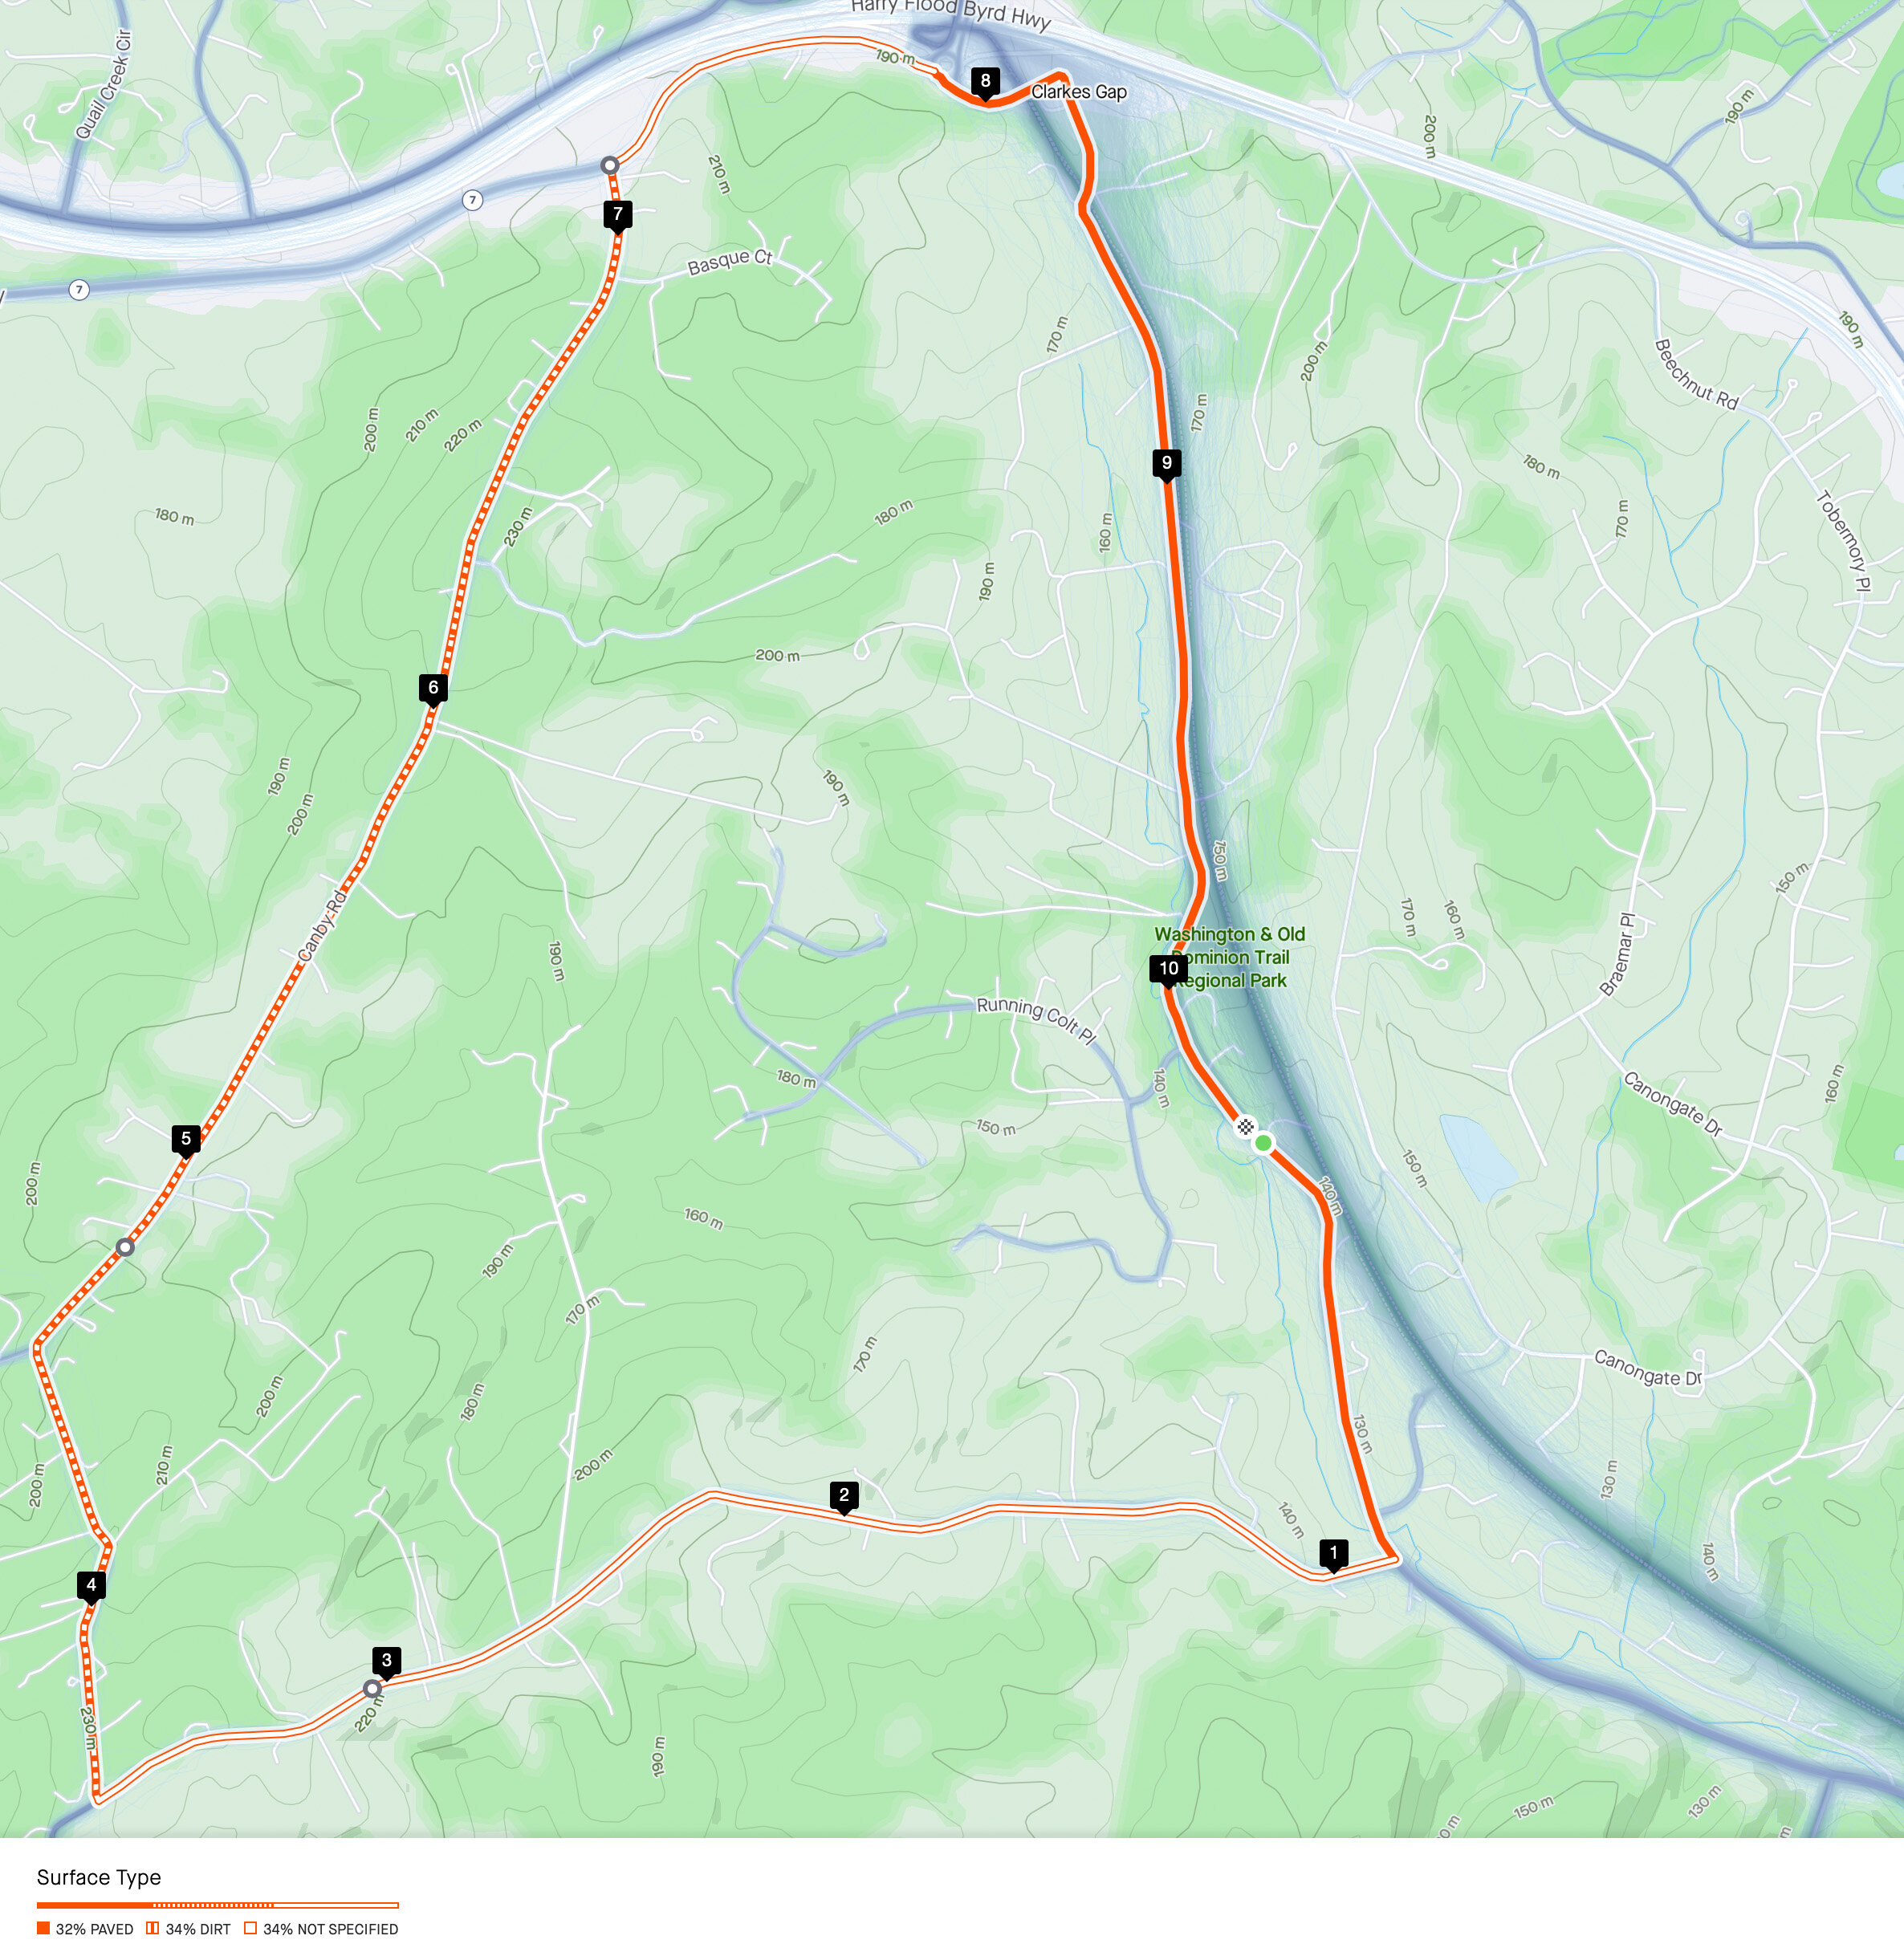
Part of this new feature includes the ability to view the road surface on the map as it gets plotted out. You will find a solid line for paved roads, a dotted line for dirt roads and an unfilled line for unknown surfaces. I find that this feature still needs some work, since it does not always get it completely right. I found many instances when roads were classified incorrectly or defaulted into the unknown category. Not ideal when planning out a road ride without gravel roads! It’s not perfect, but it does help in some way to be prepared for what awaits along any given course.
3. Segments Along the Route
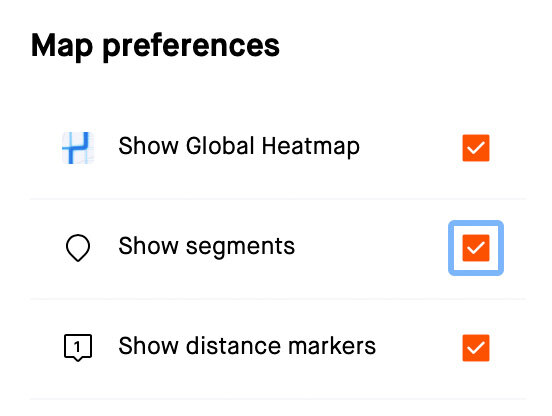
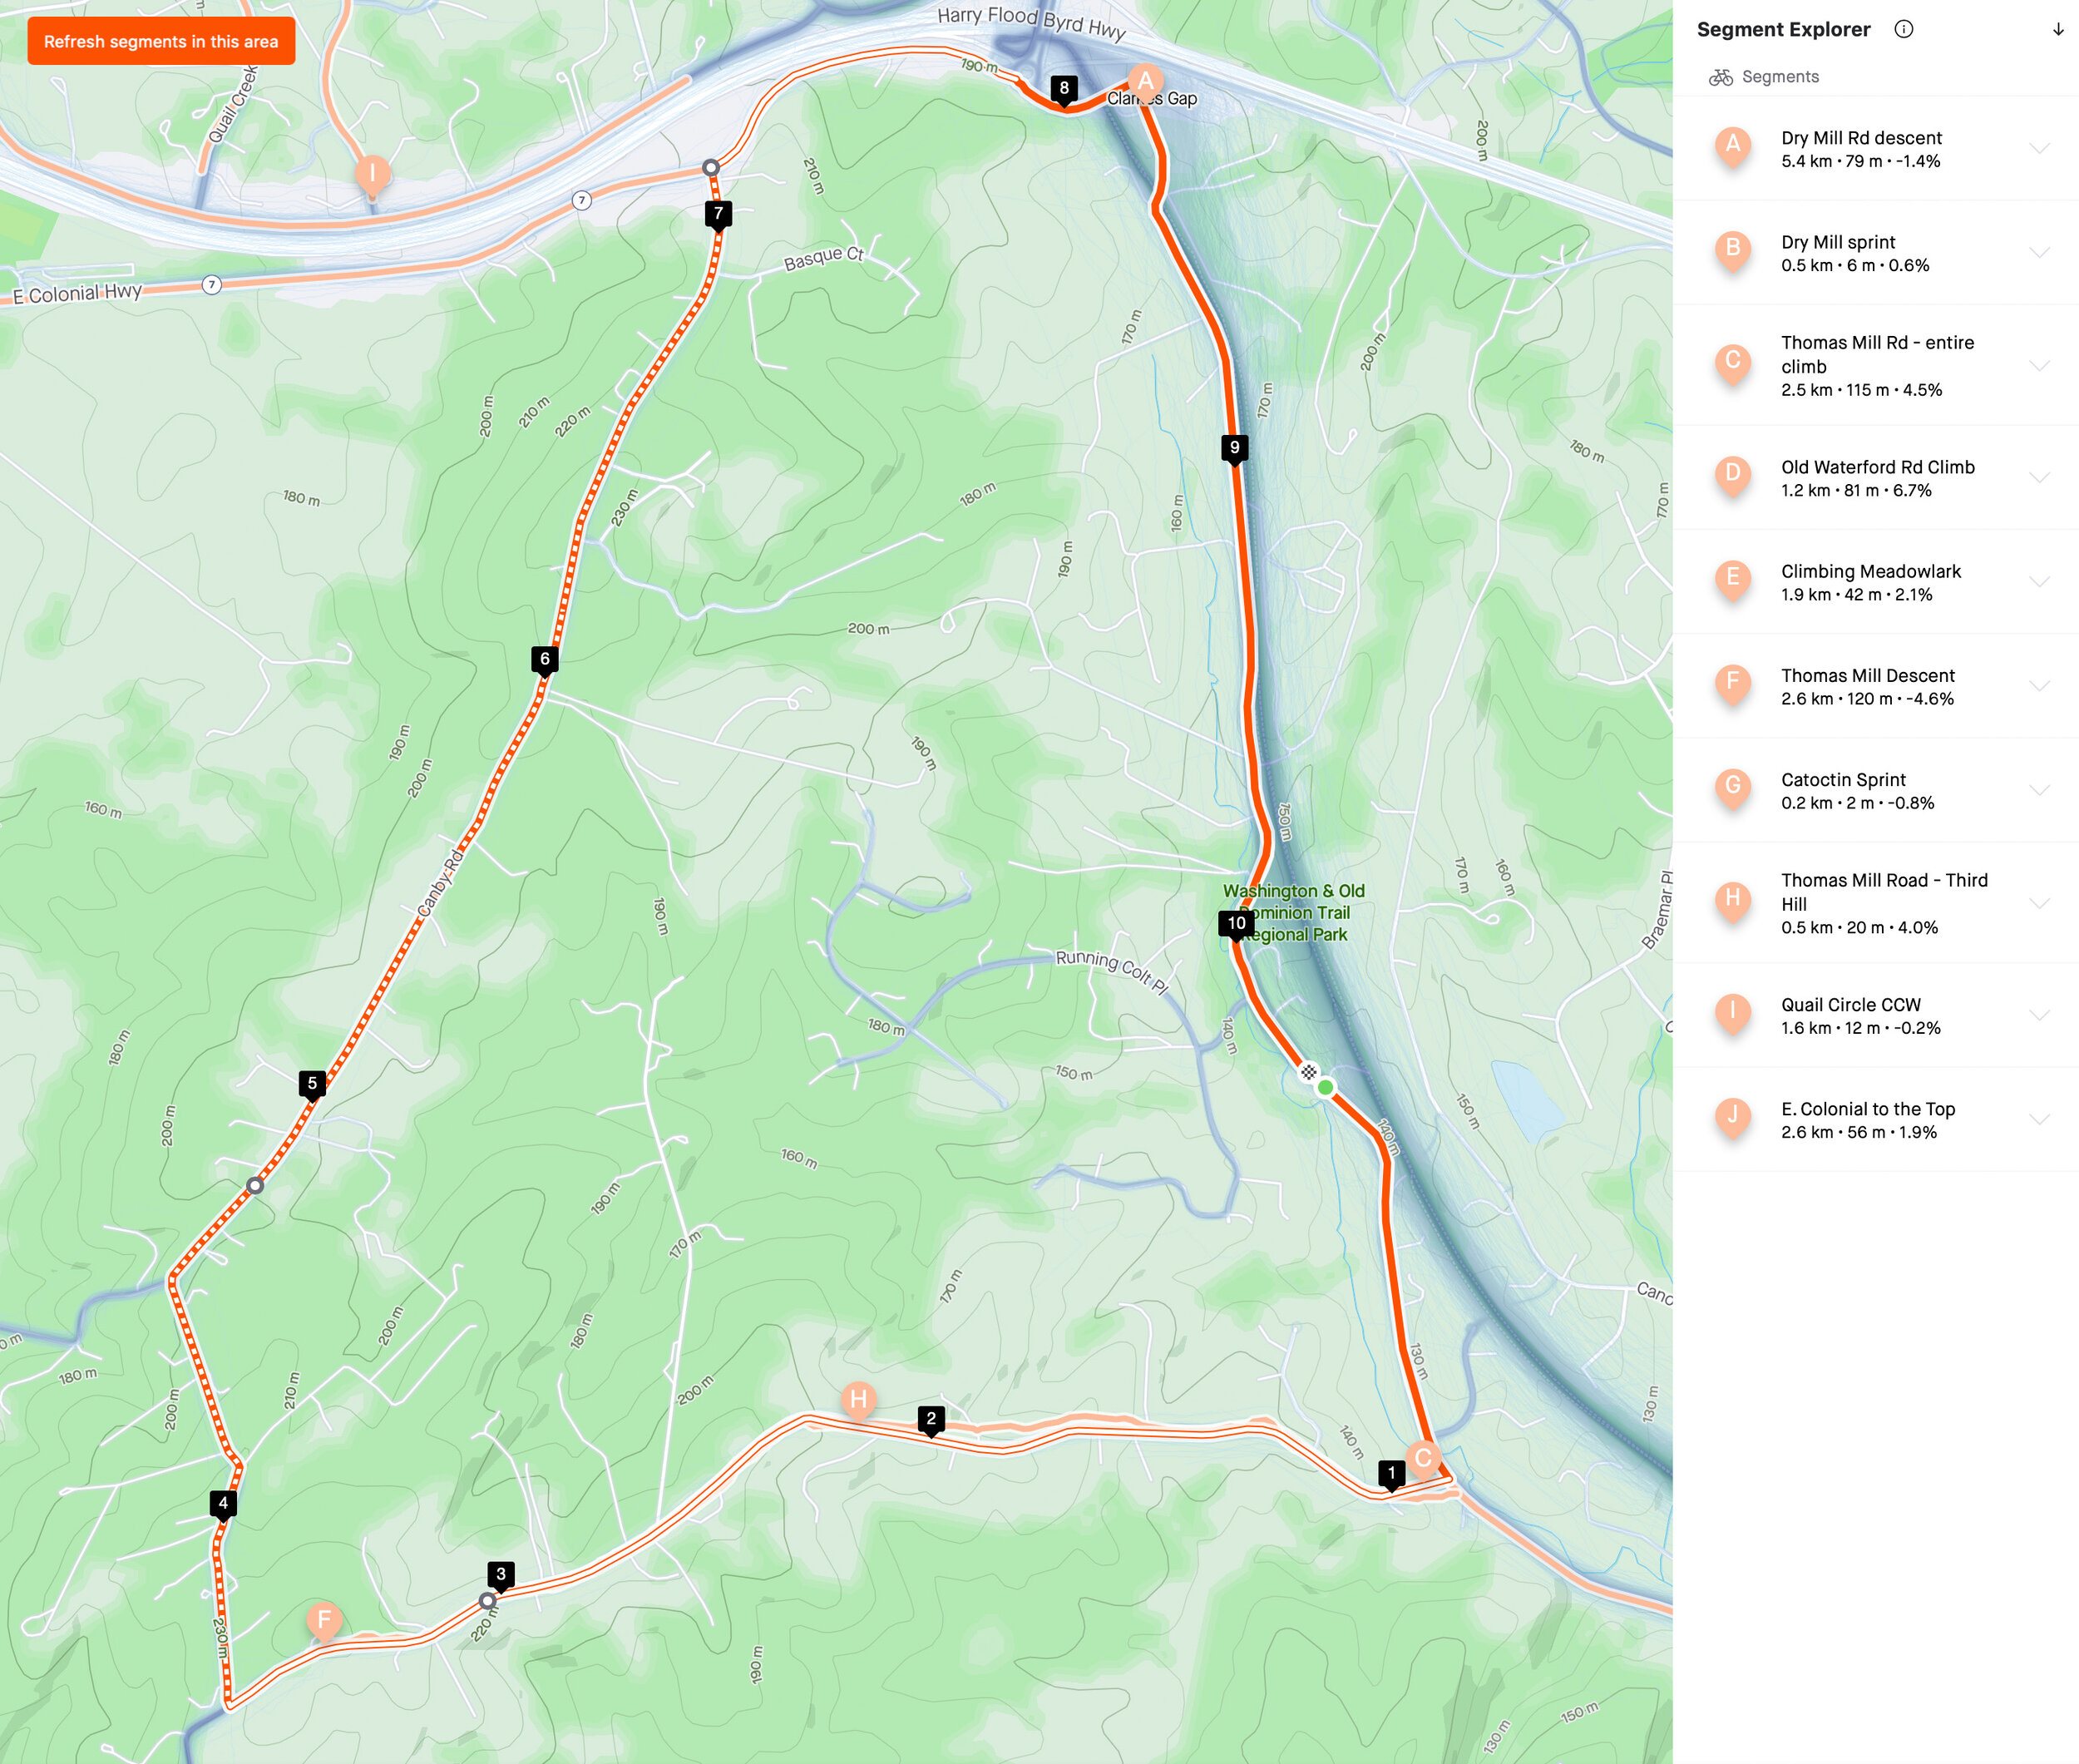
A welcome addition to the new Strava Route Builder is the ability to toggle on/off the segment view on the map. If you are a true Strava segment hunter, then this new feature should definitely be turned on! The segments in a particular area of the map can be refreshed to display those segments already created by the Strava community. I’ve found this feature to be both useful and annoying at the same time. If I want to learn about newly created segments along my regular riding route, then I’ll switch on this toggle while inspecting the map. However, when plotting out a route, the additional map layer represented by the segments can quickly create a cluttered view, making actual route planning more difficult. In those instances, it might be better to keep this layer turned off. The value-add that you gain from this feature will be highly dependent on how much attention you give to segments along your routes.
4. Saving Your Route
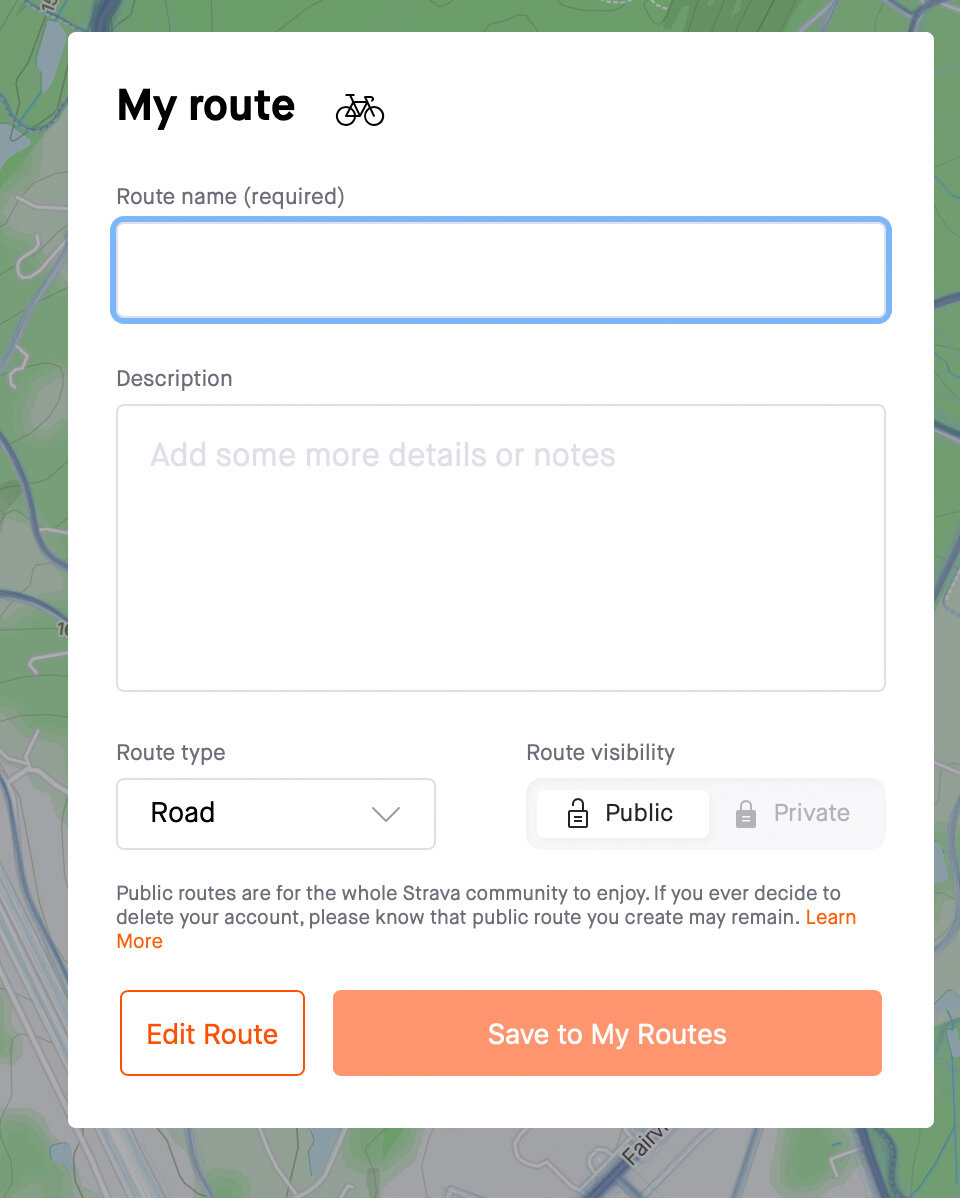
Once you have your route all planned out, it is as simple as hitting the save button in the top right-hand corner. You’ll be able to give the route a name, specify whether it’s a Road/MTB/Cyclocross course, add a description about the route and toggle between a public or private setting. Once saved, the new route will be added to your collection of routes as displayed on the “My Routes” page.
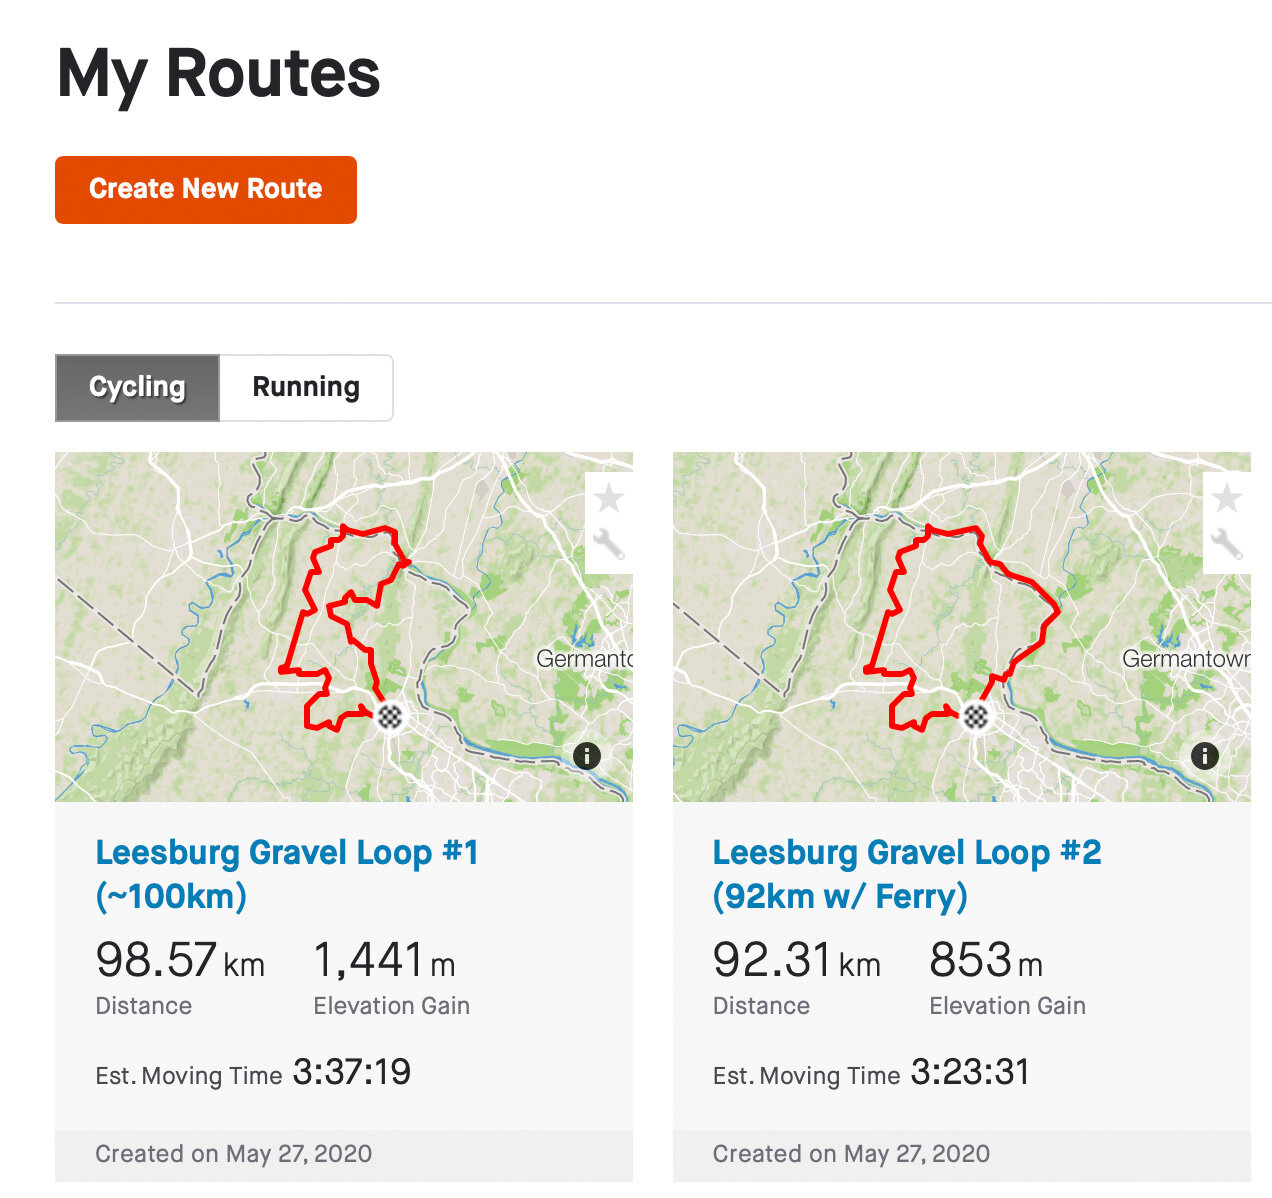
Note that you have two options in the top right-hand corner of each created route. One option to star/favorite a route (more about that later), and one option (wrench icon) that allows you to edit or delete a particular route.
5. Syncing Your Route to a Garmin GPS Device

Routes marks as favorites sync over to your Garmin GPS device automatically
Creating a route on the web portal is fine and all, but it does no good if you can’t get your route loaded onto your navigation device. This is one place where I want to give massive praise to Strava & Garmin for a recent change made to both platforms. One of the recent feature releases allows for routes to sync up perfectly in the background between the two platforms. In the past, I had to create a route on Strava, export the TCX file, upload it to Garmin Connect and then sync the route to my device. The same could also be achieved via the clunky “Strava Routes” app installed on a compatible Garmin watch/head unit. No longer do we have to jump through a million hoops to see our routes on a Garmin GPS device. All I need to do is star/favorite a created Strava route. Once a route has been starred on the “My Routes” page, the API (code running in the background) kicks in and the route gets pushed from Strava to my Garmin Connect profile and queued to sync over to my Garmin watch/head unit the next time it’s connected to the internet (either via a phone/desktop app or directly via WiFi).

To set this up, you will need to follow the steps below, to make sure Strava & Garmin Connect are connected to sync over courses.
Log into Garmin Connect Website.
Click on your profile picture in top right-hand corner to select “Account Settings.”
Click on “Account Information.”
Scroll down until you see all the connected applications and look for Strava.
Toggle onto the “Courses” option as shown in the screenshot.
Seriously, this is how route uploads to Garmin devices should have worked all along! To the engineers who finally got this feature to work, thank you! Now I can simply turn on my Garmin Edge 530 and all my starred routes sync over instantly. This even works with older Garmin devices. In fact, any historical Garmin product that came with a “Courses” option will be able to receive a Strava route in this manner. I tested it on my Garmin Fenix 5 and it works great.
Top Tips:
That wraps up the basic overview of some of the latest additions to the Strava Route builder tool that can help you get started with creating your own routes. The basic steps, as described above, only scratch the surface. It’s also worth mentioning that there are a few more advanced workflows that can be followed to get the most out of this very powerful route building tool. Writing out each of these tips step-by-step will unfortunately make this post the length of a car’s user manual, and some details may get lots. Showcasing these advanced tips via a video is a much more effective way to illustrate its full potential. If you want to use the Strava Route Builder tool like a pro, then be sure to check out this video to see all of the following in action:
-Edit Existing Routes (Waypoint Creating, Moving & Deleting)
-Duplicating Routes (Create 2+ Variations of the same route)
-Manual Mode
-Global Heat Map Inspection
-Popularity Routing On/Off
Wrap-up:
All in all, the Strava route builder remains one of my top go-to features on the Strava platform. I really like the ease with which I can slap together a running or cycling route that I have in mind. The tool works as expected and the recent changes has given it even greater functionality. I’m also pleased to say that none of the functionality on which a pro-user relies has been lost during the transition to an updated route builder. If you haven’t already done so, do check out the video that I created to see some of the advanced features in action - one blogpost simply can’t capture this router builder tool’s full potential. It’s a pity that this very useful tool is no longer accessible to everyone in the Strava community, but I also understand that the decision to make this tool subscriber-based will ultimately lead to even further enhancements down the line. Now that’s worthy of some kudos from me! Now go create a few interesting routes in your area and then get out there to explore the world.
If you know of any other Strava route builder tips that I did not mention in this post or in the video, then please leave a comment to let us know about it.
- Wiehan