How to Make Sauerkraut
Disclaimer: This post contains affiliate links, through which we earn a commission.
Ever since learning about the health benefits of fermented foods within the last decade, I've been eating organic sauerkraut, purchased from health food stores. But only a few months ago did the thought occur to me that maybe the products, even from the health food stores, were not the real deal. After a little bit of digging, I discovered that most sauerkraut is given an artificial fermentation boost with ingredients like lactic acid or vinegar, and the product is also flash pasteurized, which allows shelf stabilization. But isn't the point of eating sauerkraut to get the live beneficial bacteria from the raw, fermented cabbage? I needed no further motivation for making my own sauerkraut. In this video and blog post, I'm documenting one of my early efforts toward making my own sauerkraut, while sharing what I've learned to get started with the process.

In addition to having control over the process, making sauerkraut at home saves a significant amount of money. While there are some startup investments for a few kitchen supplies, only two very inexpensive ingredients are required. The brand that I used to buy is currently listed at $12.98 for just 12 oz, in contrast to the couple of dollars a head of cabbage costs, plus a tablespoon or two of salt. However, if you don't have the time to make sauerkraut yourself, but you do want to include healthy ferments in your diet, look for jars that include the words "raw" and "organic." Also, make sure the ingredients only include cabbage, salt, and perhaps a few other vegetables or spices listed by name, such as carrots, garlic or caraway seeds. Always avoid foods with “natural flavors” included in the ingredient list. That could mean anything. And at least in my area, there are several really high quality ferment companies, so be sure to check locally as well.
Just to clarify, I'm no fermentation expert. I'm just a gal who was raised in suburbia in the 1980s, trying to relearn the wisdom of my great grandparents that was unfortunately dropped when the modern day grocery store and fancy kitchen appliances came around. Here on Mountain Road Life, I like to share my learning process with you. There are plenty of fermentation experts out there and if you're new to the process, I highly suggest doing your own research before diving in.
Here are a few online resources that helped me get started:
Homemade Sauerkraut Recipe (Easy Countertop Method) from Wellness Mama
SALTY Cabbage to SOUR Sauerkraut: Fermentation Signs to Monitor from Make Sauerkraut!
How Much Salt do I use for Sauerkraut? from Secrets of Cooking
Has Your Sauerkraut Fermentation Gone Bad? Three Fermentation Rules and Many Troubleshooting Tips from Make Sauerkraut!
Fermenting for Dummies! So Easy from Off Grid with Doug & Stacy
How to Ferment any Vegetable! Get More Nutrition from Off Grid with Doug & Stacy
With my first few attempts fermenting cabbage, I boiled my bottles, weights, airlock lids and lid bands in a waterbath canner, for the purpose of sterilization. But that process used a ton of water and electricity and was also pulling a lot of my time and energy, taking nearly as long as the actual cabbage preparation. Then I read advice in a blog post by Carol of Ferment Tools, stating essentially that if boiling the equipment is discouraging you from fermenting, it's best to skip that step and rather simply wash equipment with soap and water, making sure that all soap is rinsed out before beginning the ferment process. The reason being that the salt used in the fermentation process creates a safe and clean environment, a fact that is backed up by Sally Fallon Morell in her Nourishing Traditions cookbook. The key is to make sure that the veggies sit below the brine. Making your own sauerkraut is still a time commitment, but the benefits far outweigh any inconvenience. And in the stressful times in which we live, squeezing some cabbage can almost be like free therapy, right?? And hey, if it’s a nice day, why not take the process outdoors and take in some glorious fresh air and sunshine in the process? Just make sure to clean your working surface well before beginning.


How to Make Sauerkraut
Preparation Time: approx. 45 minutes
Makes: 2 quarts / 1.9 liters
Equipment:
1 gallon / 3.8 liter bowl
2 quart / 1.9 liter Mason Jar with metal lid bands
Kitchen scale
Fermenting Weights
Airlock Fermentation Lids
Sauerkraut Pounder Tool (optional)
Large Cutting Board
Chef’s Knife
Ingredients:
1 - 2 large heads of organic cabbage
Himalayan Salt or Sea Salt (amount varies, depending on weight of cabbage)
Instructions:
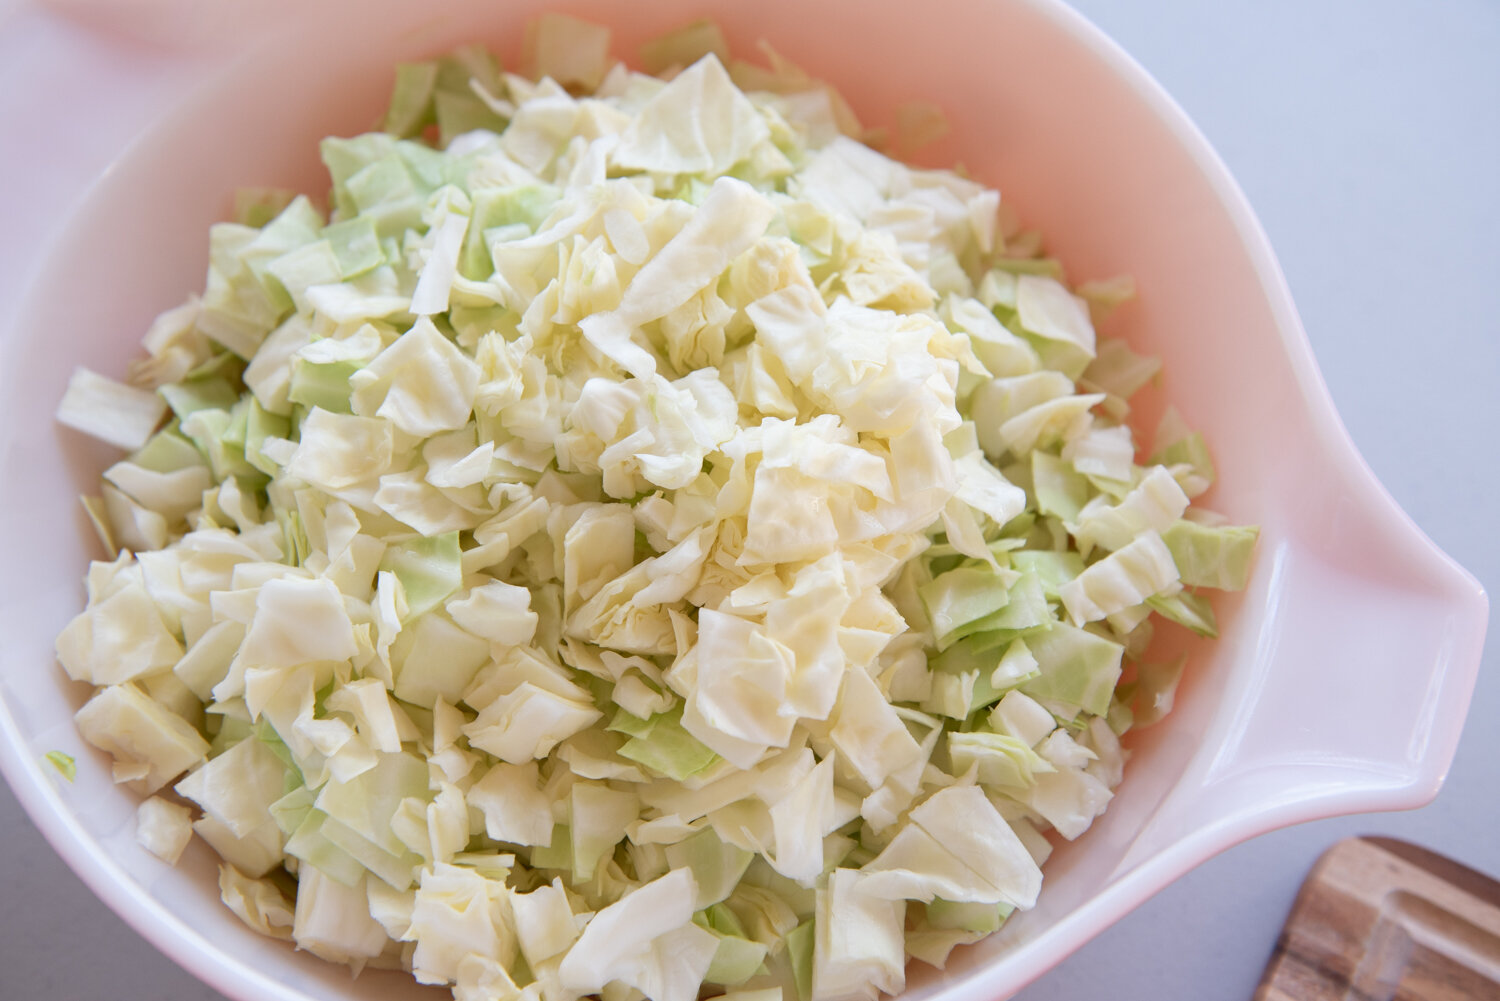
Make sure all your equipment is thoroughly washed with soap and water, including your hands. And make sure all the soap has been washed away. Cut out the inner core of the cabbage and remove the first 2 or 3 outer leaves, saving them for later. Measure the cabbage in grams. Multiply the weight by .02. This will give you the amount of salt that you'll need, in grams. For example, 1150g of cabbage will require 23g salt. Rinse the head of cabbage with water. Using your cutting board and chef’s knife, thinly slice your cabbage and place in large bowl. Add the salt. Using your hands or a sauerkraut pounder tool, massage or pound the cabbage, mixing in the salt, with the aim of squeezing the water out of the cabbage pieces. After 5 - 10 minutes, when you begin to feel the water coming out of the cabbage, allow the cabbage to rest for about 5 minutes. Continue to massage or pound until there is a good amount of liquid or "brine" in the bottom of the bowl. Transfer cabbage and brine to your jar and use your fist or pounder tool to press the cabbage down. The goal is to nearly fill the jar, leaving space for the fermenting weight and some room for the brine levels to rise. It’s always a good idea to have an extra head of cabbage on reserve, in case the first head of cabbage doesn’t fill the jar. Then you can cut off a portion of the second head of cabbage and repeat the process: measure, chop, add salt, massage and add to jar. When you have enough brine to cover or almost cover the cabbage, form one or two of the outer cabbage leaves into a circle that will fit into your jar. Place the leaves in the jar, on top of the chopped cabbage. Place the fermenting weight on top of the cabbage leaves. Place the airlock lid on the jar and screw the metal band over it. Mark down the date that you made the sauerkraut. Place the jar out of direct sunlight, in temperatures ranging from 65 - 72° F (18 - 22° C).
Now begins the waiting period. It's okay to interact with your sauerkraut. Smell it. Notice the changes day by day. Bubbling or foaming is normal. Cloudy or white coloration of the brine is normal. But if there's excess brine that looks like it's going to leak out, use a spoon to discard some. Look out for mold. If you do find mold, remove and discard the moldy pieces. Some people suggest smelling the sauerkraut and tasting a small piece, if it smells okay, and then continuing to eat the sauerkraut if it tastes okay. Others, such as Food Renegade, advise against eating a moldy batch. Fortunately I haven’t come across this problem yet. The best ways to prevent mold are to use fresh, organic cabbage, wash all your equipment, keep all cabbage under the brine and keep your jar in the temperature range listed above.
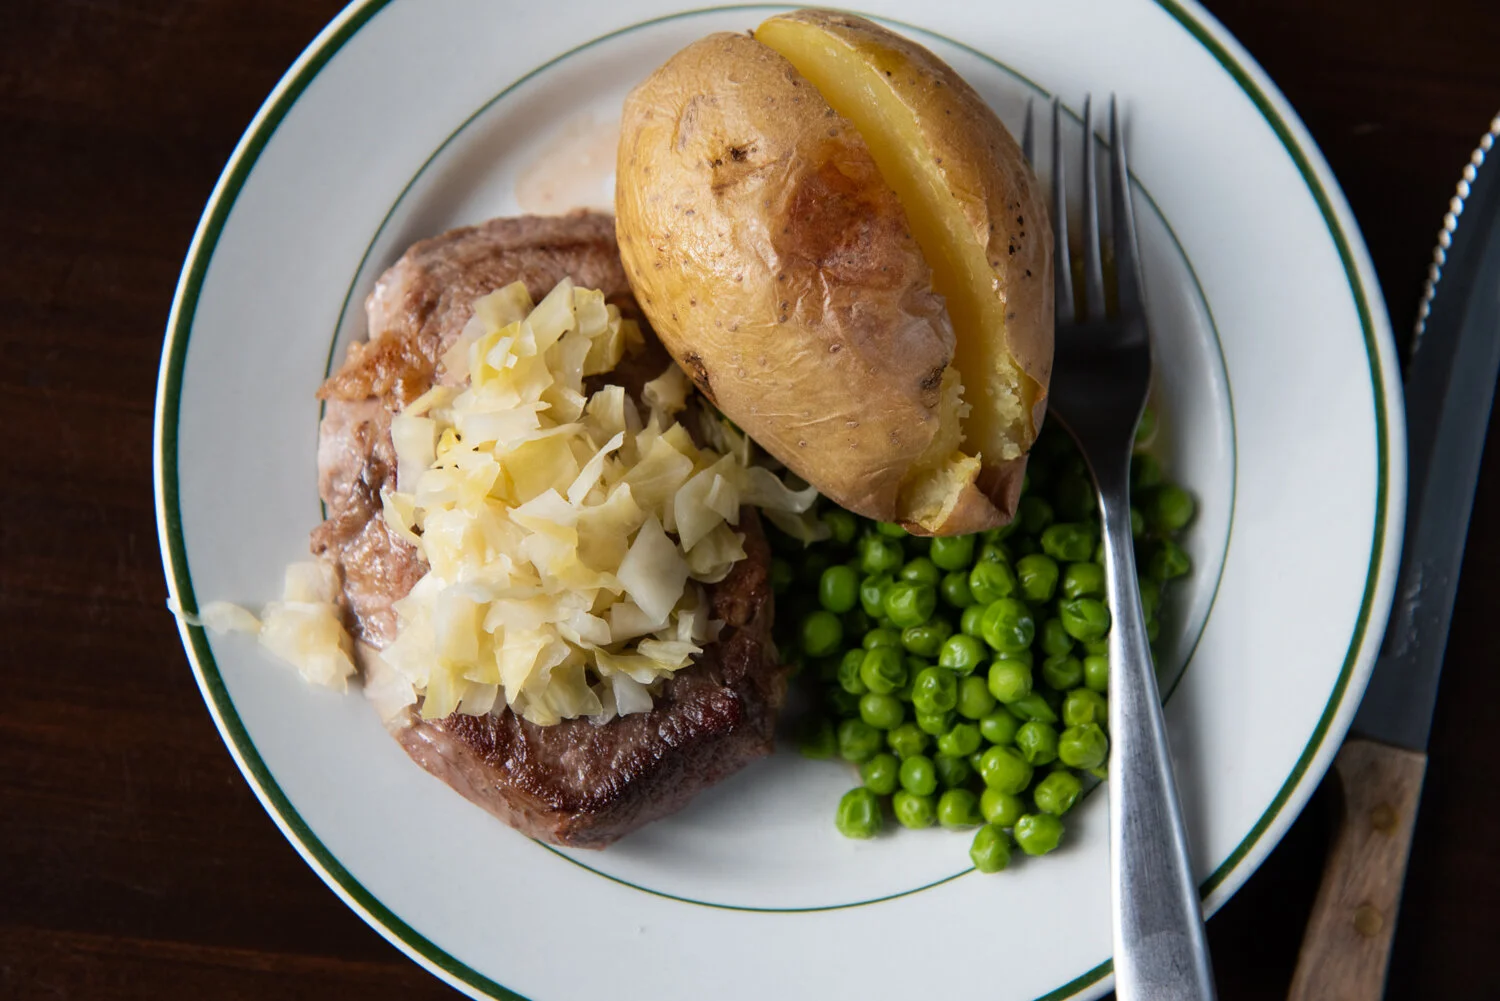
I like to allow about 2 - 3 weeks for fermentation. Whenever you are happy with the balance of salty and sour, place the jar in the fridge (or root cellar, if you're blessed with one!) to slow down the fermentation process. The sauerkraut will last for months in a cool environment. And enjoy your sauerkraut! Pairs well with so many foods, my favorite being chicken or any cut of red meat, with steamed green vegetables and a buttered baked potato or sweet potato.
You can see the full process in the video. This is just one of many ways in which to ferment veggies. So tell us! Are you a fan of sauerkraut? Have you ever tried making it yourself? If you’re a seasoned fermenter, leave some tips in the comments for those of us who are new to the club!
- Christin