Light-Duty Gravel Grinding: A Rim-Brake Road Bike Setup
Disclaimer: This post contains affiliate links, through which we earn a commission.
Have you ever wondered if you could convert an older road bike, with rim brakes, into a gravel riding bike? Well, that’s exactly what I set out to do for this latest post. In this article I’ll walk you through the modifications that I made to my road bike to give it some gravel flare. I’ll also give a few pointers and provide a list of components that you’d want to consider should this bike conversion be something you’d like to pursue in the future. Let’s get started!
An Ode to the Pioneers of Gravel
Before we dive into all the technical details of the setup, it’s worth mentioning that this setup will be nothing new to the grassroots riders who started the whole “gravel” movement. If not for those mavericks who took standard road bikes onto “roads” that they clearly weren’t designed for, we would never have seen the invention of modern gravel bikes that now allow for epic off-road adventures. The bike industry has certainly come a long way over the last 5 or 6 years and I, for one, am extremely thankful to those riders who helped carve out this truly exciting new genre of cycling. Here’s to the gravel pioneers!


Although a road bike setup might be a somewhat old-school approach to gravel riding, it’s appealing for those who mainly ride on the road, but would like to dip their toes (or wheels) into the dirt from time to time. I was totally amazed to see so many road bikes on the start grid when I lined up at a recently recorded Gravel Ride of the Week, the Stokesville Strade. I'll admit that seeing those riders pull it off served as inspiration to put together this post. If you're in the same boat, then the technical breakdown to follow will be just what you need to create your own road-to-gravel setup.
The Bike Geometry
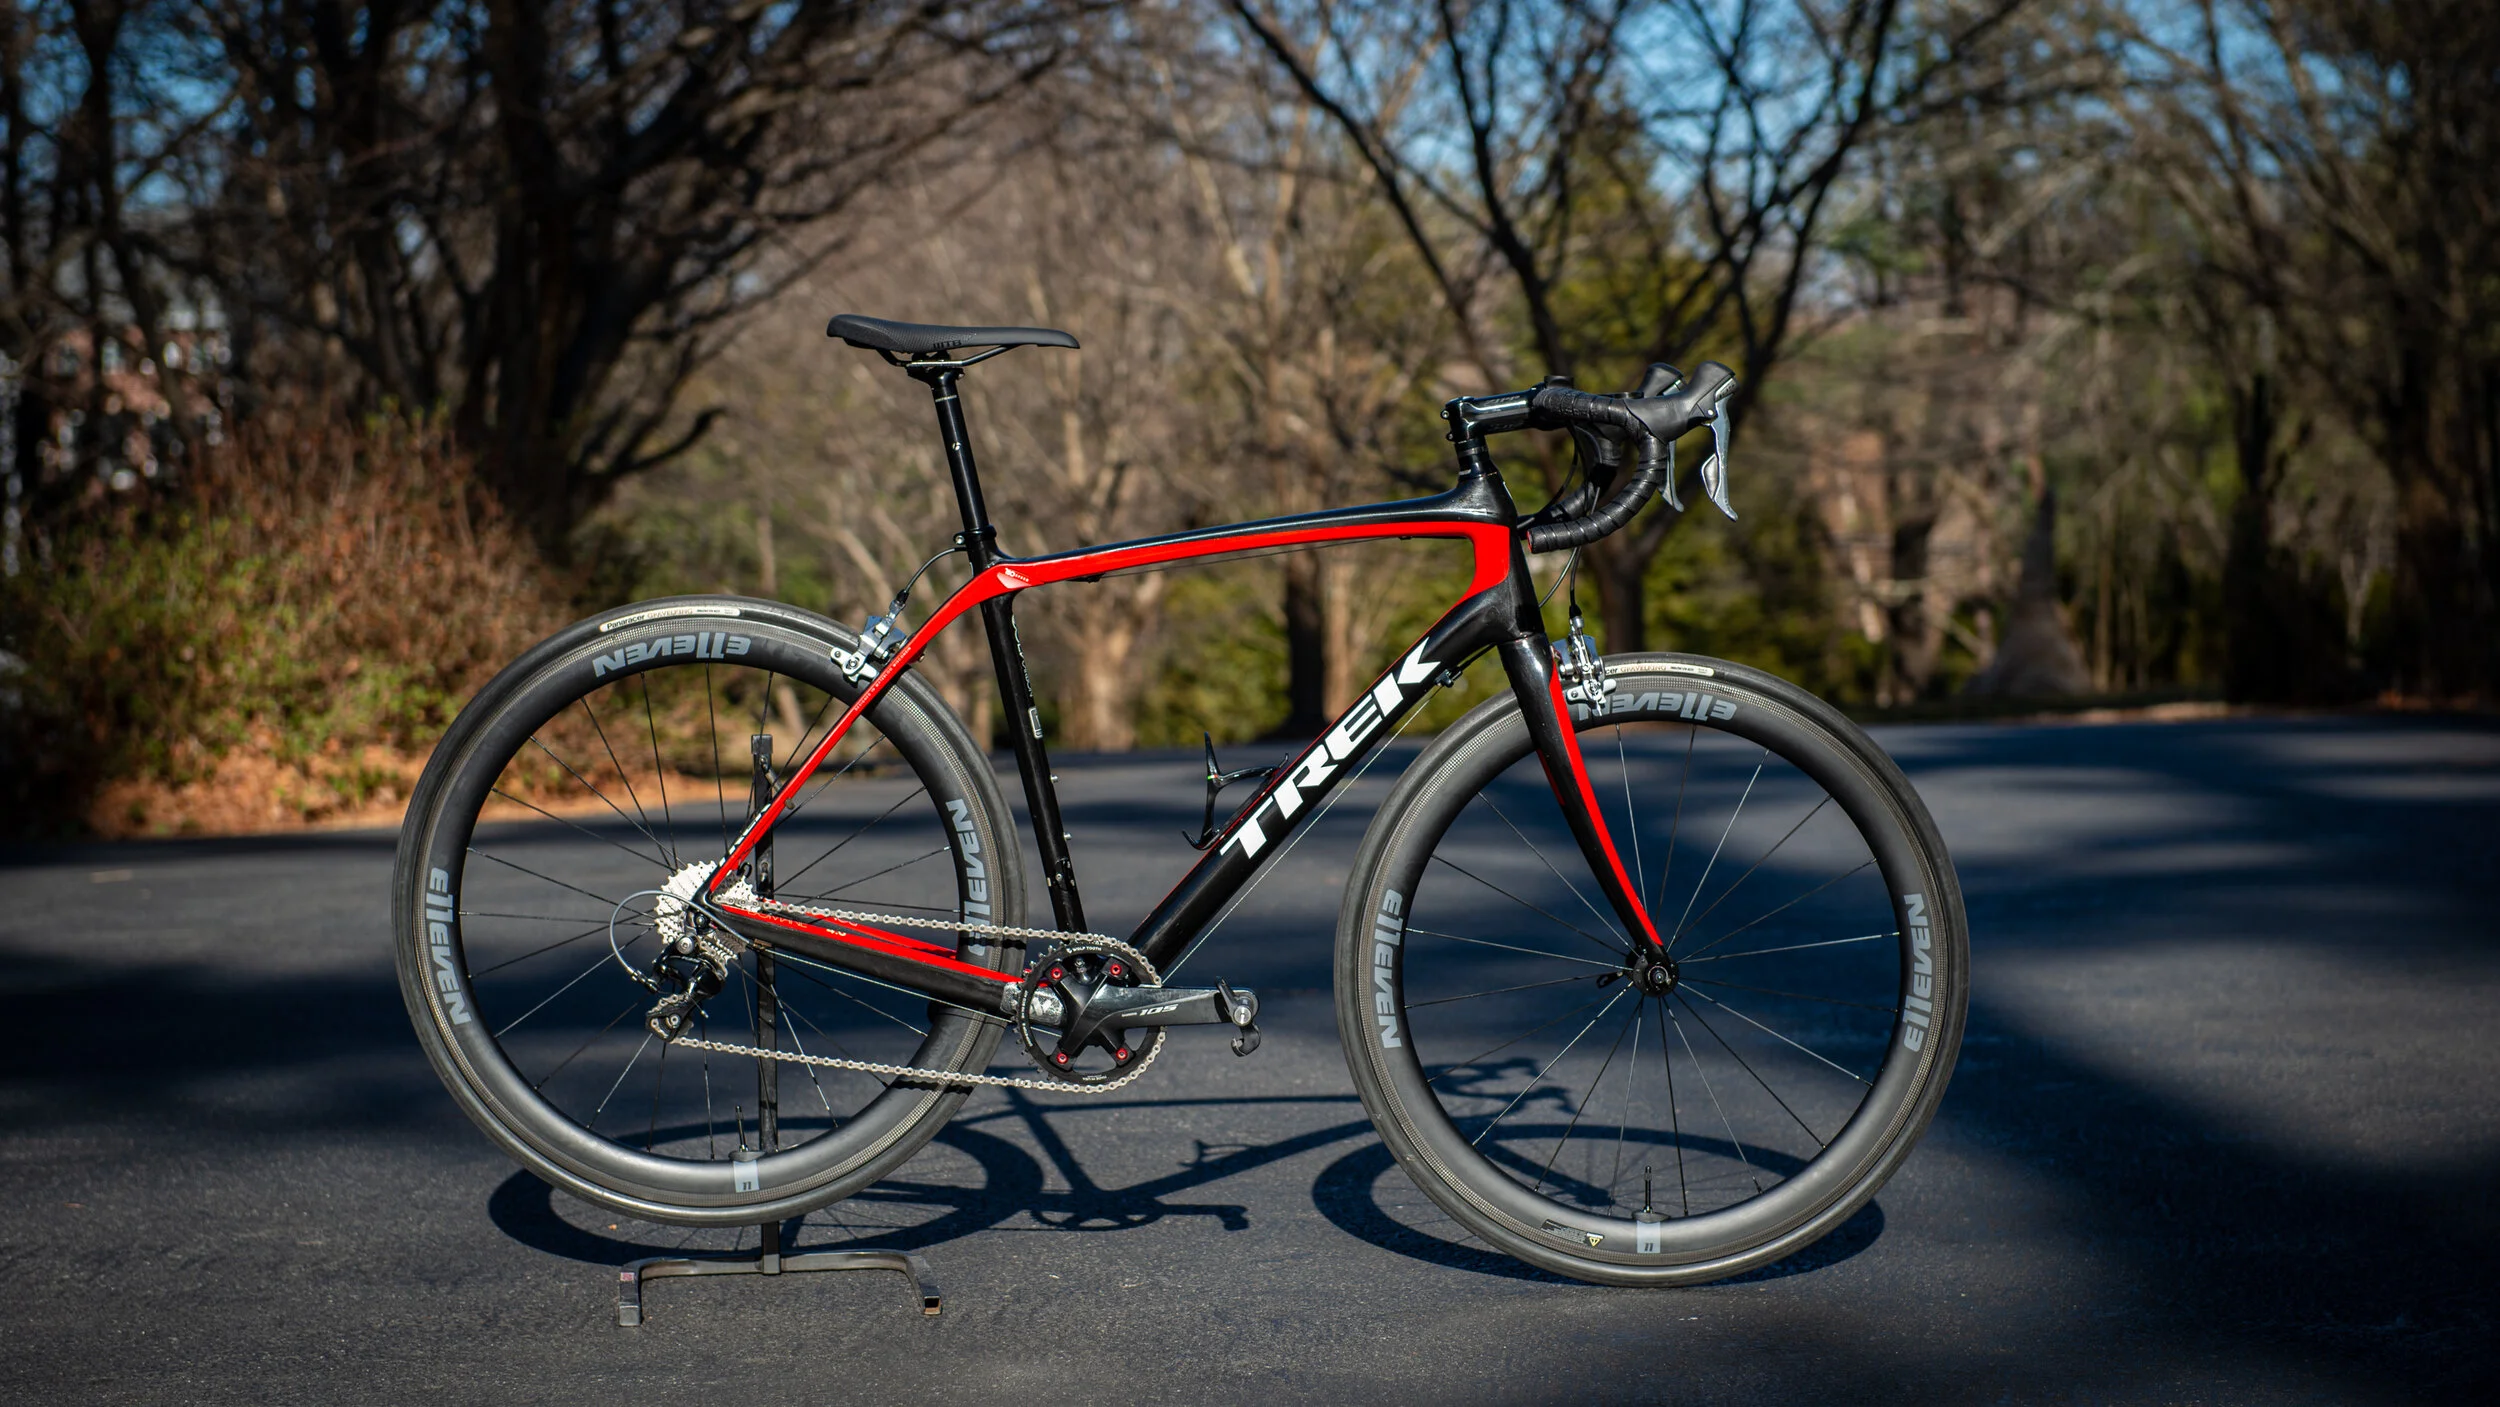
The frame’s geometry must surely be the most important consideration when converting an older road bike to a gravel suitable rig. Road bikes, in general, are designed with a much more aggressive position in mind, allowing riders to be as aerodynamic or efficient as possible. This translates to a slammed front-end (lower stack height) and generally a more stretched out position (longer reach). That said, the road bike that I used for this conversion project falls into a slightly different category, the “Endurance” style road bike. These bikes come with a more relaxed geometry and allow riders to adopt a position that’s slightly more upright, thanks to the the higher stack height and shorter reach measurements that you find on these frames. If you’re familiar with Trek’s line-up of bikes, then you’ll know that their Domane range fits the bill for an endurance road bike, whereas their Madone bikes follow the more traditional racing road bike design. “All-road” is a more modern term that's been used to describe the endurance category of bikes, since these newer bikes not only come with ample tire clearance (we’ll get back to this later), but they also offer riders the ability to feel more comfortable during longer rides, thanks to the relaxed geometry.

The “Endurance” geometry of the Domane played in my favor
The 2014 Trek Domane that I own has been the subject of a few experiments by now. A while back, I wrote a detailed post about my (failed) attempt to convert this bike into a Time Trial (TT) or triathlon-ready bike. I made it happen, sort of, and was even able to race that setup at the US National Triathlon Championships in Cleveland. The reason for classifying it as a failed attempt, however, lies in the frame’s geometry. The TT setup that I pieced together ultimately led to some injuries, which resulted in a reversion to the original road riding setup. The major cause for the injury was due to the higher stack height found with the Domane’s frame, as this didn’t allow the TT position to be low enough, placing additional strain on my lower back and calves. Fortunately, gravel riding and TTs fall on opposite ends of the cycling spectrum. When it comes to gravel, every bit of comfort helps and the more relaxed frame geometry of my Domane road bike surely helped to make the latest conversion experiment much more feasible.

Racing the TT conversion at the US National Triathlon Championships in Cleveland
The key lesson to take from this part of my discussion is to check your bike’s geometry before starting off with a similar conversion project. While a traditional road bike will still work with all my steps, it may, however, lead to a slightly less forgiving riding experience due to the aggressive geometry. Don’t worry if you don’t have access to an “endurance” or “all-road” style frame, since I’ll include a section later that addresses a few of the strategies for you to follow if you want to add more comfort to the ride.
Gearing
The next consideration in the quest for a road-to-gravel conversion is the gearing. Gravel riding requires far easier gears than what you might find on a road bike. The 52, or even 50, tooth front chainrings that you find on most road bikes just won’t cut it when you are faced with the additional resistance that comes from riding on gravel. There’s always the option to ride in your small chainring more often, but switching up the gearing to be better suited for gravel can significantly enhance the riding experience. Everyone’s riding conditions will vary and it’s worth giving this modification some careful thought before you spend money on new parts. I’ll break down how I approached this part of the build, and hopefully you can pick up a few tips about things to consider when you plan out the gearing.
My objective with the gearing modification was straight-forward and can be summarized by this one question: What was the minimum number of purchases I needed to make for my road bike to be better suited for gravel riding? The answer was one. All that I needed to do was convert the 2x setup (containing a 50/34T chainring combo) to a 1x setup. After spending way too much time analyzing gear ratios, I ultimately settled on a 40T front chainring. I purchased Wolf Tooth Components’ 110 BCD asymmetric chainring for Shimano cranks and it easily fit onto my Shimano 105 R7000 crank.


That was it. No other changes were made in terms of gearing and I retained the standard 11-28 cassette in the rear. The reason for keeping the same cassette simply came down to keeping the cost as low as possible, since a new cassette (with an easier lower gear) would also require that I buy a new derailleur that could shift into that kind of gear. This setup is, of course, far from ideal and certainly leaves me with a very limited range. The 40T (front) + 11T (rear) combination can easily lead to a spin-out on fast moving roads or on downhills. The 40T+28T combo, on the other hand, is not the world’s best climbing gear either and if I’m faced with any significant climbs, then I’m surely going to run out of range quickly. That said, I picked this setup keeping in mind that I would only ride on pre-selected gravel roads, ones that I know will keep me within this gear range. For all my other gravel adventures, where conditions are less known, I will still use my dedicated gravel bike instead.


Future improvements to this setup might include going to a sightly bigger front chainring (possibly a 42 or 44T) and increasing the cassette to an 11-34T. Covering every possible gearing option is nearly impossible, and your selection of gears will largely depend on what you can afford and where you intend to ride. My recommendation in this regard would be to start with the stock road gearing and adjust it systematically according to the type of riding you’ll be be doing.
Chain Retention
Gravel riding is bumpy by nature, which means that a chain can easily shake out of place, especially when you run a 1x setup as I just explained. If you were paying close attention to this gearing breakdown, then you might have noticed how the rear derailleur was never changed to one that contains a clutch. Therefore, unlike what you find with modern day gravel (and MTB) derailleurs, my old-fashioned derailleur will not help to reduce chain-slap, which in turn can lead to dropped chains. To prevent this, I’m relying on two key Wolf Tooth products.
The first is the chainring that I mentioned earlier. I developed immense respect for the 1x Wolf Tooth chainrings over the last few months and now exclusively run Wolf Tooth chainrings on both my gravel, as well as this converted road bike. Their “drop-stop” tooth profile design does absolute wonders to keep a chain in place and I will easily recommend this product to anyone looking for better chain retention on a 1x setup.


The second trick up my sleeve for keeping a chain in place while using a non-clutch derailleur, comes in the form of the Wolf Tooth Gnarwolf chainguide. I’ve written a full review about this and have nothing but praise for this product. I’ve used it on my gravel bike for extended periods and have had absolutely zero issues with dropped chains even when riding over the gnarliest gravel sections. Adding the Gnarwolf to the converted road bike setup provides a second layer of protection just in case the “drop-stop” technology does not do the job.


Tires
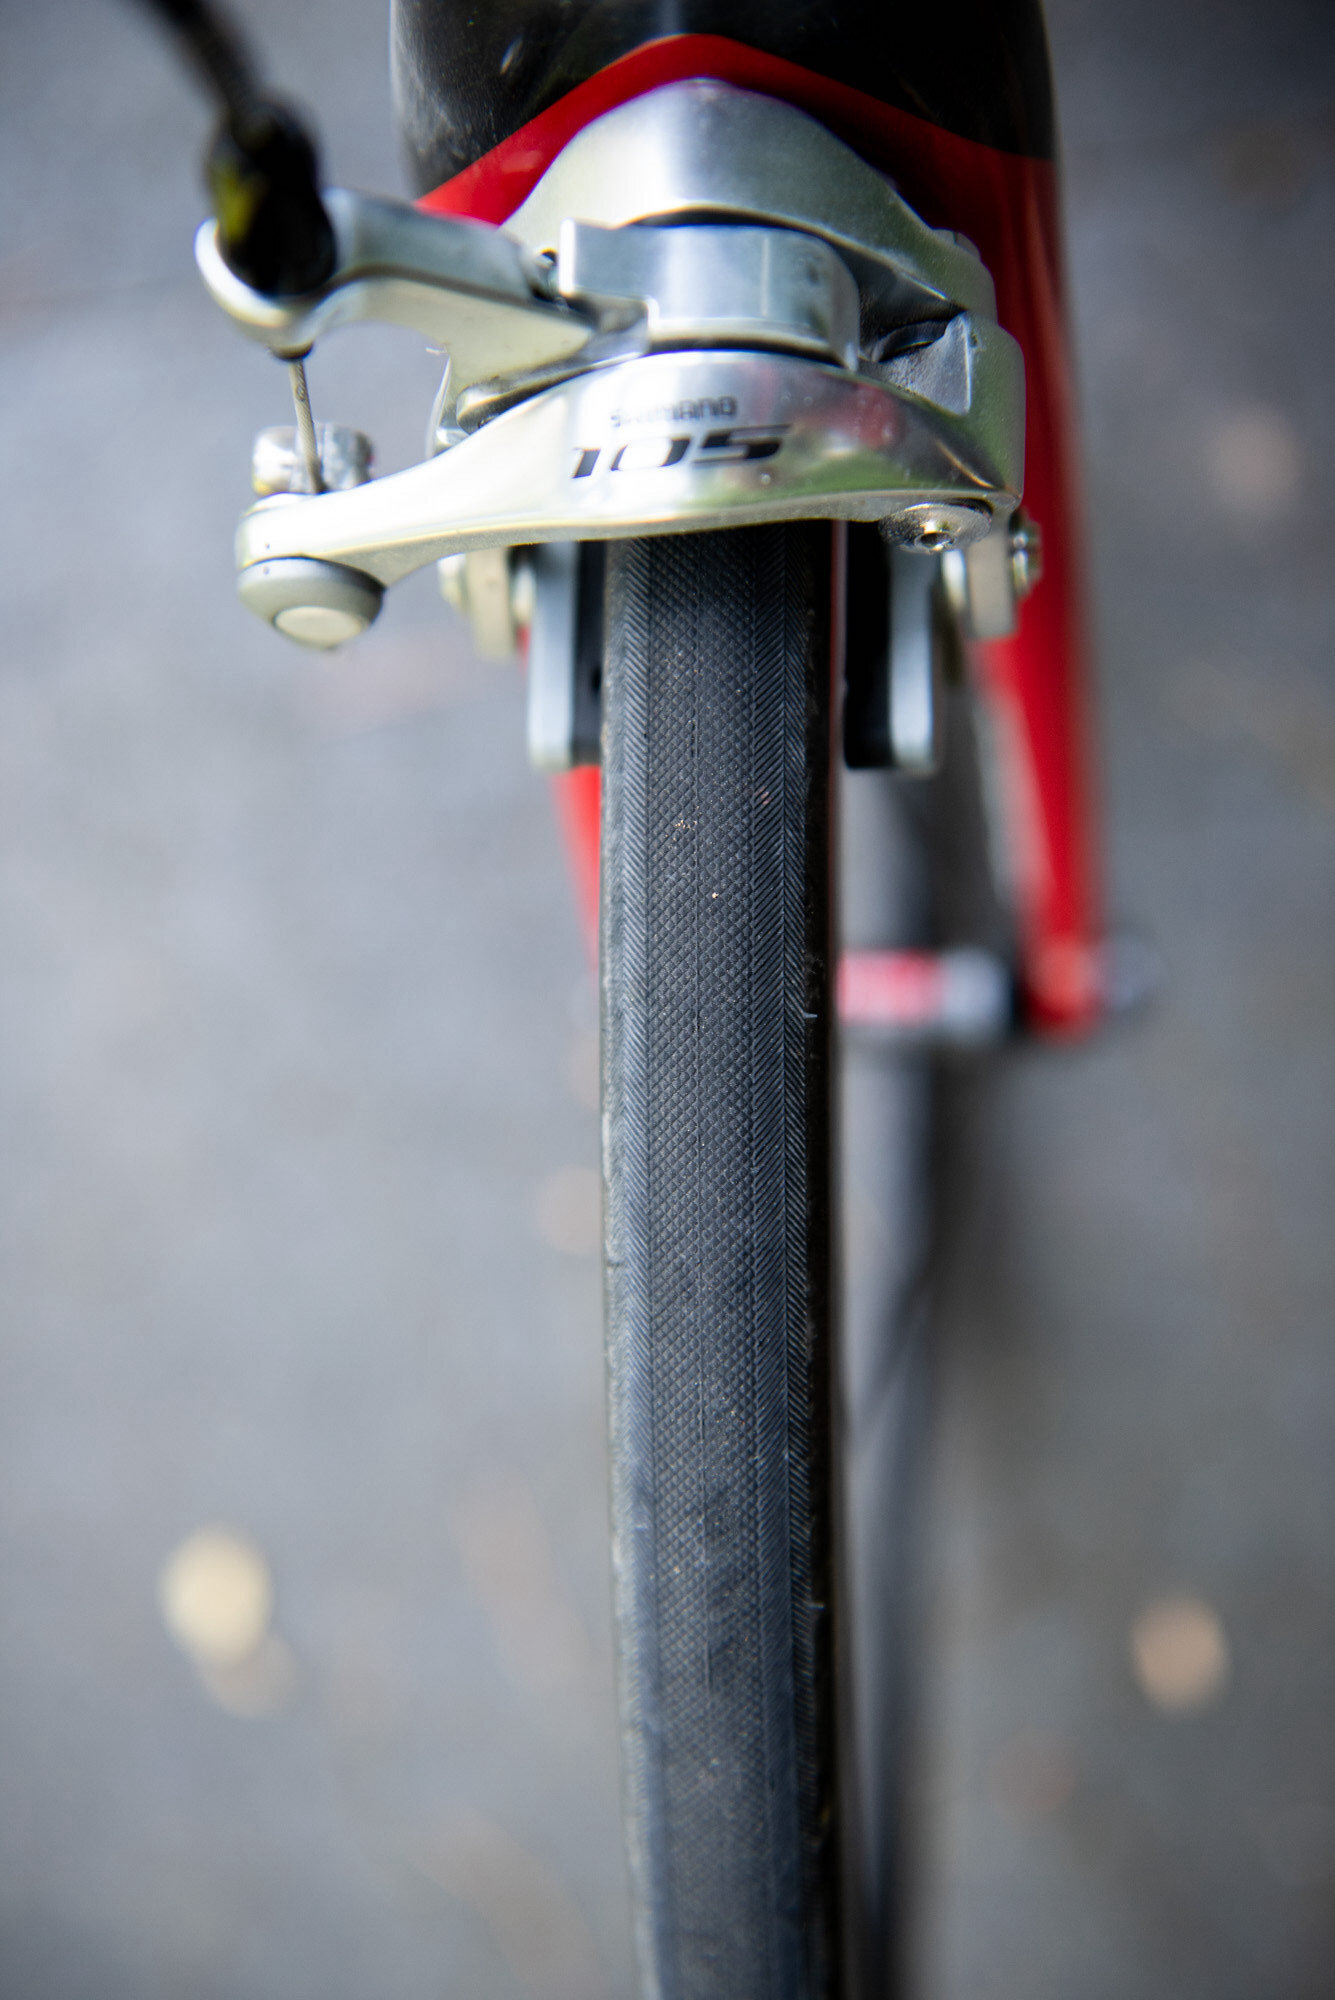
The star of the show for this road-to-gravel-bike conversion, must surely be the tires. This is quite literally the part of the bike where the rubber hits the road, making it the dealbreaker when it comes to having a gravel-worthy bike. Most modern-day gravel (and even some all-road) bikes come with massive tire clearance, allowing one to easily fit gravel tires of up to 40mm (or more) into the frame. Traditional rim-brake road bikes, on the other hand, do not have this luxury of wide tire clearance, especially bikes (like mine) that were built in a time when everyone still rode 19-23mm tires and inflated them to a rock solid 125psi.
The trick was to find a suitable tire that would be capable of taking on gravel, yet at the same time, also skinny enough to fit inside the narrow space of a standard road frame. Turns out there is a tire that meets exactly this need: Enter the Panaracer GravelKing SK 700x26C tire! Yes, that’s not a typo, this tire is only 26mm wide, but still comes with a tread pattern that is perfectly geared towards gravel riding. I also won't blame long-time readers of this blog for thinking that I might have already reviewed the Panaracer GravelKing 700x26C tires in the past. The difference this time, lies in the two additional letters in the name, SK, standing for side-knob. Whereas my previous review was based on the slick version of the GravelKing tire, this time I opted to make use of the much more versatile SK model. Simply look at the side-by-side view of the tread profile for both tires and you can easily tell why the SK version of the tire provides much better traction on loose gravel surfaces.

There are two things to consider when it comes to the Panaracer GravelKing SK 700x26C tire: Pressure ratings and clearance. Let's address each of these individually.
The sidewalls of the SK tires indicate that they can be run at pressures ranging between 60psi and 100psi. This stands in contrast to the slick version of the tire, where the recommended pressure is stated as 105psi. I can assure you that running a 26mm tire at pressures around 100psi on gravel can lead to a very uncomfortable ride very quickly, making the slick version less ideal for any kind of rough gravel surfaces.
Achieving a lower pressure on a gravel tire is by far the most important element that dictates the level of comfort and control while riding. It's not uncommon for 40mm gravel tires to be run between 25-45psi, and as a lifelong road rider I still sometimes step into the trap of wanting to set the pressure too high when going out for a gravel ride. Although the 60 psi for the SKs sounds high when compared to the other numbers I just provided, it feels fairly forgiving. The slimmer tire chasing is firm, but still offers a surprising amount of shock absorption. This lower-end pressure rating of the GravelKing SK 700x26C tires really helps to make a road-to-gravel conversion very possible. I'd even go as far as to say that conditions beyond a silky-smooth gravel road can still be attempted with these tires, especially if your bike handling skills are on point. More about the ride quality later.

The second consideration with the tires is the clearance within your frame. I won't go into all the details again, but in my Panaracer GravelKing 700x26C review I mentioned how I've had bad luck with fitting a 28mm tire into my Domane's frame. The marks on the rear triangle serve as a reminder of that experiment. I therefore played it safe and opted to keep the tire width at a maximum of 26mm, just in case they measure in wider than stated. In hindsight, I could have gone with the 28mm wide tire, since the GravelKing SKs measure in very true to what is stated. You'll be able to tell from the photos that I still have more than enough room to bump up the size, should I want to in the future. If you own a standard road bike with rim brakes, then I'm confident that you'd be able to fit the 28mm version of this tire.


Puncture Protection
The next piece to the tire conundrum is how to prevent punctures. Running a skinny tire on rough gravel will surely increase the risk of flats and any measures to help reduce this risk are worth taking. The first line of defense lies in the tire itself. The Panaracer GravelKing tire that I highlighted above is far better suited for rougher roads when compared to a standard road tire, since it includes a reinforced puncture protection layer within the lay-up of the tire. However, relying solely on the tire is not sufficient. From time to time there will be the inevitable sharp object on the road that leads to a flat. With that in mind, the next logical question might be, what about going tubeless?


Unfortunately, things aren’t that straight forward when you are dealing with a tire this narrow. Panaracer states that both their 26mm as well as their 28mm GravelKing SK models are not tubeless compatible. This calls for plan B - good old-fashioned Slime filled inner tubes. This product is by no means anything new and has been on the shelves for years, perhaps even before tubeless went mainstream. The idea is very similar to a tubeless setup, but instead of filling the tire with a sealant, the sealant (green slime) is contained within the inner tube. Once the inner tube gets punctured, the slime should theoretically fill this hole and prevent a flat. Slime sells pre-filled tubes, but you can also buy the Slime refill separately and insert it into a tube yourself. I opted to go for their “extra strong” inner tubes on this road-to-gravel bike build. So far so good! In lieu of a full tubeless setup, this additional layer of puncture protection really helps to ease the fear of flats when blasting over some rocky gravel. It might not be as light as a traditional tubeless setup, but with this build other things surely take preference over weight savings - reducing flats being one of them.


Adding comfort to the setup
Let’s wrap up the technicalities of this build by looking at ways to soften up the harshness of a gravel ride. I mentioned earlier how a traditional road bike’s aggressive geometry might lead to a less forgiving ride, but fortunately there are ways to overcome this limitation through the use of a few “suspension” components. The additional comfort that you’ll gain in this regard won’t just come in handy on gravel, but can also help to smooth out the ride during long days in the saddle while going for a road ride.
I was lucky to start off this build with the Trek’s frame since a major perk with the Domane is the inclusion of the IsoSpeed decoupler that you find on the seat tube (and the headset with newer models). This design provides some additional compliance in the seat tube which “decouples” from the top tube, providing some extra flex. While this decoupler didn’t exactly help when I turned the bike into a TT setup, it does come in super handy on gravel.

While other bike brands might not offer the same IsoSpeed technology on its frames, you still have a few options when it comes to additional compliance. The two key places where you’ll be able to add extra “suspension” lies in the stem and the seatpost. Redshift’s Shockstop Pro Suspension Stem and Kinekt’s Suspension Stem are two of the leading products on the market when it comes to adding shock absorption on the stem of a bike. Although I’ve never had the opportunity to test either of these products, they look promising and I wouldn’t mind trying them out in the future.


When it comes to additional suspension in the rear of the bike, a suspension seatpost might be just what you are looking for. Once again, Redshift and Kinekt lead the charge with their suspension seatposts, but Crane Creek also sells the eeSilk seatpost, which comes in at a very respectable 295g for the carbon version. The bottom line is that there are plenty of creative ways for you to add a bit of comfort to a road bike, making it better suited for the rigors of off-road riding.


Ride Quality & Considerations
On paper, everything about this build checks out, but how does it perform when it’s taken for a proper gravel ride? I’ll cover a few of my key take-aways in this section to summarize some of the overall considerations, should you'd want to pursue a similar project. Be sure to also check out the video that goes along with this post for a real-world view of how this setup performed out on the open roads.


Let’s get the reality check out of the way first - this setup simply won’t give you the same versatility and freedom-to-roam as you’ll find with a gravel-specific bike. That’s just the reality that comes with riding a skinny tire on rougher surfaces. You’ll have to accept that this road-to-gravel bike conversion might be great for a casual gravel ride on country roads, but anything more extreme will not be doable. If the roads that you intend to ride are well-known and you can anticipate any obstacles and/or technical sections well in advance, then this setup becomes much more feasible.
The rim-brakes are another limiting factor when it comes to this setup and do require braking earlier into corners and downhills when compared to a disc-brake bike. Once again, having prior knowledge of the terrain will greatly improve how functional this setup can be. I certainly wouldn’t pitch up at a gravel event with this bike where the course is completely unknown. If the organizers decide to take riders on a stretch of single-track through the woods filled with rocks and roots, then this bike setup will most surely result in a hike-a-bike. The saying of “horses for courses” definitely applies in this regard.


The good news is that regular (maintained) gravel roads are totally rideable with this setup, and I’ve been pleasantly surprised by its performance. The lower tire pressure, tire grip and correct gearing do wonders for the ride quality and even after a 46-mile (75km) gravel ride onboard this bike, I still felt comfortable. Even the occasional washboard section was rideable. Harsh, but doable. You’ll need to read the road up ahead more carefully and pick better lines through potholes and other tricky sections, but overall, this setup works surprisingly well for light-duty gravel grinding.
Wrap-Up
If you intend to fully commit to gravel riding, then you might want to overlook this build and save your money to buy a dedicated gravel bike instead. If, however, you aren’t sold on the idea of gravel just yet and want to find an affordable solution to get a taste of this new and fast-growing cycling genre, then this setup might be exactly what you are looking for. Keep in mind that it will not be as capable as a newer gravel bike, but it can still provide a relatively easy entry-point if you want to start out by incorporating more gravel sections into your regular road rides.
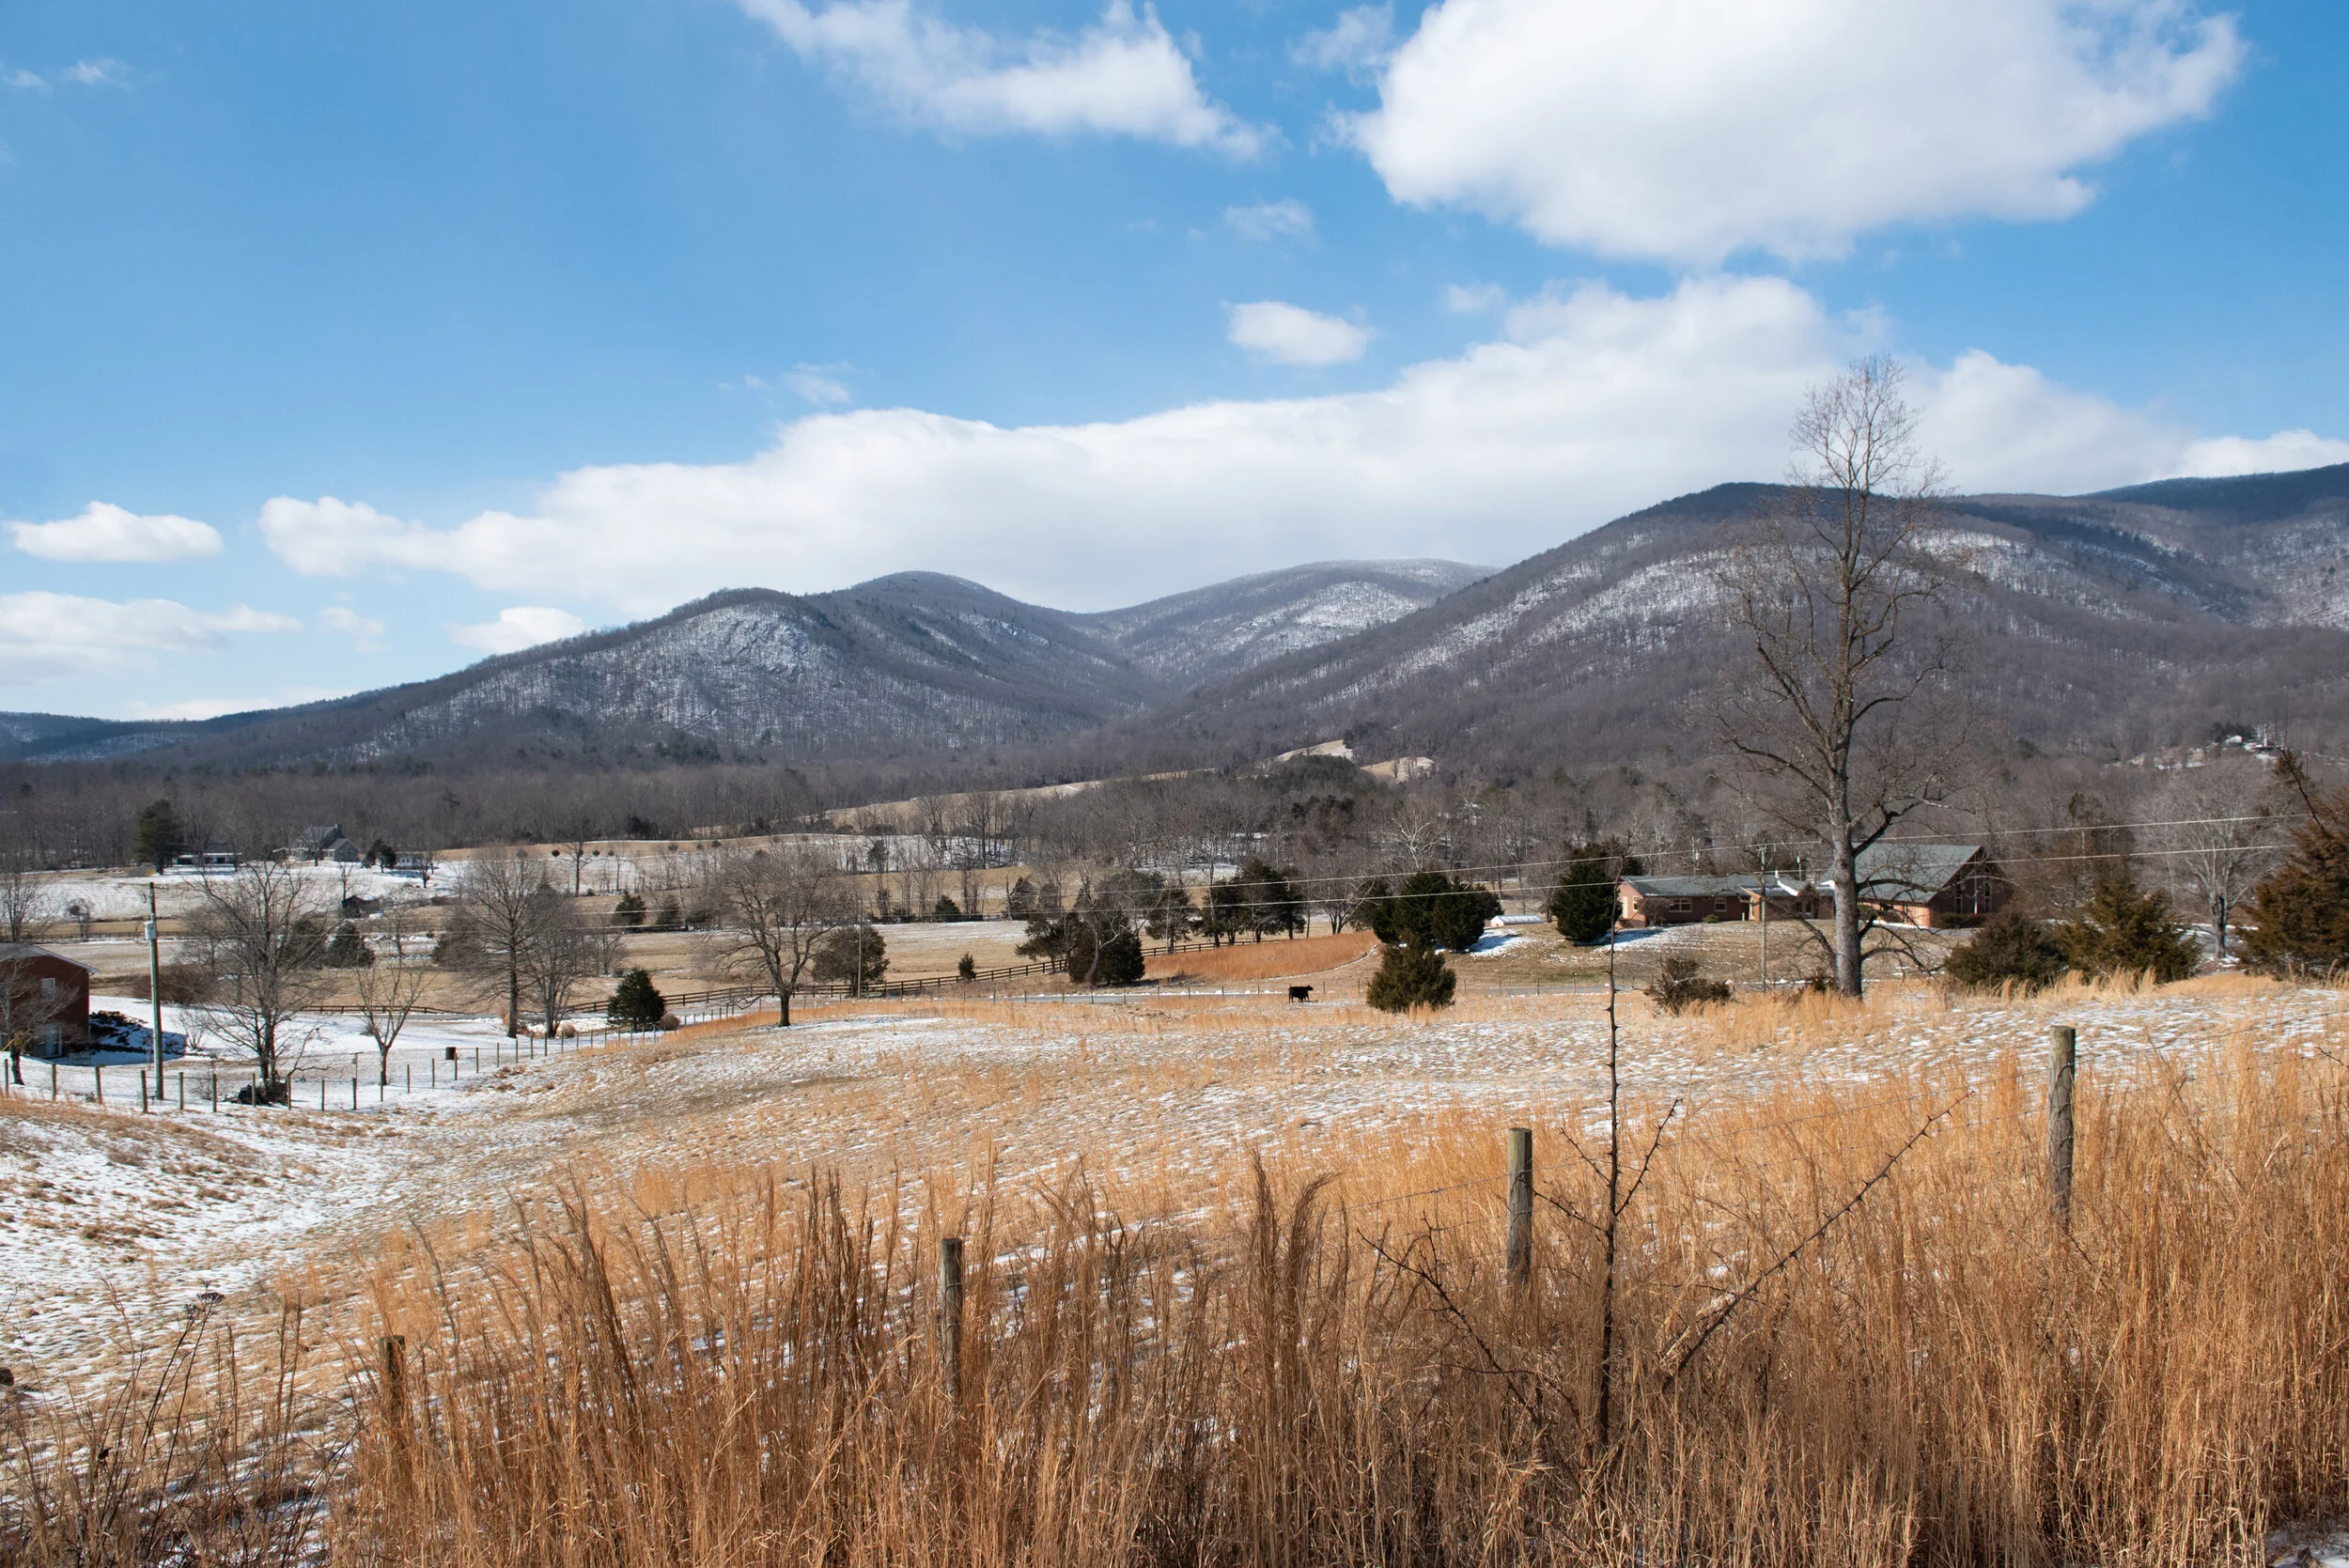
I can assure you that simply turning off the main road onto a quiet back gravel road can be incredibly rewarding, not only because of lower traffic volumes, but also for the stunning natural beauty that’s tucked away from plain sight. If this bike build breakdown helps to get more people out onto the gravel roads, then I’ve succeeded with my goal for this write-up. Until next time, enjoy your ride!
- Wiehan