STATE 4130 All-Road: My first DIY frame-up bike build
Disclaimer: This post contains affiliate links, through which we earn a commission.
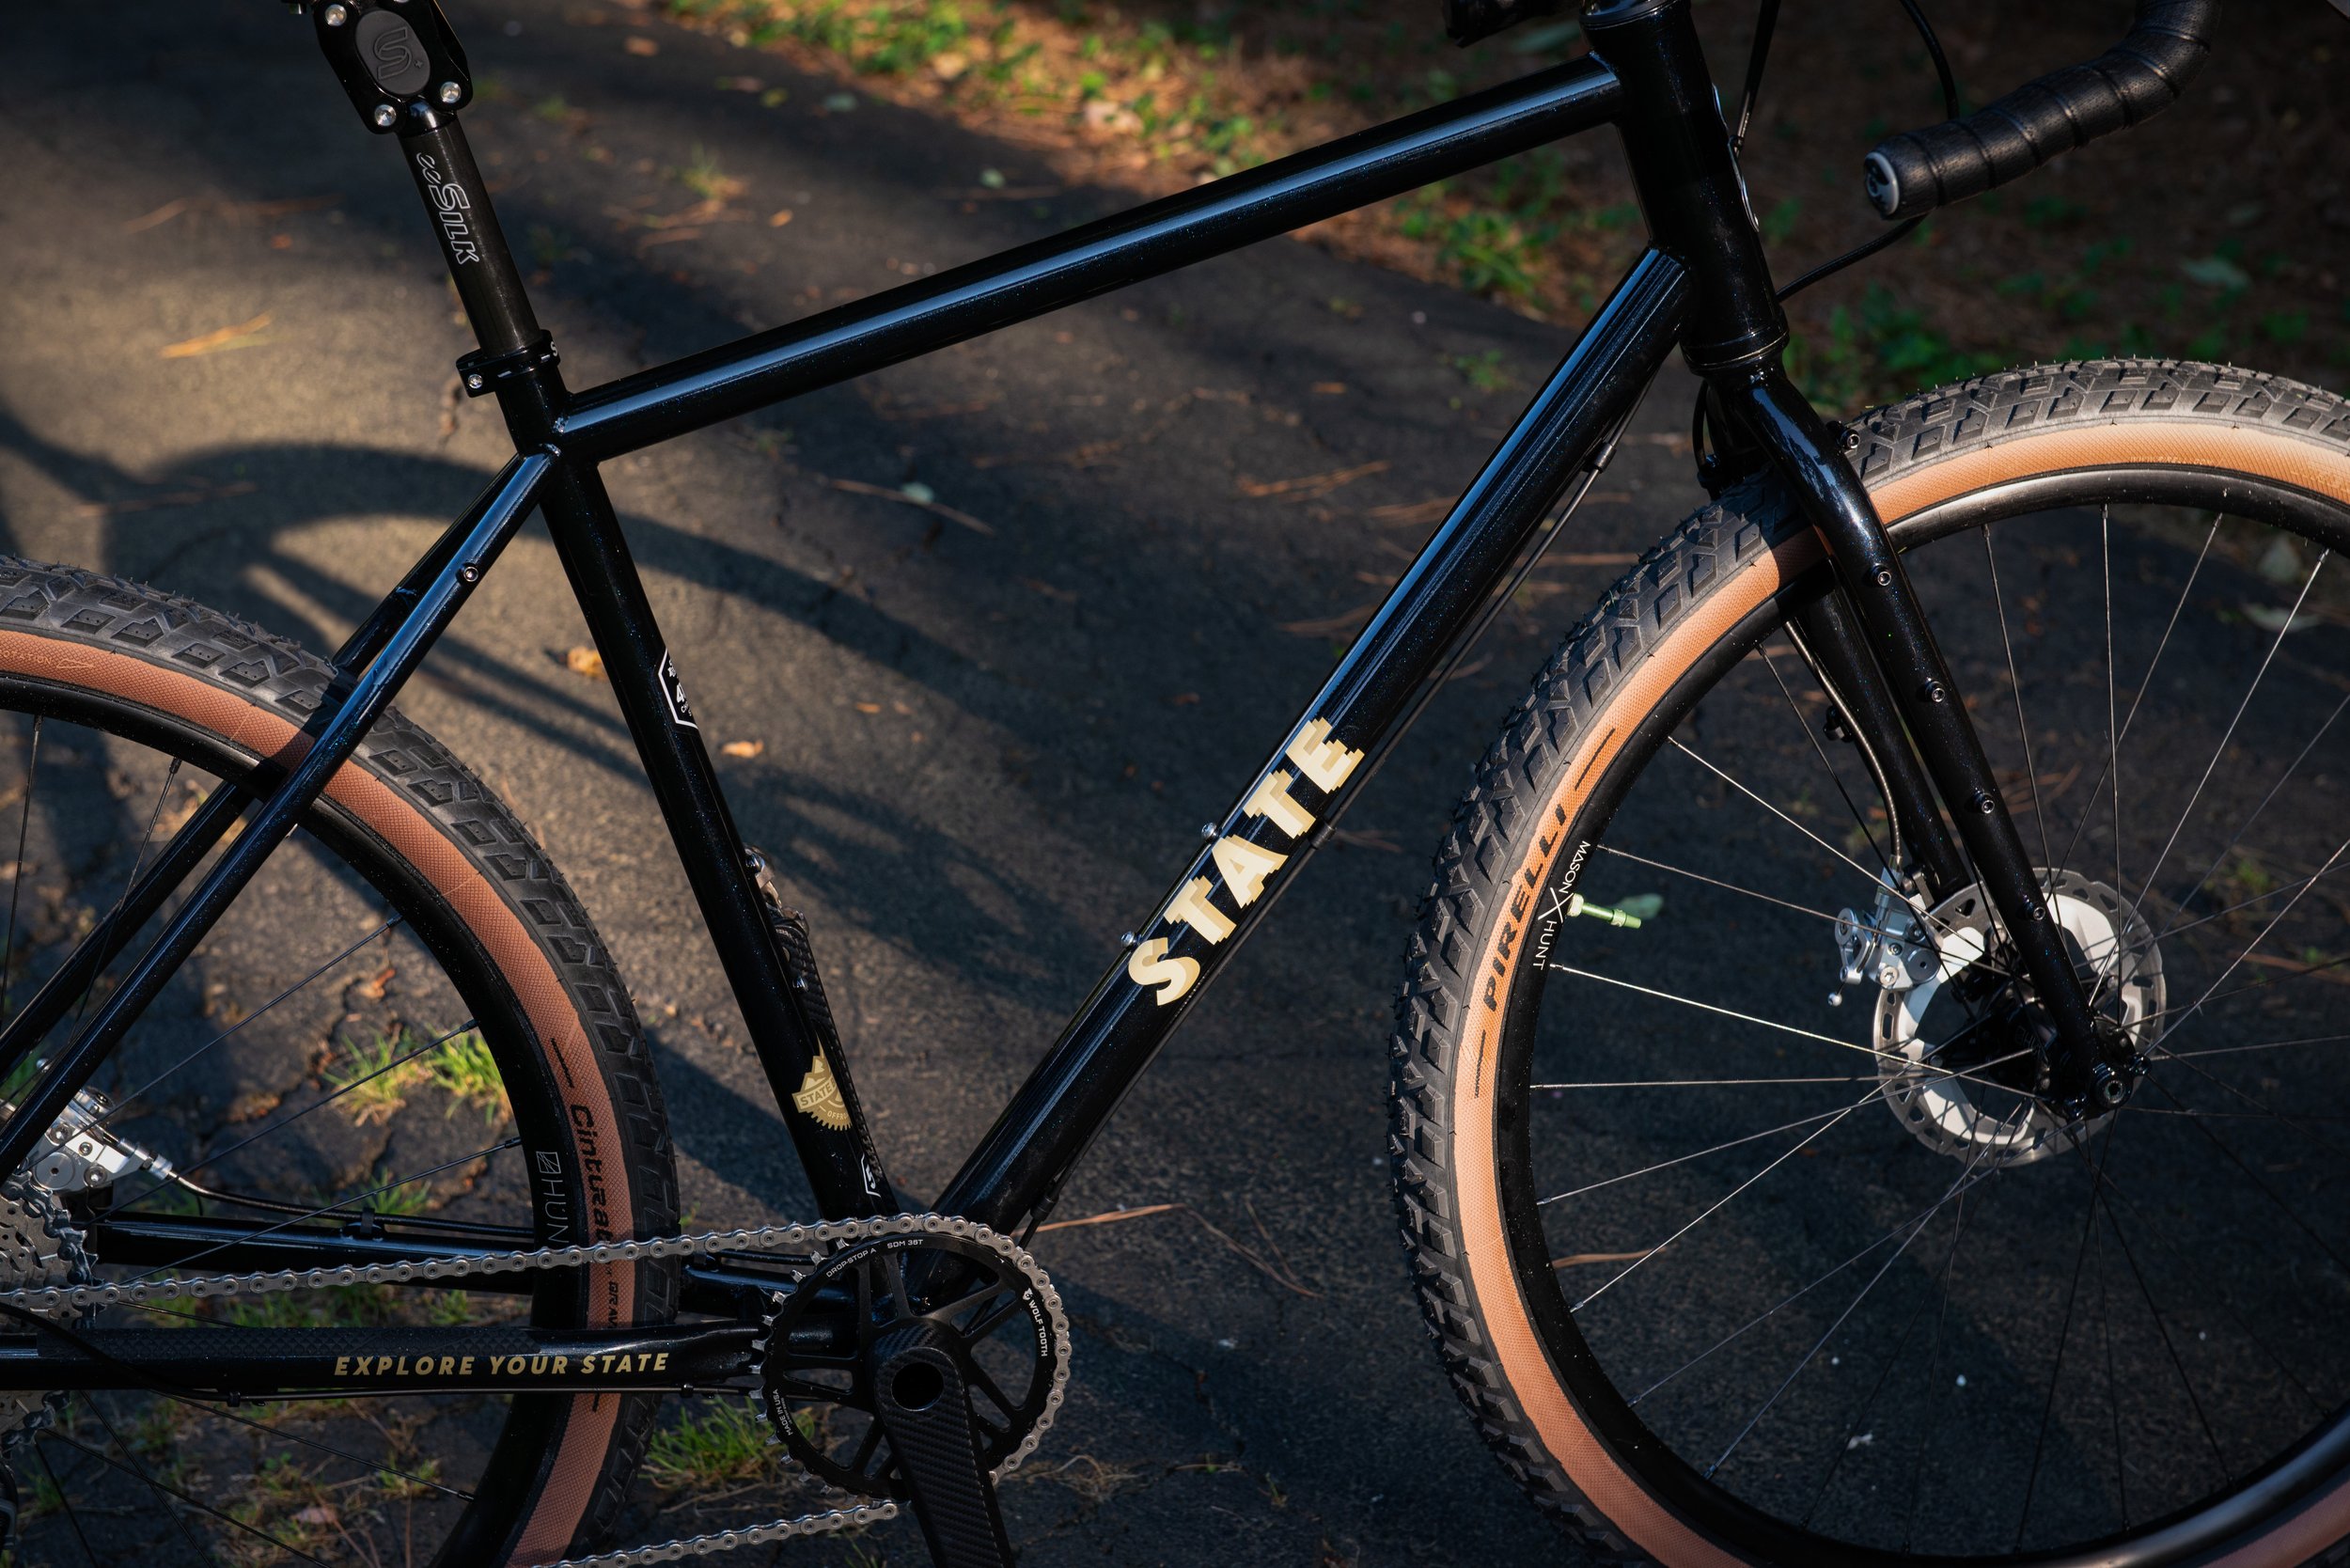
Introducing the State 4130 All-Road, the latest addition to the Mountain Road Ride bike family! I'm pumped to show you this new frameset and I have no doubt that it's going to feature on many Mountain Road Ride adventures in the future. I've been steadily upgrading my 3T Exploro gravel bike setup for a few years now, and along the way, I've picked up a few extra parts - including some which I panic-bought during the supply shortages. With this stockpile, I saw the perfect opportunity to finally tackle a frame-up build – my first attempt at such a project. The only missing pieces were a saddle, handlebar, and bottom bracket. Besides this, the frame was the only thing standing in my way from embarking on this new project. In this post I’ll walk you through what went into this build and what the final result was. Spoiler alert, I think it turned out really nicely!
The Frame
When I set out on my quest for the perfect frame, I had a list of must-haves in mind that would work well with my current components. I was looking for a modern-day setup with 12mm thru-axles front and rear, a 27.2mm seat post, plenty of tire clearance for a wide 650b tire setup, and most importantly, a threaded bottom bracket. Budget was also a big consideration - I wanted something that wouldn't break the bank. I had my sights set on steel, embracing the "Steel is Real" mentality, since titanium frames mostly carry a hefty price tag that was out of my budget. Steel frames usually run from $700 to $1500, making it tough to justify this project with all my previous component investments. But I wondered, was there a more budget-friendly option out there - perhaps in the $500 range? That was the challenge.


After spending way too much time browsing through endless bike websites, I eventually stumbled upon State Bicycle Company and their unbeatable value for money. I hit the jackpot with the State 4130 All-Road frame - it had everything I needed to complete this project. 12x100mm and 12x142mm thru-axles? Check. 4130 Steel frame and fork with all the necessary mounting points? Check. A 68mm threaded bottom bracket? Music to a home mechanic's ears. Ample tire clearance for both 650b (53mm tire) and 700c (45mm tire) wheels? Double check. Adding to the already impressive features of this frame are the flat-mounted disc brakes and the convenience of full external cable routing, making this a truly irresistible offer.
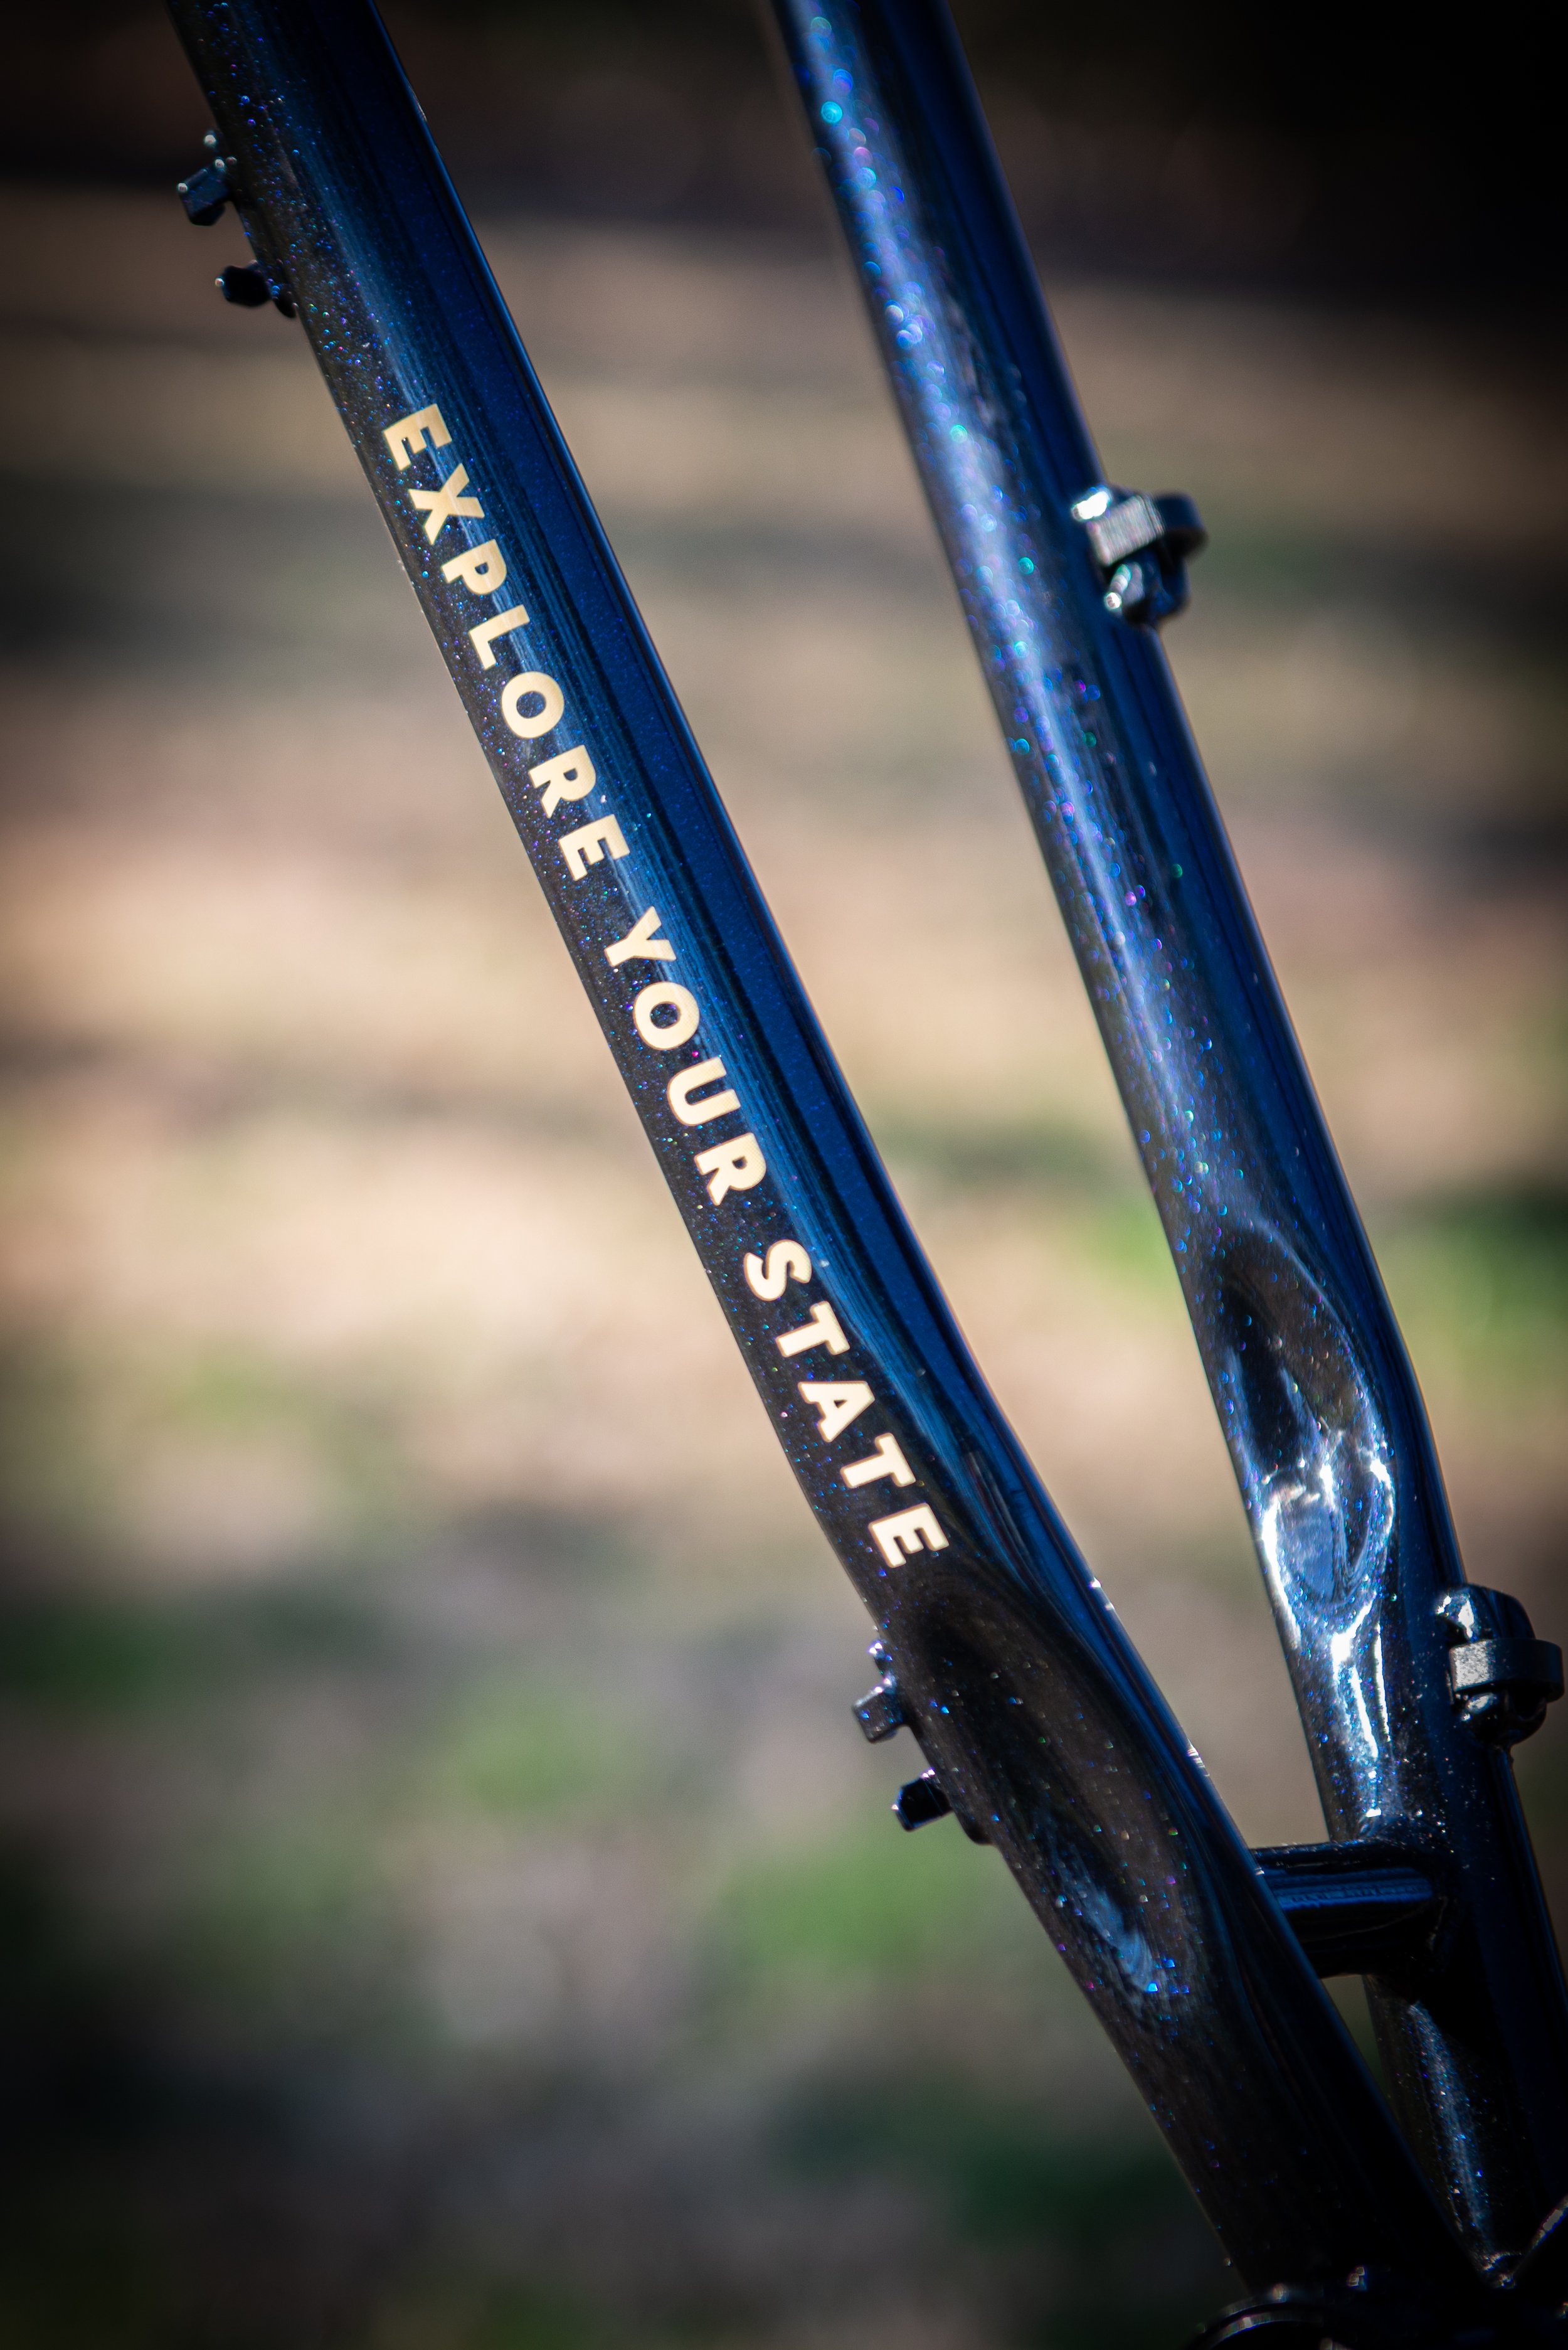

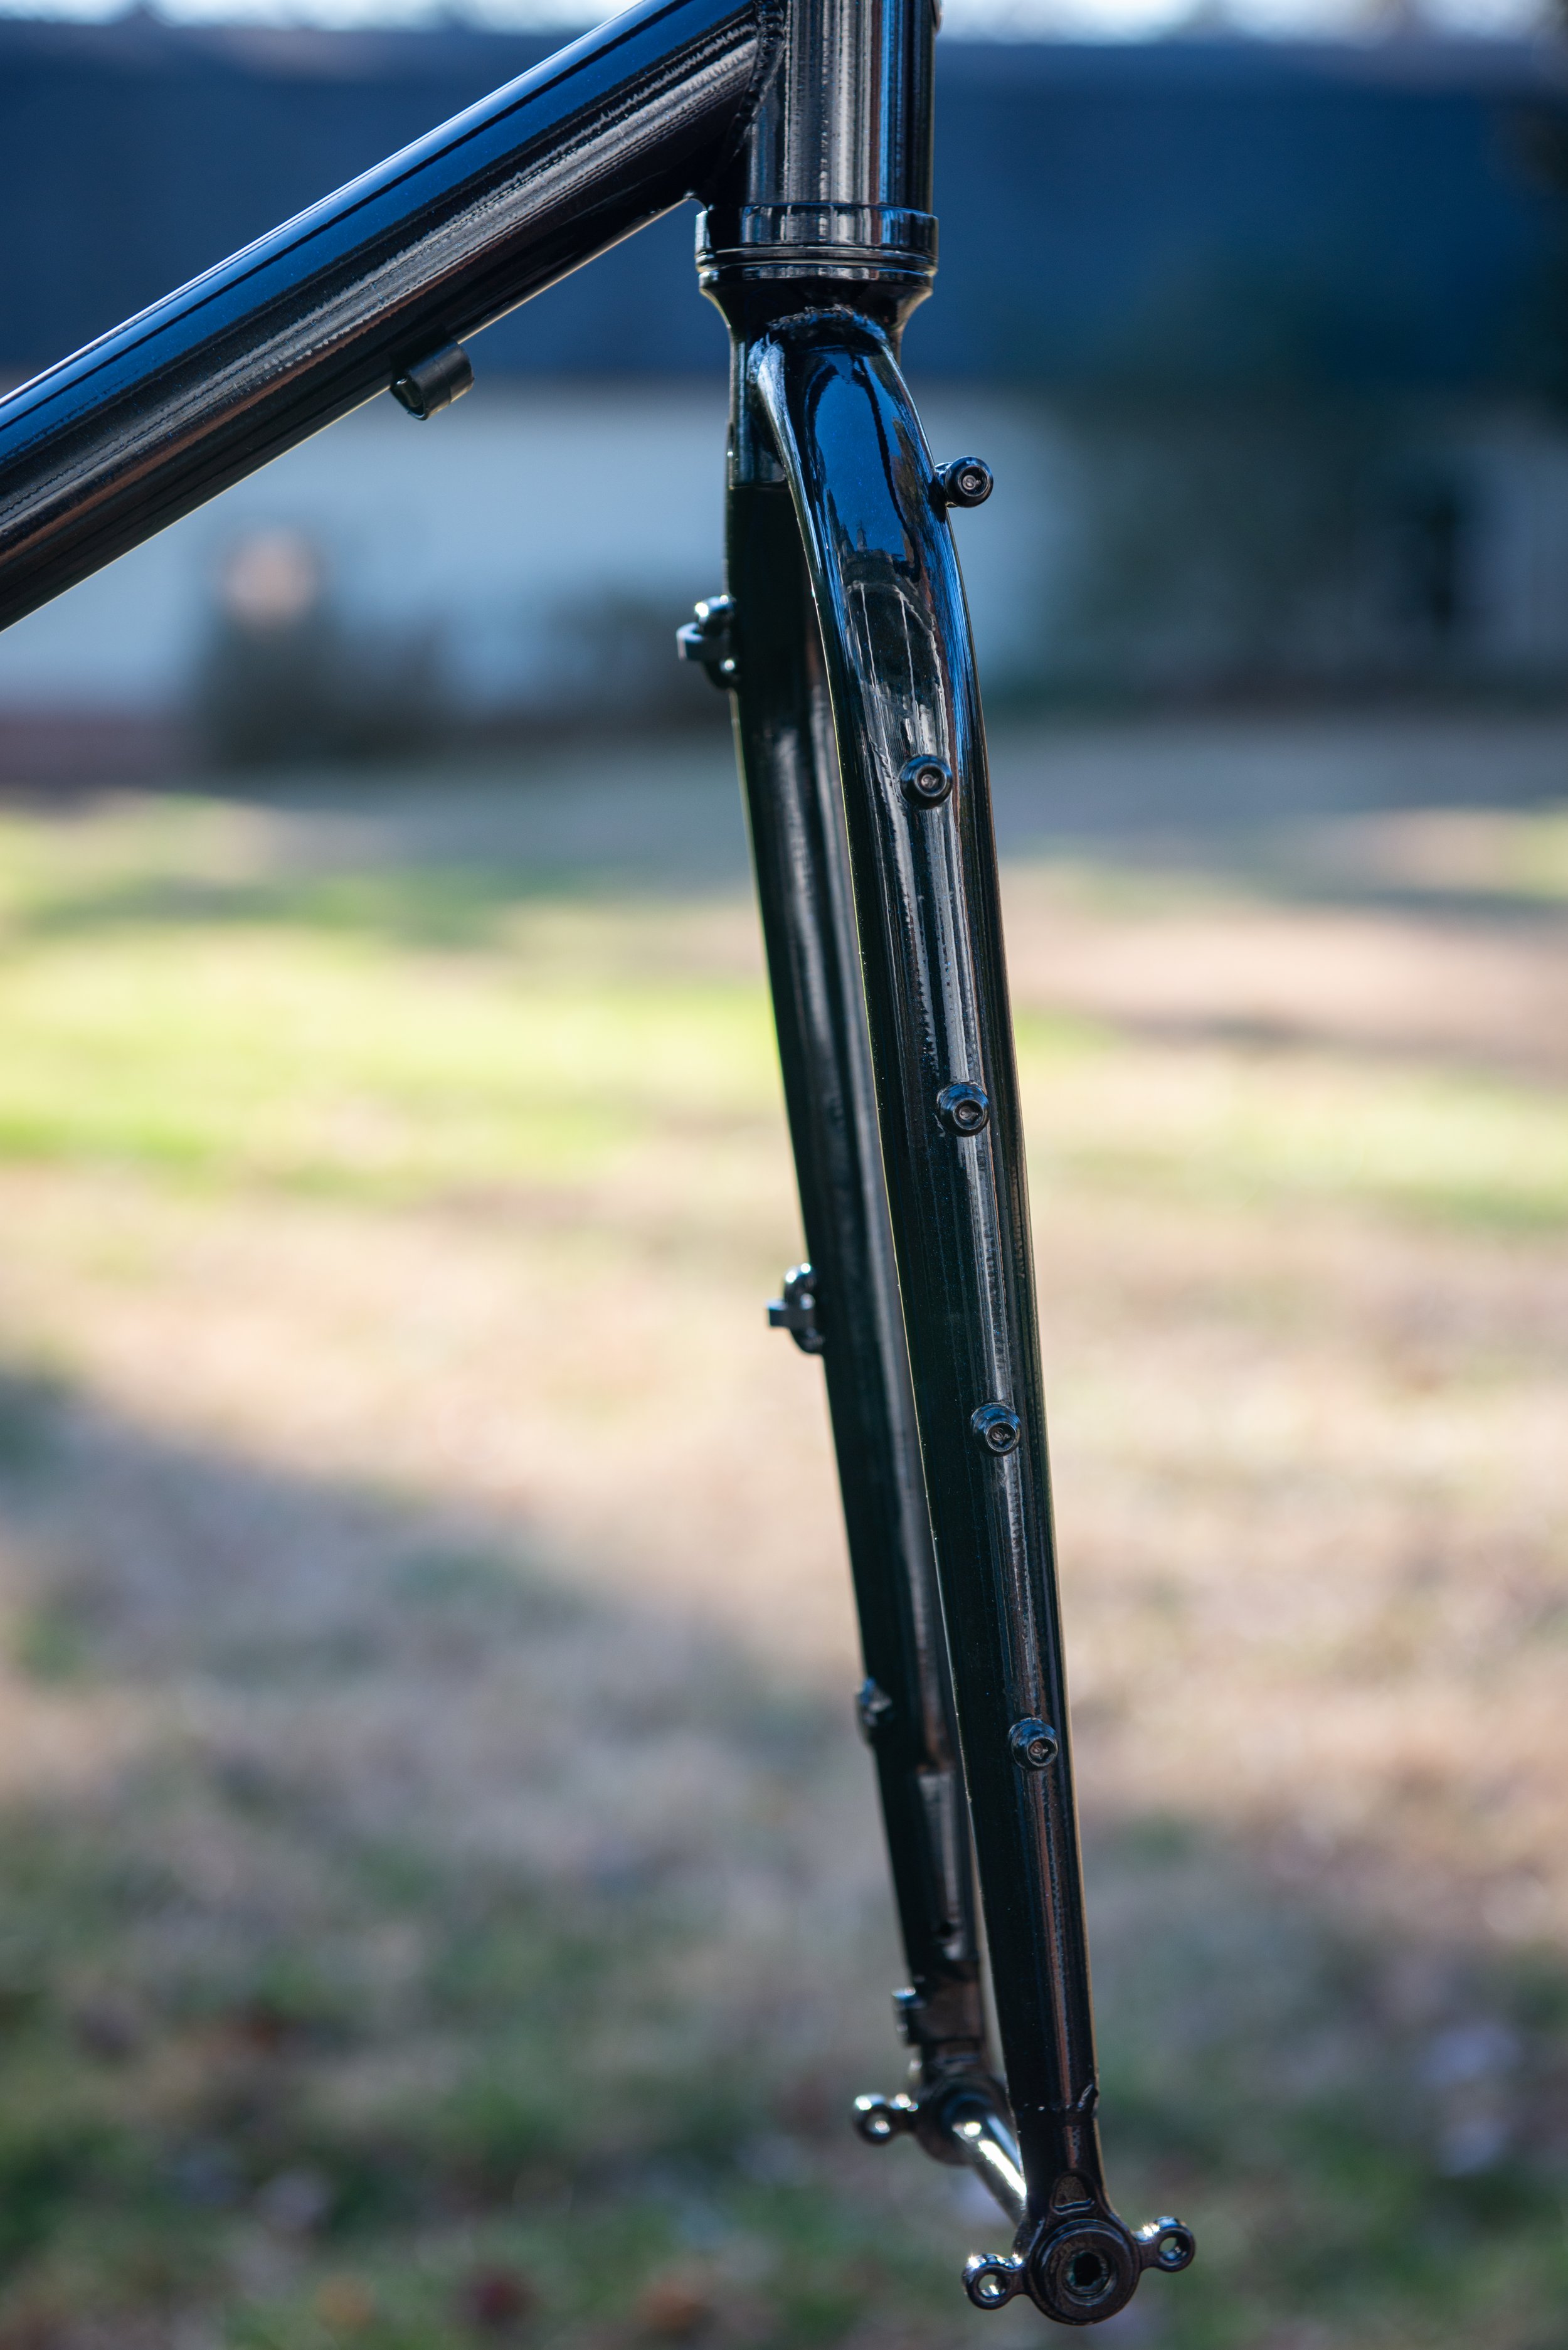
It has just the right geometry, with a medium size boasting 371.5mm of reach and 602mm of stack height and a long wheelbase of 1054mm for added stability on rough terrain. And to top it all off, it was available at an unbeatable price of only $429!


The decision was a no-brainer. The combination of price and specs was too good to pass up, and the online ordering process was a breeze. In no time, the frame arrived, and I was now ready to get started on this exciting project. I' decided to piece together this beauty with a mix of top-tier and not-so-luxe components to make it come to life. To give you a taste of this exciting build, let's delve into some of the noteworthy components that I mounted on this frame.

Components - The New:
Growtac Equal Brakes
The Growtac Equal Brakes are a standout on my list of components. In a market that has been dominated by hydraulic disc brakes, these cable-actuated mechanical brakes are making waves and proving to be a serious contender. I can't wait to put them to the test and see if the hype is real.


Designed with road-style shifters in mind, these brakes boast a short pull cable and a lightweight 135g per caliper design. While some may dismiss the single piston pad actuation as offering less stopping power compared to a dual-sided piston, the reviews I've come across paint a different picture. In fact, many users have praised the consistent stopping power delivered by the single piston design.
What sets the Growtac Equal Brakes apart, however, is the included Japanese-made cables and housing, road and mountain bike brake cables, and all necessary mounting hardware. It's a comprehensive solution, and the box comes with both compressionless and non-compressionless housing, as well as a range of housing endcaps. It's a premium package that, while not cheap, offers excellent value compared to competitors like the Paul Klamper mechanical brakes, which don't include cables or housing.


I stepped into uncharted territory with this build by attempting to run a full set of housing and cables on a bike for the first time. It was bit intimidating, but ultimately I think I pulled it off successfully. Here's to learning new bike skills!


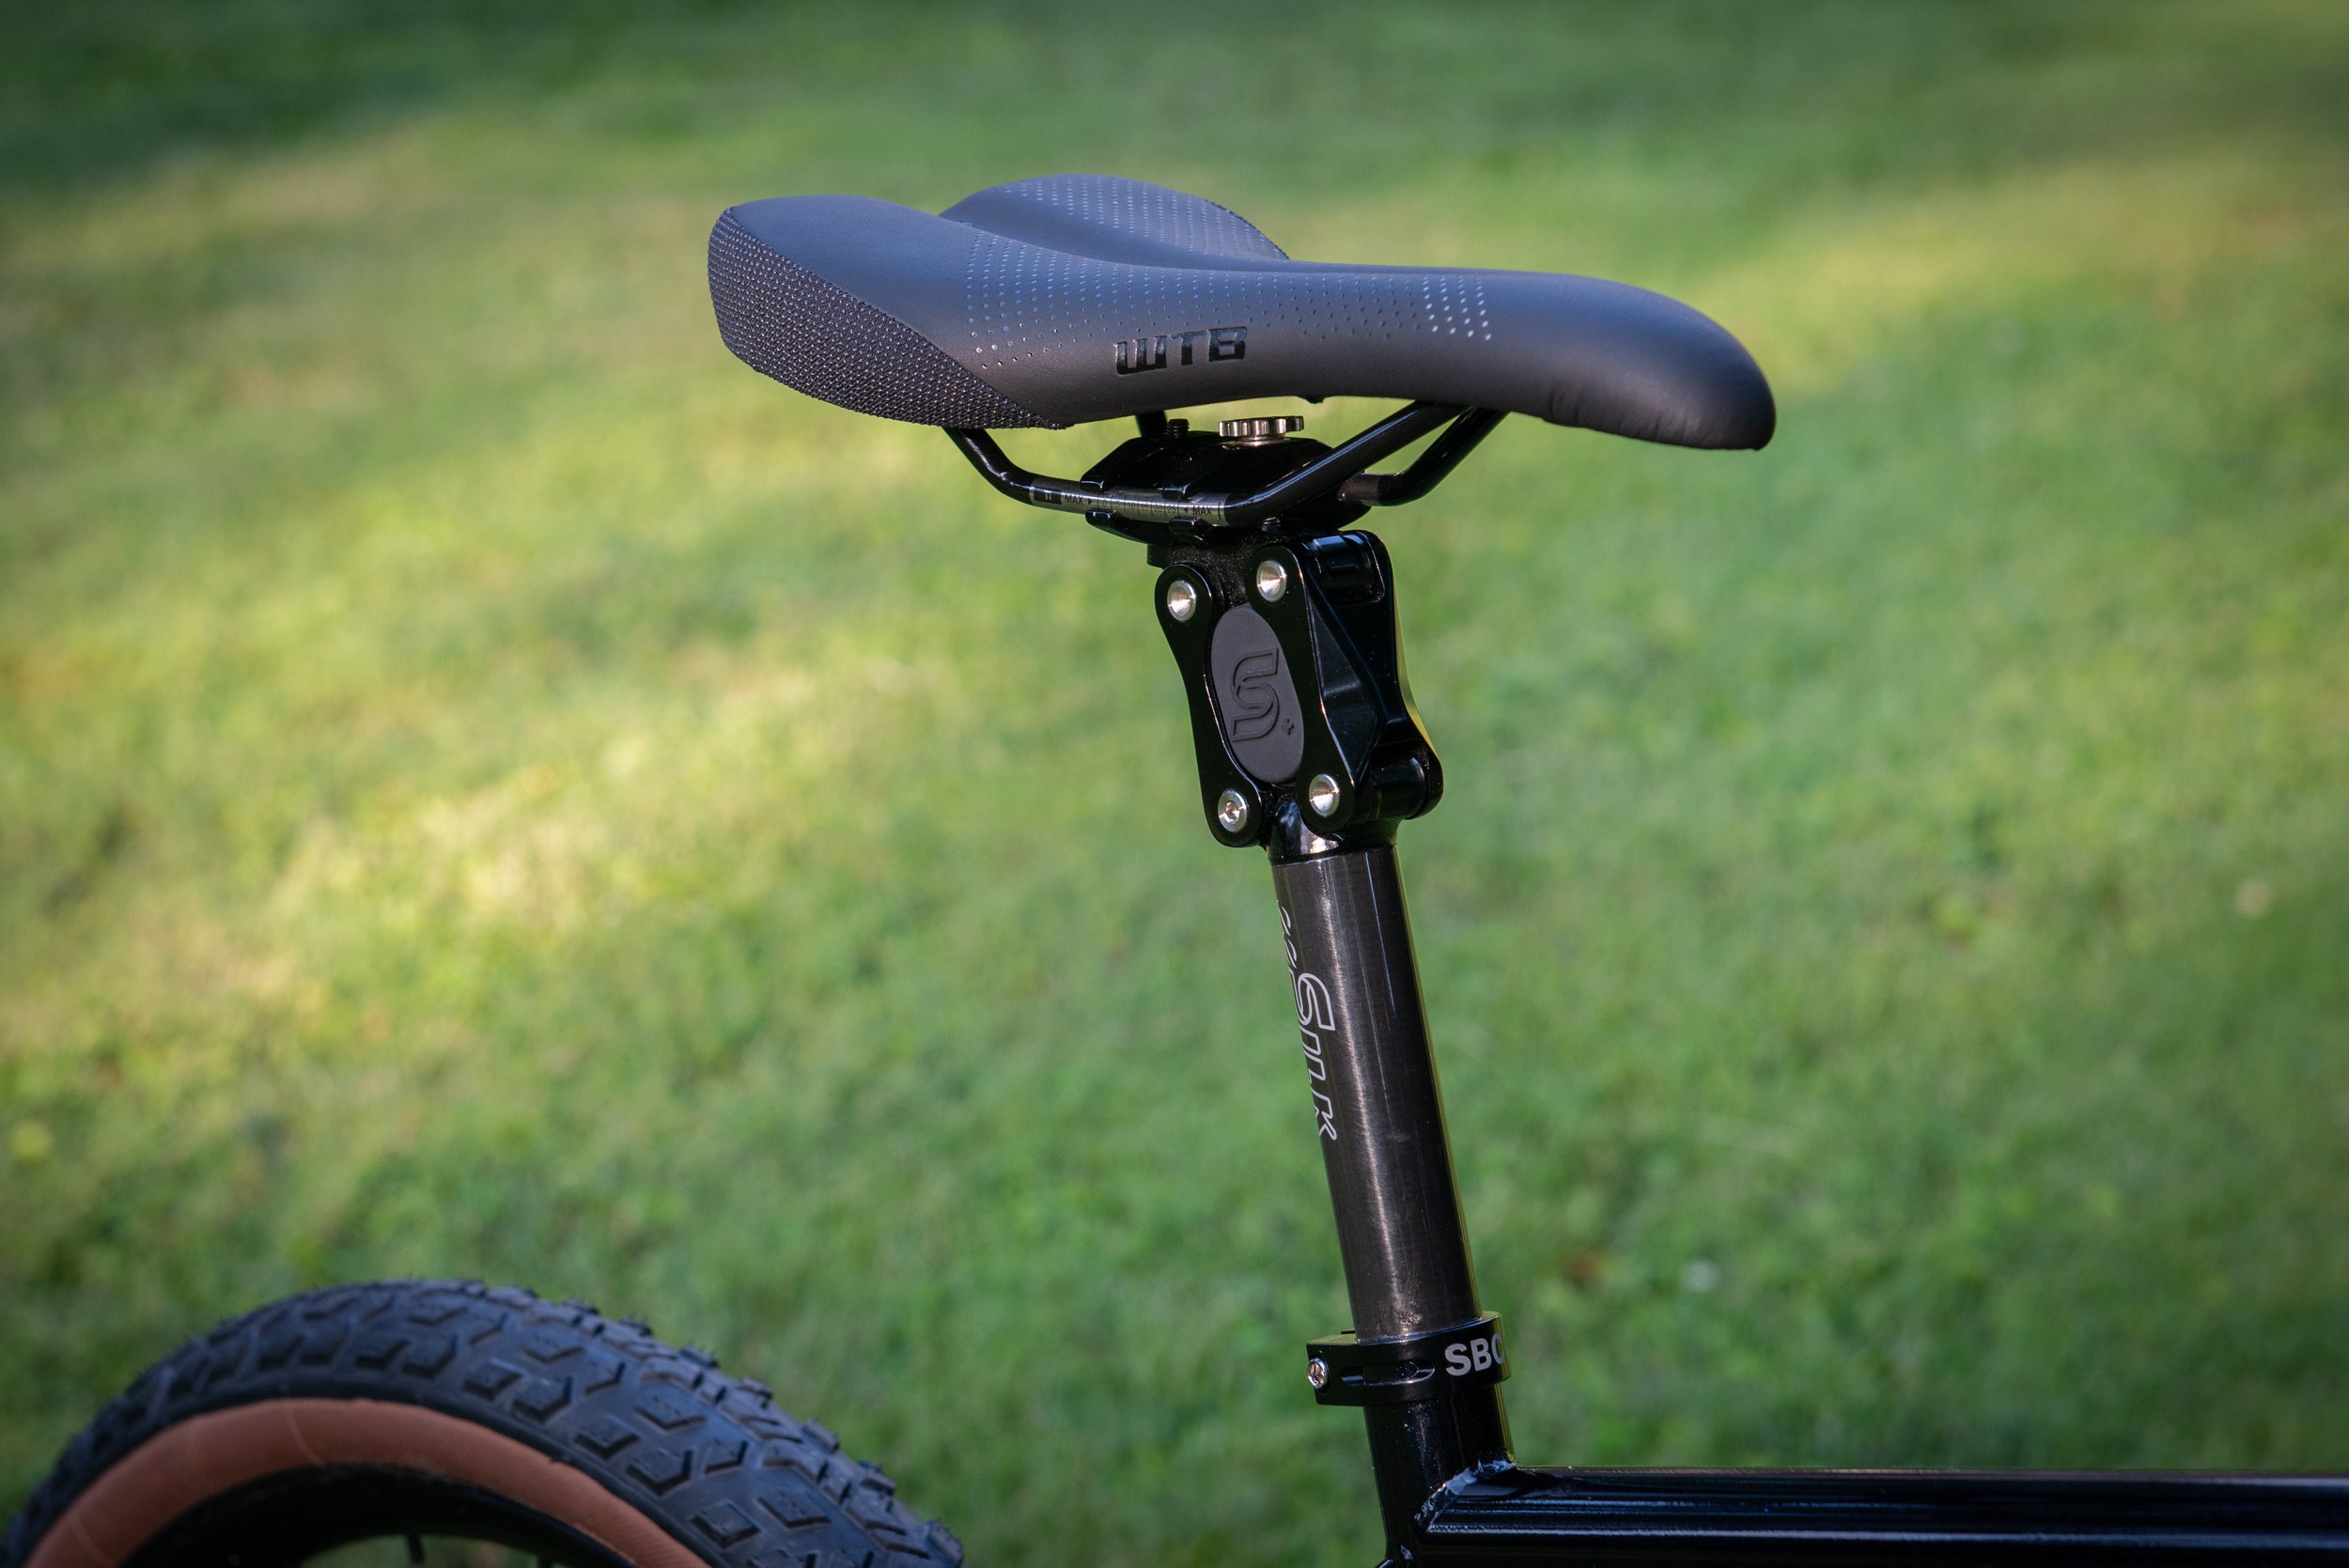
Cane Creek eeSilk+ Carbon Suspension Seatpost
The reason for my search for a new frame was, in part, due to my 3T Exploro's aero post design not accommodating a 27.2mm seatpost. I've been itching to try out the suspension seatposts on the market and finally came across a great opportunity to acquire one. Sure, some riders may opt for a mountain bike style dropper post, but I have my own thoughts on that topic. Stay tuned for a future post where I delve deeper into my stance on the subject. For now, I'm looking forward to putting this top-notch Cane Creek eeSilk+ suspension seatpost to the test and see how it performs.


I've only had the chance to test it briefly on my Trek road bike, but I'm eager to really put the 35mm of compliance offered by the eeSilk+ through its paces. Fingers crossed that it'll live up to its claims of "noticeably softening any gravel or mixed-surface" ride.
This seatpost operates by reducing the chatter transmitted from the surface to the rider. It's based on Cane Creek's Thudbuster suspension seatpost's parallel linkage technology, which stays in the direct path of the rear wheel's natural travel. As a bump lifts the back of the bike, the rear wheel pushes up and forward, directly into the rider. The seatpost incorporates an elastomer to absorb this motion, and the elastomers can be swapped. It comes with a medium elastomer (categorized as #5) by default, but I also bought a slightly softer one (#3) for future adjustment if I prefer a less firm setup.


I went all in and opted for the carbon version, but I got lucky with a great holiday sale that marked it down by 40%. It's not often you can snag a top-quality product at such a discounted price, so I took the chance and I'm glad I did. I'll be sure to provide a thorough update on its performance over time, but from my initial rides on the road bike, I'm already very impressed and can't wait to see how it performs on terrain it was designed for.
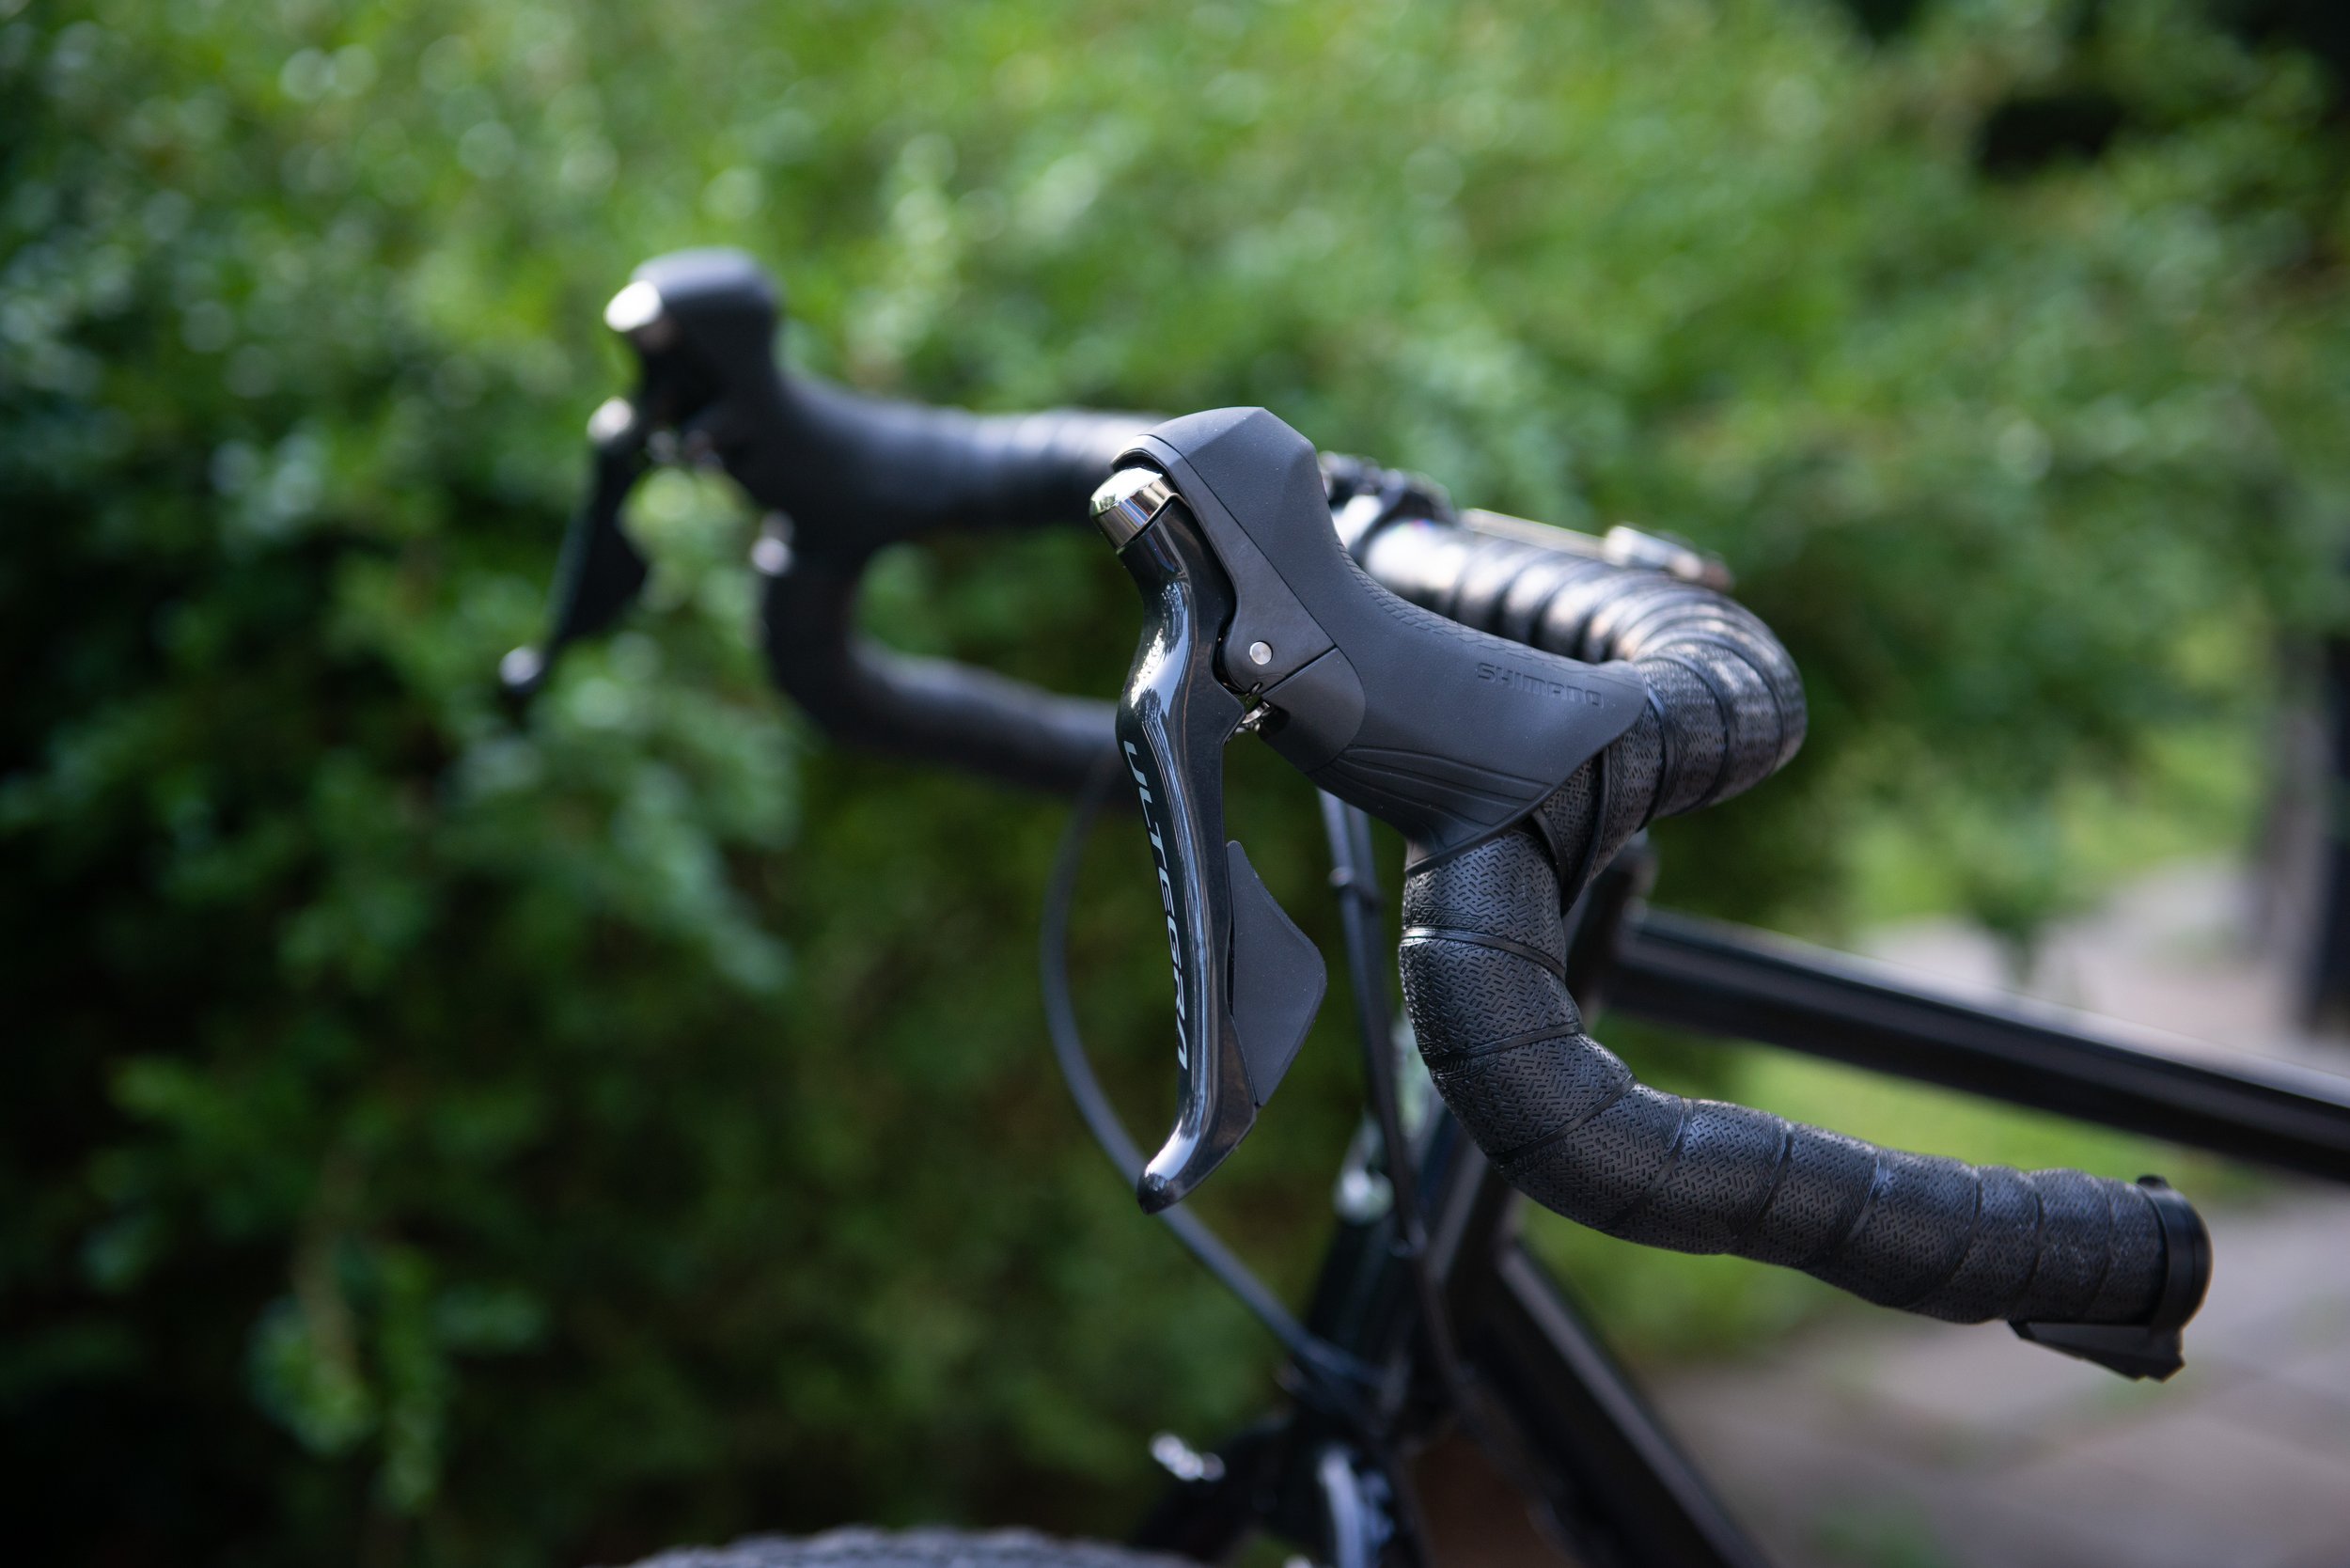
Shimano Ultegra R8000 STI Levers
The next component on the list falls into my "supply shortage panic-buying" category. This isn't a brand-new item (on the market), but it's still "new" to me as these unopened shifters were gathering dust in a box under my desk.

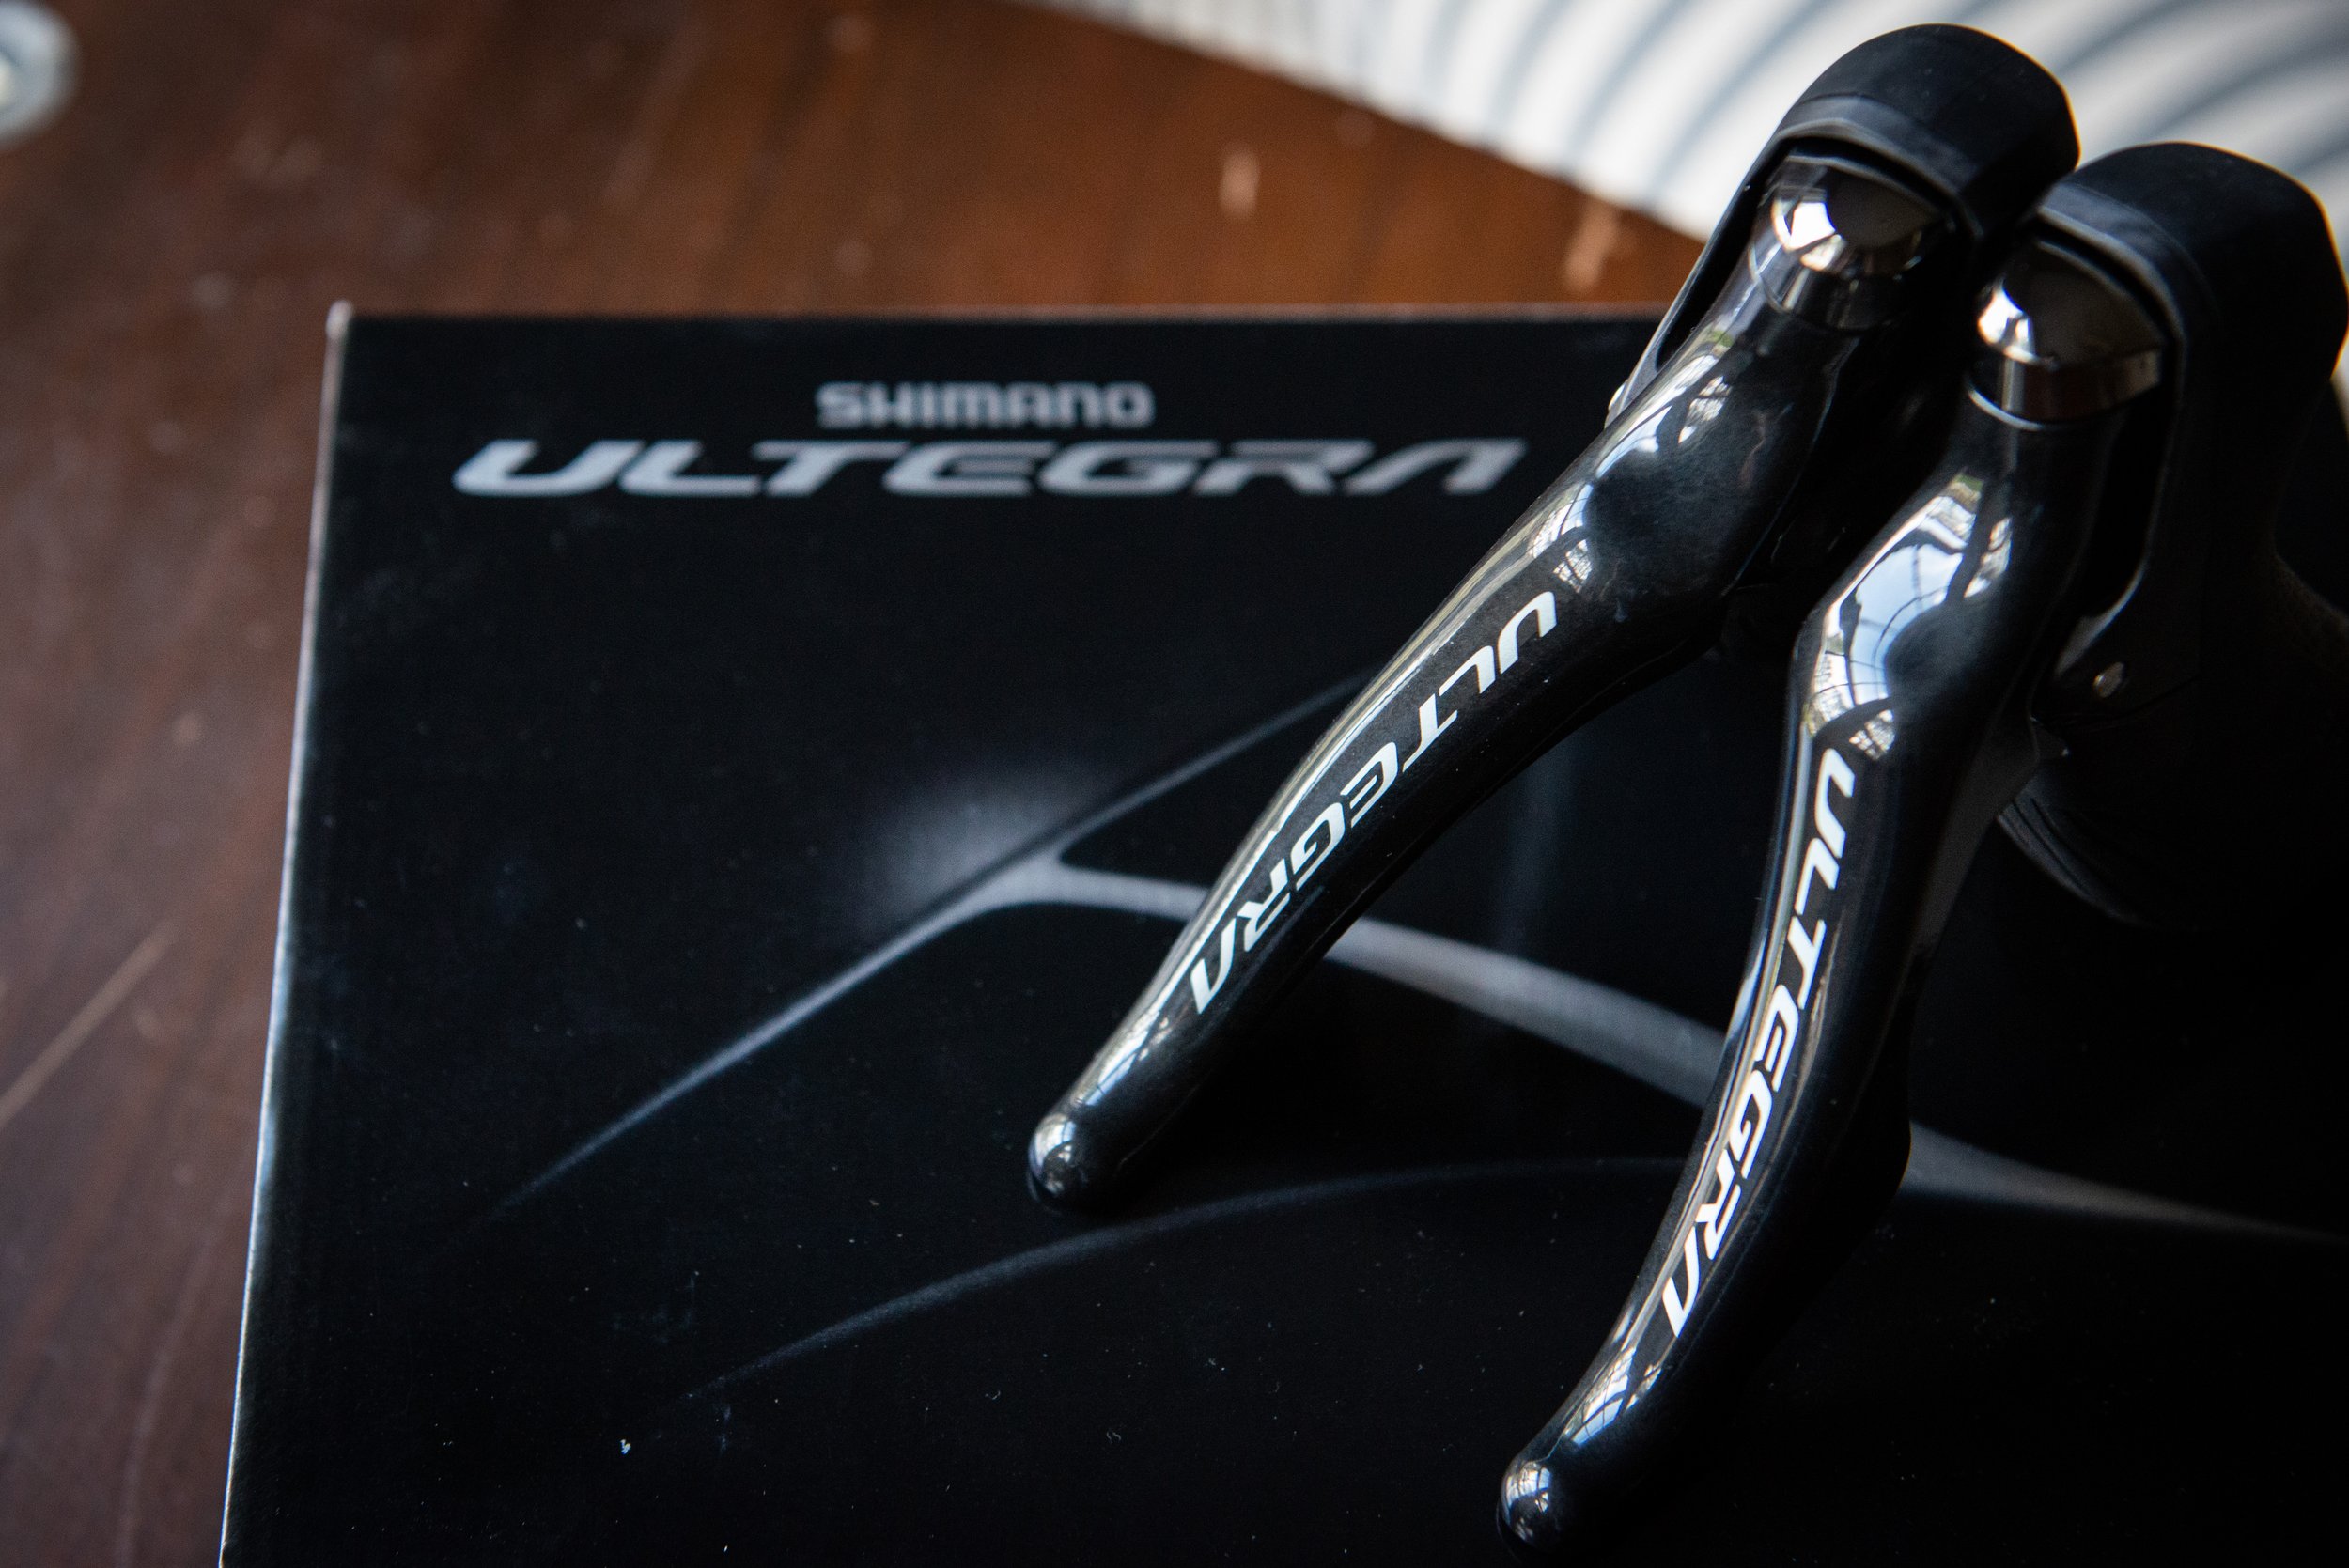
I originally bought these Shimano R8000 shifters with the intention of upgrading the 105 5800 shifters on my road bike, as I thought that any type of shifter will become unobtainable, forever, as the supply chains dried up. That's the power of panic-buying for you! As far as I'm concerned, the Ultegra R8000 shifters from Shimano are still one of the finest shifting systems they've ever made. And what's even better is that they offer the advantage of being significantly lighter compared to the majority of modern hydraulic shifters which can be quite bulky.


Like many other components on my list, I managed to get these at a great deal by adding them to my Amazon wishlist, checking on its status from time to time, and eventually buying them at nearly half the regular price during a sale in 2021. They served as a backup set for my road shifters, but as I pieced together my bike build, I was thrilled to discover how well these R8000 shifters paired with the Growtac brakes. The beauty of mechanical disc brakes is the versatility to pair them with different shifter options. I'll hopefully be using these shifters for many miles to come and I'm confident that it's going to be a fantastic experience.
Shimano GRX 812 Derailleur & M8000 Cassette
I first encountered Shimano's GRX gravel specific groupset when I purchased my 3T Exploro over three years ago. Incredibly, I'm still using the original GRX rear derailleur that came with the bike, even after racking up 21,500km! The only thing I had to replace were the pulley wheels, but even after some rough treatment, the GRX derailleur held up exceptionally well.


The GRX 812 derailleur was one of those items that I feared would be gone forever, due to supply chain issues. I searched everywhere for nearly two years and just couldn't find it in stock. So, when it finally reappeared on online retailer's websites, I jumped at the chance to stock up.
Thankfully, the shortage seems to have passed, for now, and I'm happy to have a spare on hand to fit on my new frame, knowing that I can easily replace it when necessary.
The same reasoning behind stockpiling spares applied when I purchased two Shimano M8000 cassettes, to have extra parts on hand in case I needed to replace worn ones. One of these will now go onto the new State 4130 build.
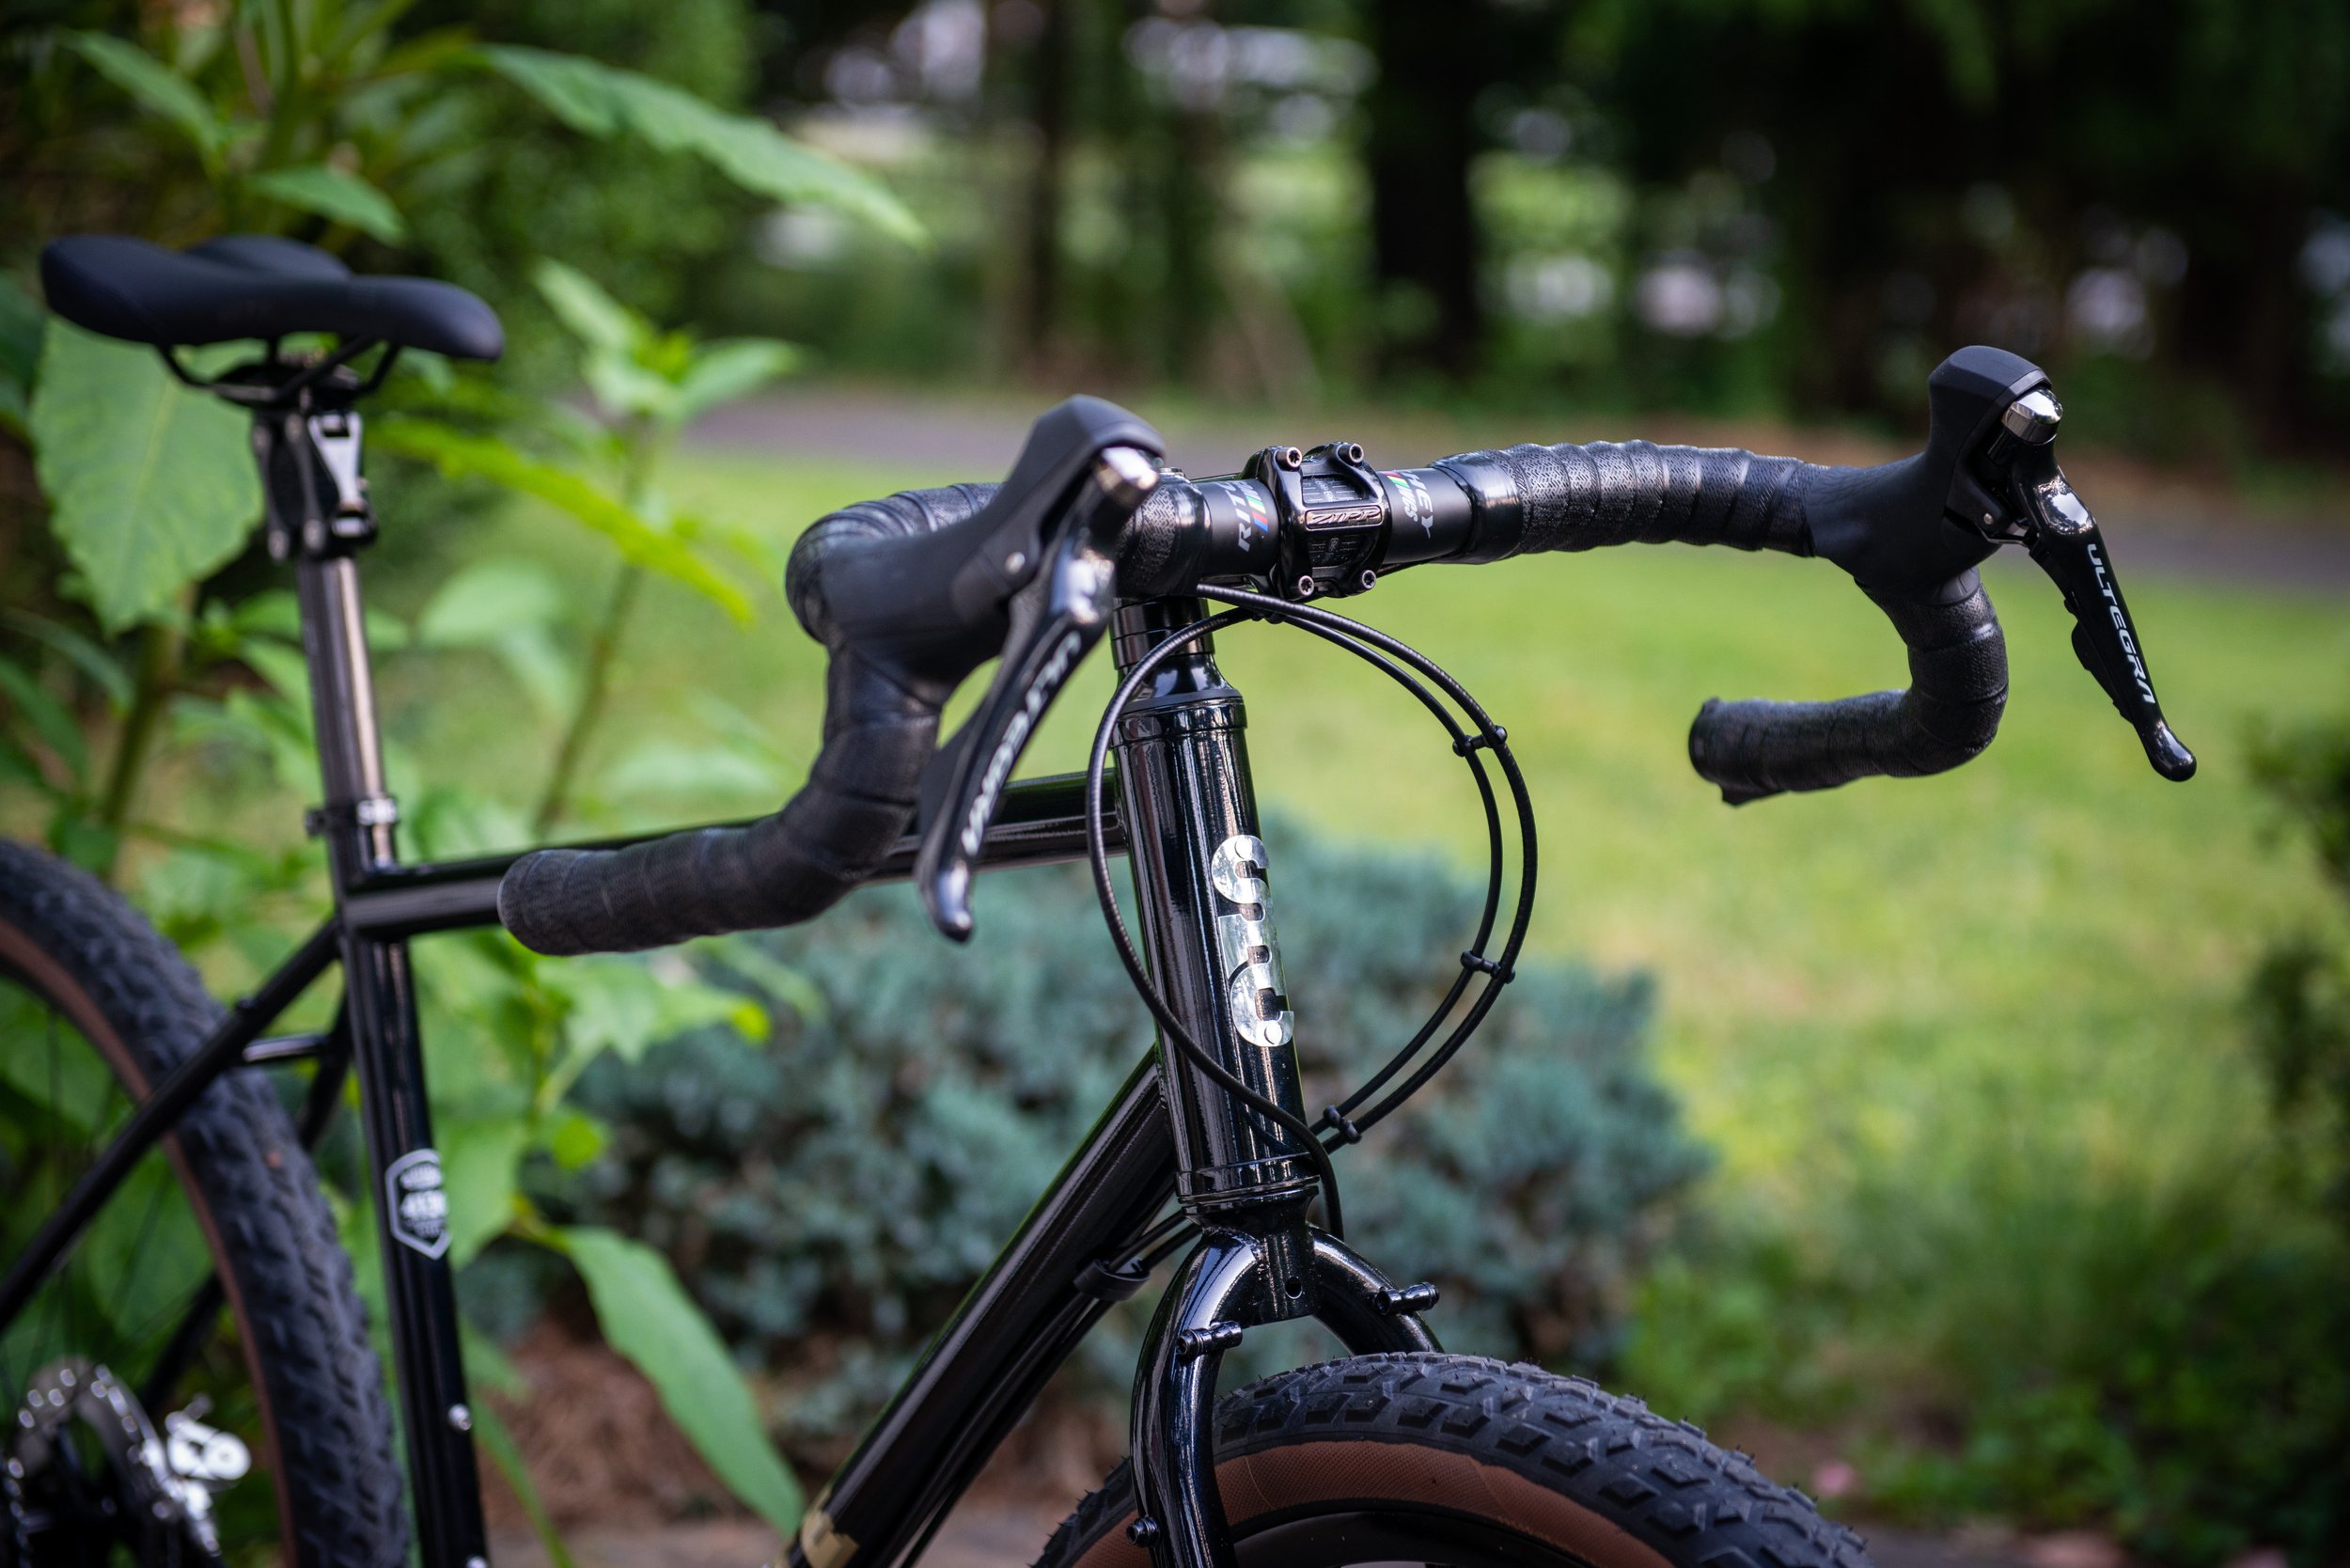
Ritchey WCS Venturemax Handlebar
As I noted in my introduction, the handlebar was one of the parts I needed to purchase specifically for this build. I had reviewed the Surly Truckstop bar in 2021 and have been thoroughly satisfied with it since then. However, for this build, I wanted something a little wider in the drops. Unlike with my 3T Exploro, I don't have the same stack height issue on the State frame, so I can opt for a non-riser bar with the right amount of flare. To me, that means a 24° flare at the drops.


The handlebar is designed with a bio-bend shape for a natural grip and reduced hand fatigue and an aerodynamic top section. It is crafted from triple-butted 7050 alloy and is available in widths from 38cm to 46cm, with the 42cm size being the chosen option. The handlebar features a drop of 102mm, a reach of 75mm, and a 6° flare out and 4.6° back sweep. The clamp diameter is 31.8mm, with an accessory mount of the same diameter. The weight of the 42cm handlebar is 270g.


Given all the positive reviews I've seen, I'm optimistic that I'll be able to give similarly favorable feedback in the future.
WTB Volt Saddle
Scanning through bike listings online, you'll likely see the reliable WTB Volt saddle on several of them. My 3T Exploro came with a WTB SL8 saddle, and I've been thoroughly impressed with it over the years. WTB does an excellent job with their saddle designs, and one standout feature for me is the "ABR corners". These durable patches protect the corners and sides of the saddle from tears and rips. After accidentally knocking my bike over a few times, I've found these reinforced corners to be incredibly valuable in protecting the saddle from further damage.


For this build, I decided to go with the Volt for the added comfort it provides over the SL8's racing feel. The extra padding is what I was looking for in a saddle given the type of riding I'll be doing on this setup.
Components - The Not so New:
Zipp Service Course Stem
When it came to selecting a stem for my latest build, I was initially drawn to the Redshift Sport Shockstop Pro Suspension Stem. After all, this stem had generated quite a bit of buzz in the cycling community for its promise of a smoother and more comfortable ride. However, after two months of testing it out on my 3T Exploro, I found myself sorely disappointed with its lackluster performance. Despite its supposed "suspension," I actually experienced extreme feedback from the stem and found myself reaching out to the company for clarification. After realizing an exchange wasn't worth it, I ended up returning the stem for a refund.


Left with a trusty stem sitting in my parts bin, I opted for the 90mm Zipp Service Course SL stem instead. While not as flashy as the Redshift, it should do a solid job of securing my new Ritchey handlebar in place and providing a reliable connection in the headset that allows the State steel frame to do its job of absorbing shock.
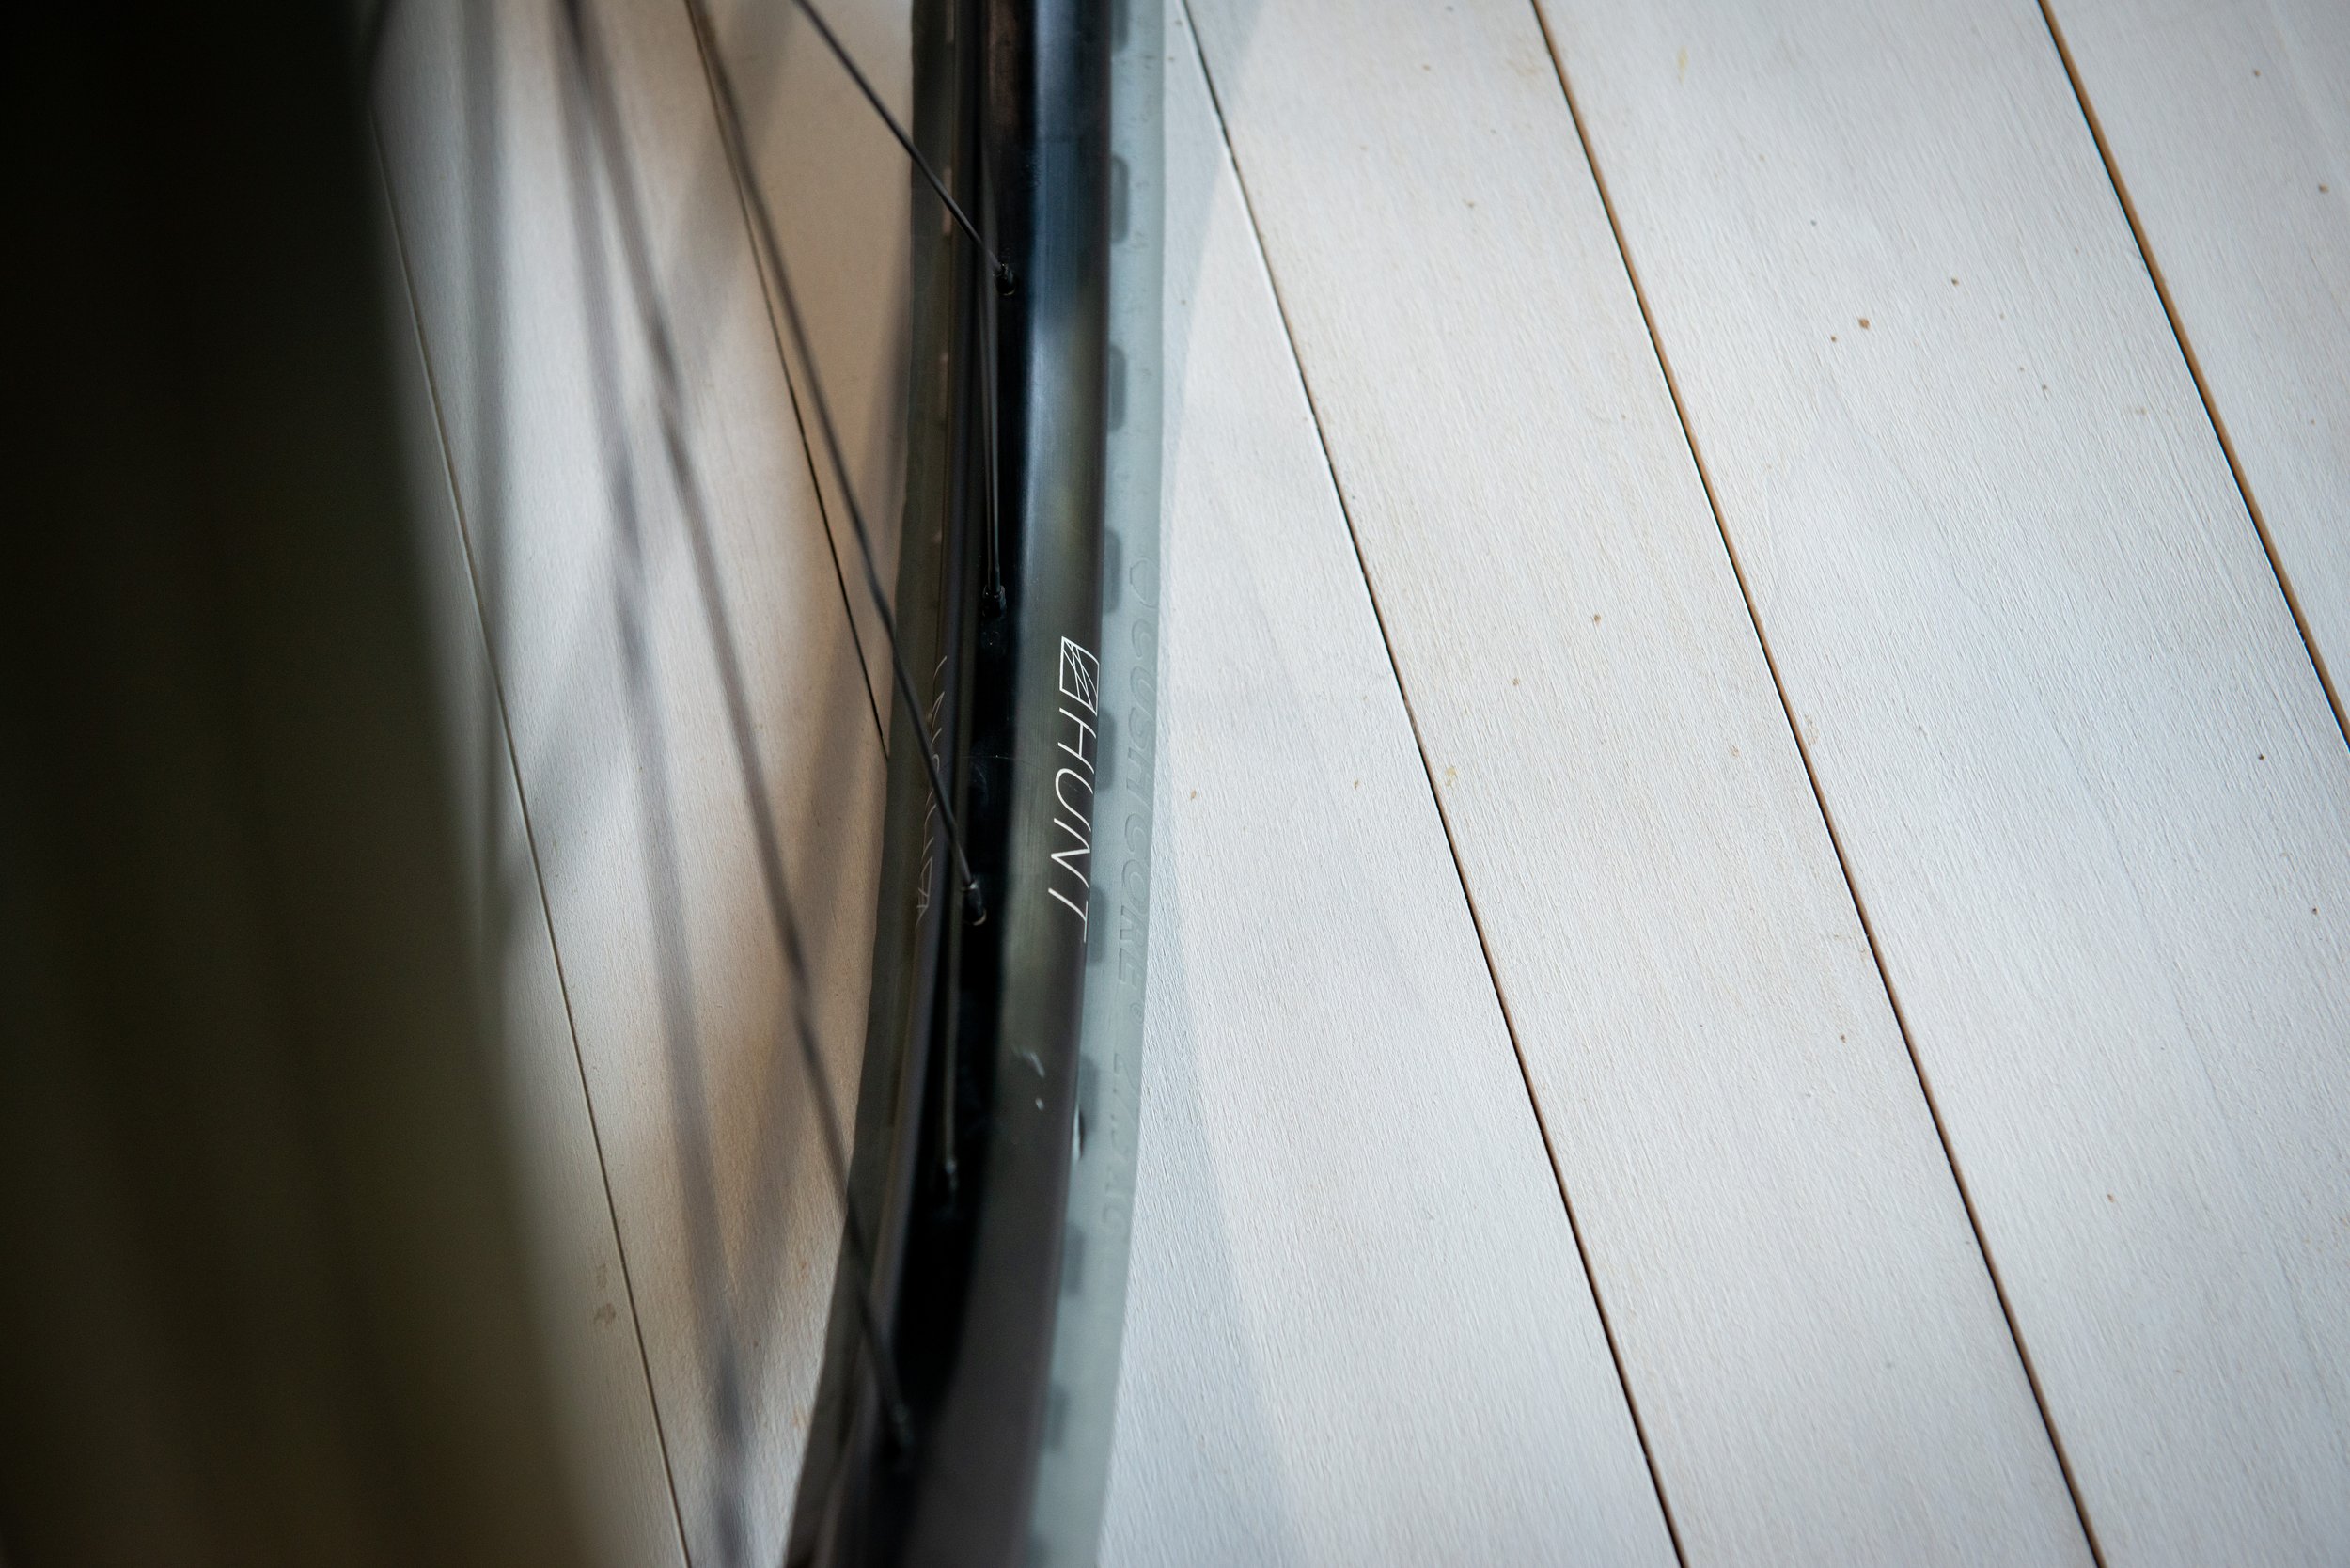
Mason x Hunt 650b Adventure Sport Disc wheelset
The Hunt 650B wheelset is a versatile option that offers incredible value for money. In my opinion, 650B size wheels are some of the most underrated on the market. They are often referred to as the "party size" due to the highly entertaining and comfortable riding experience they provide.

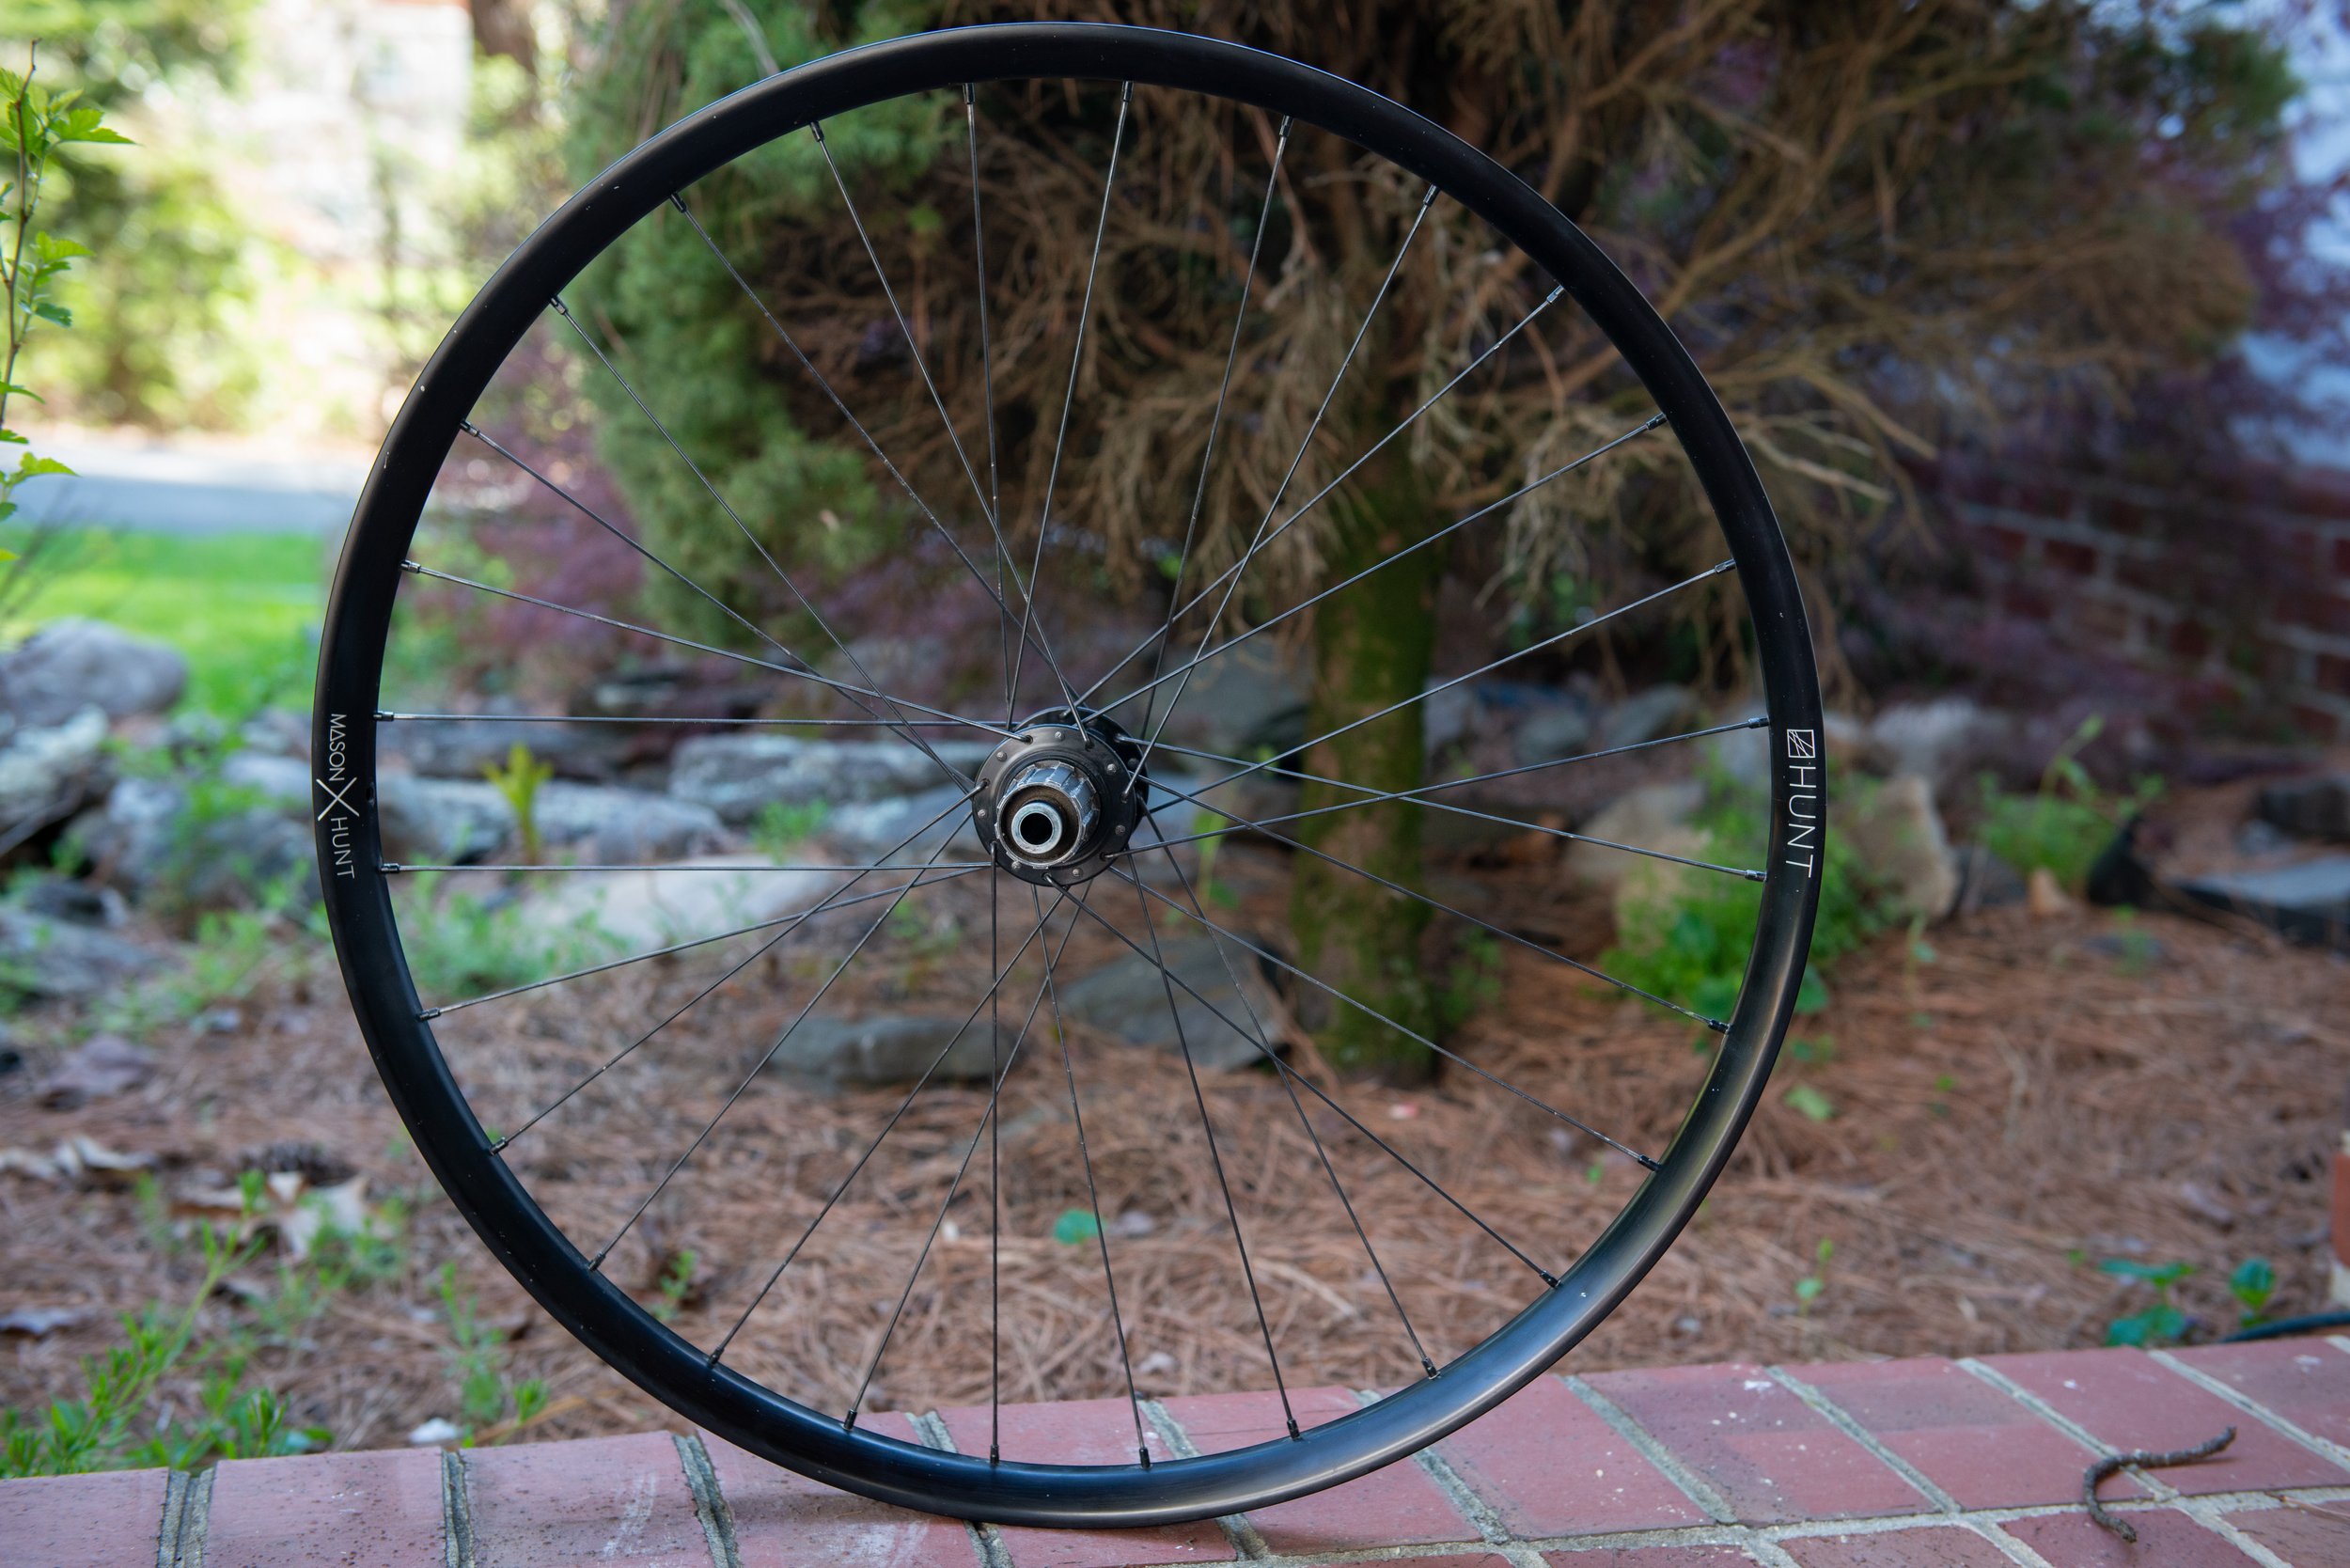
I've been riding with this wheelset for over two years now and it's still performing incredibly well. I've taken it on numerous cycling adventures and put it through some heavy use, as evidenced by my Rockstar bikepacking trip and Gravelocity "Gravel Ride of the Week." Despite the abuse, it has held up remarkably well.


At a price point of under $500, I highly recommend this wheelset. I'm thrilled that it will now have a permanent place on one of my bikes. My 3T Exploro will be dedicated to racing with 700C wheels, while the State All-Road will sport the Hunt 650Bs.
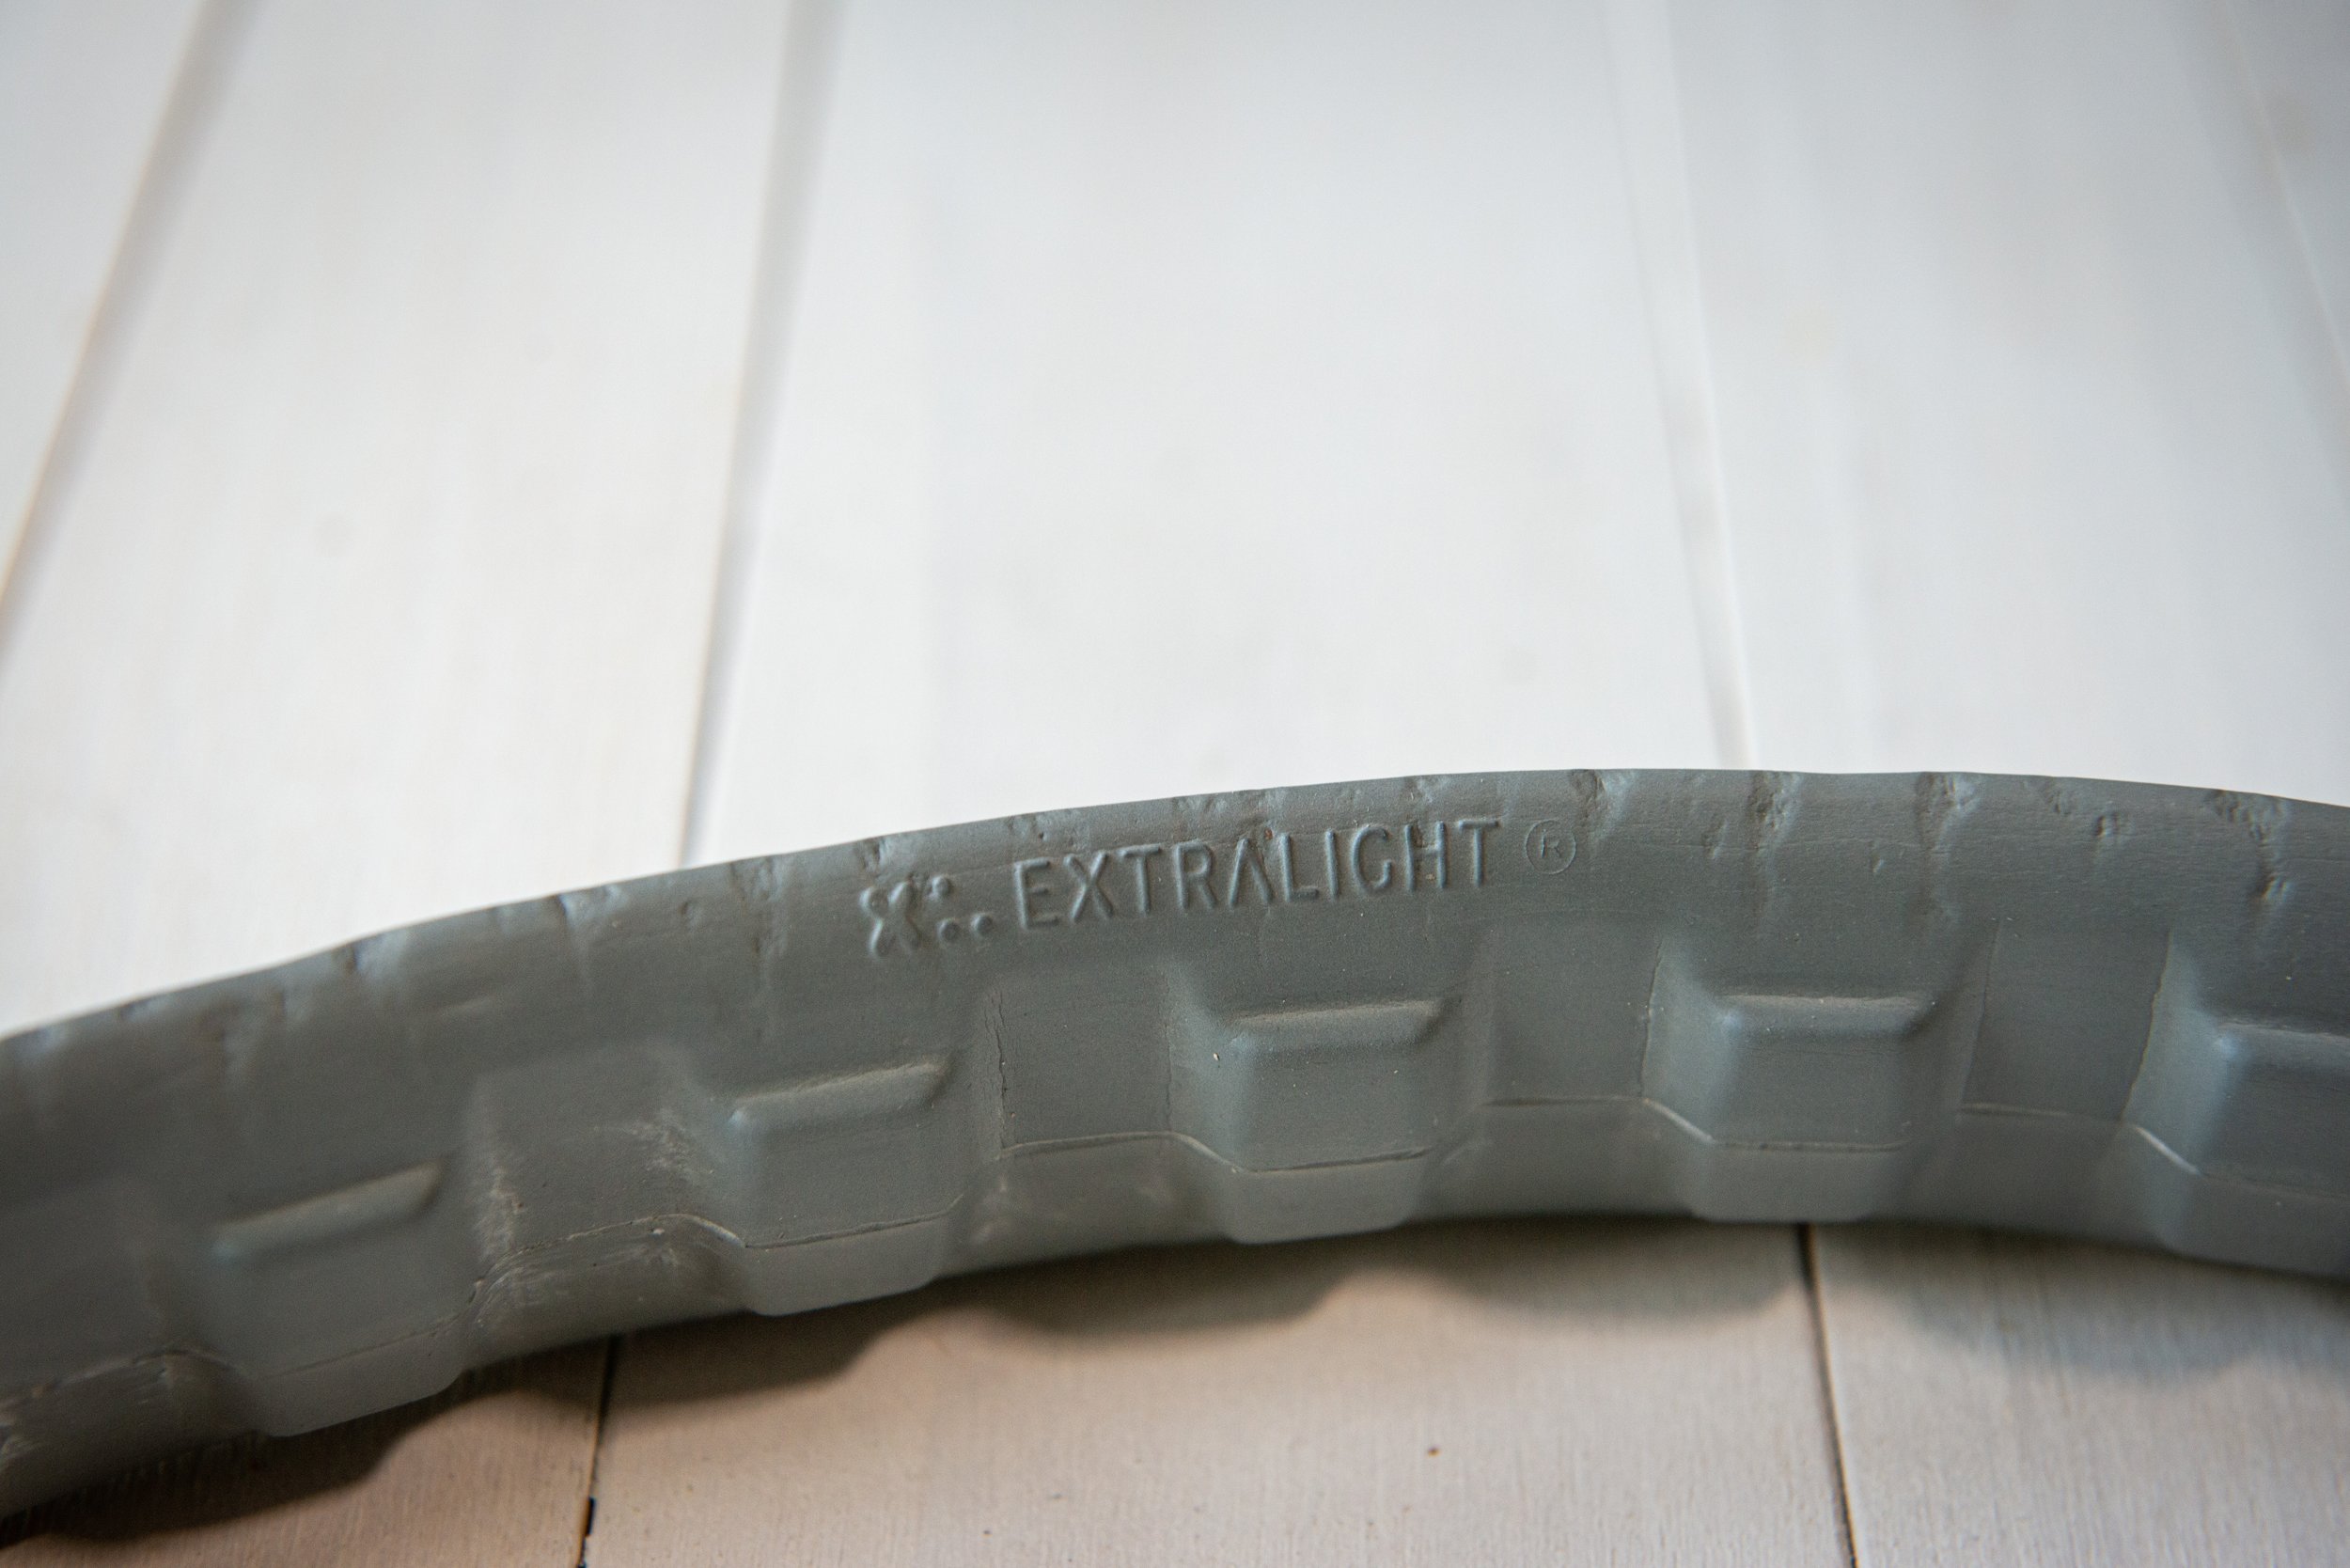
Pirelli Cinturato Gravel M Tires (650B x 50mm)
When it comes to tires for my State All-Road bike build, there was no question in my mind about what to choose - the Pirelli Cinturato Gravel M tires. I've already put these tires through the wringer in a previous review and I can wholeheartedly say they are the best tires I've ever owned.


From snow to ice, thick mud to loose sand, smooth roads to rough terrain, these tires have proven their versatility time and time again. I was only met with one puncture (during 2+ years of use), which was quickly sealed with the sealant in the tire, and the tires have held up exceptionally well under heavy use and abuse.
Given their exceptional performance, I had no hesitation in replacing my worn-out tires with the exact same pair. The State All-Road's frame can accommodate the 50mm wide tires with ease and might even have room for a slightly wider tire, but I'm more than happy with the performance of these Pirelli Cinturato Gravel M tires. I'm excited to see what adventures lie ahead with these tires on my bike!
Cush Core XC Tire Inserts
The phrase "game-changer" is often overused, but the Cush Core tire inserts are truly deserving of this title. They have transformed the type of terrain I can tackle with ease and confidence. Recently added to my 650bx50mm setup, these inserts have exceeded my expectations. I opted for the XC version, designed for cross-country racing, light trail riding, and less aggressive riders, and it has been perfect for my needs. The inserts have allowed me to lower my tire pressure from 23 psi to around 19-20 psi in each tire, which has tremendous implications for the bike's capabilities.


Not only have the inserts added comfort to my ride, but they have also provided stability when navigating rough terrain. Hard impacts on rocks or tree roots are significantly reduced, and the inserts help prevent rim damage. Mountain bikers have been relying on this product for years, and now I understand why. The hype is definitely real!
Given the adventures I have planned for my State bike, these inserts will help make the ride much more comfortable and enable this "All-Road" bike to venture off-road far more.
Praxis Works ALBA M30 crankset + Bottom Bracket
The Praxis crankset is a one of the most worn and used component in my list of parts for this build. It originally came with my 3T Exploro and served me well, but in an effort to make my 3T lighter, I replaced the ALBA alloy cranks with the carbon Zayante version. This left me with a convenient crankset option for the new build. Although it has some wear and tear, I had a trick up my sleeve to spruce it up - keep scrolling to see what a little elbow grease and some 3M vinyl car wrap can do to make this old crankset look totally different.


Compatibility with bottom brackets can be an issue for the Praxis crankset, as only a few manufacturers offer BBs that fit its 30mm drive-side and 28mm non-drive-side bearings. Outside of Praxis' own offerings, BB Infinite and Wheels Manufacturing are the only options I'm aware of. I went with the cost-effective Praxis version.


For a true bike nerd, the threaded bottom bracket on my new State frame is a highlight. No more pounding away with a hammer to remove a press-fit bearing - just a M30 tool and a wrench are all I need for maintenance. The 68mm road BB standard on the State frame makes it possible to reuse my narrow Q-factor Praxis crankset, which is still in good shape, so there's no need to replace a component that's not broken.


WolfTooth 36T Chainring
Another component on my bike build list that has seen significant use over the last few years is the chainring. While I appreciate the Praxis crankset, the one aspect that I dislike is the Praxis chainring design. The "wave-form" pattern of the chainring teeth is, in my opinion, a poorly designed concept. I found that I was frequently experiencing dropped chains and the wear rate was much higher than I would have liked.
In search of a more reliable alternative, I decided to look for a chainring that could fit on the Praxis 3-bolt SRAM style direct mount crankset. After some research, I settled on the offerings from Wolftooth. I have been using their oval-shaped chainrings for a few years now, and they have proven to be a great choice. The "narrow-wide" design provided by Wolftooth is much more reliable in keeping the chain in place, and the company's marketing materials rightfully claim that it is a "drop-stop" solution. The chain wear rate has also been significantly lower than what I experienced with the Praxis ring.
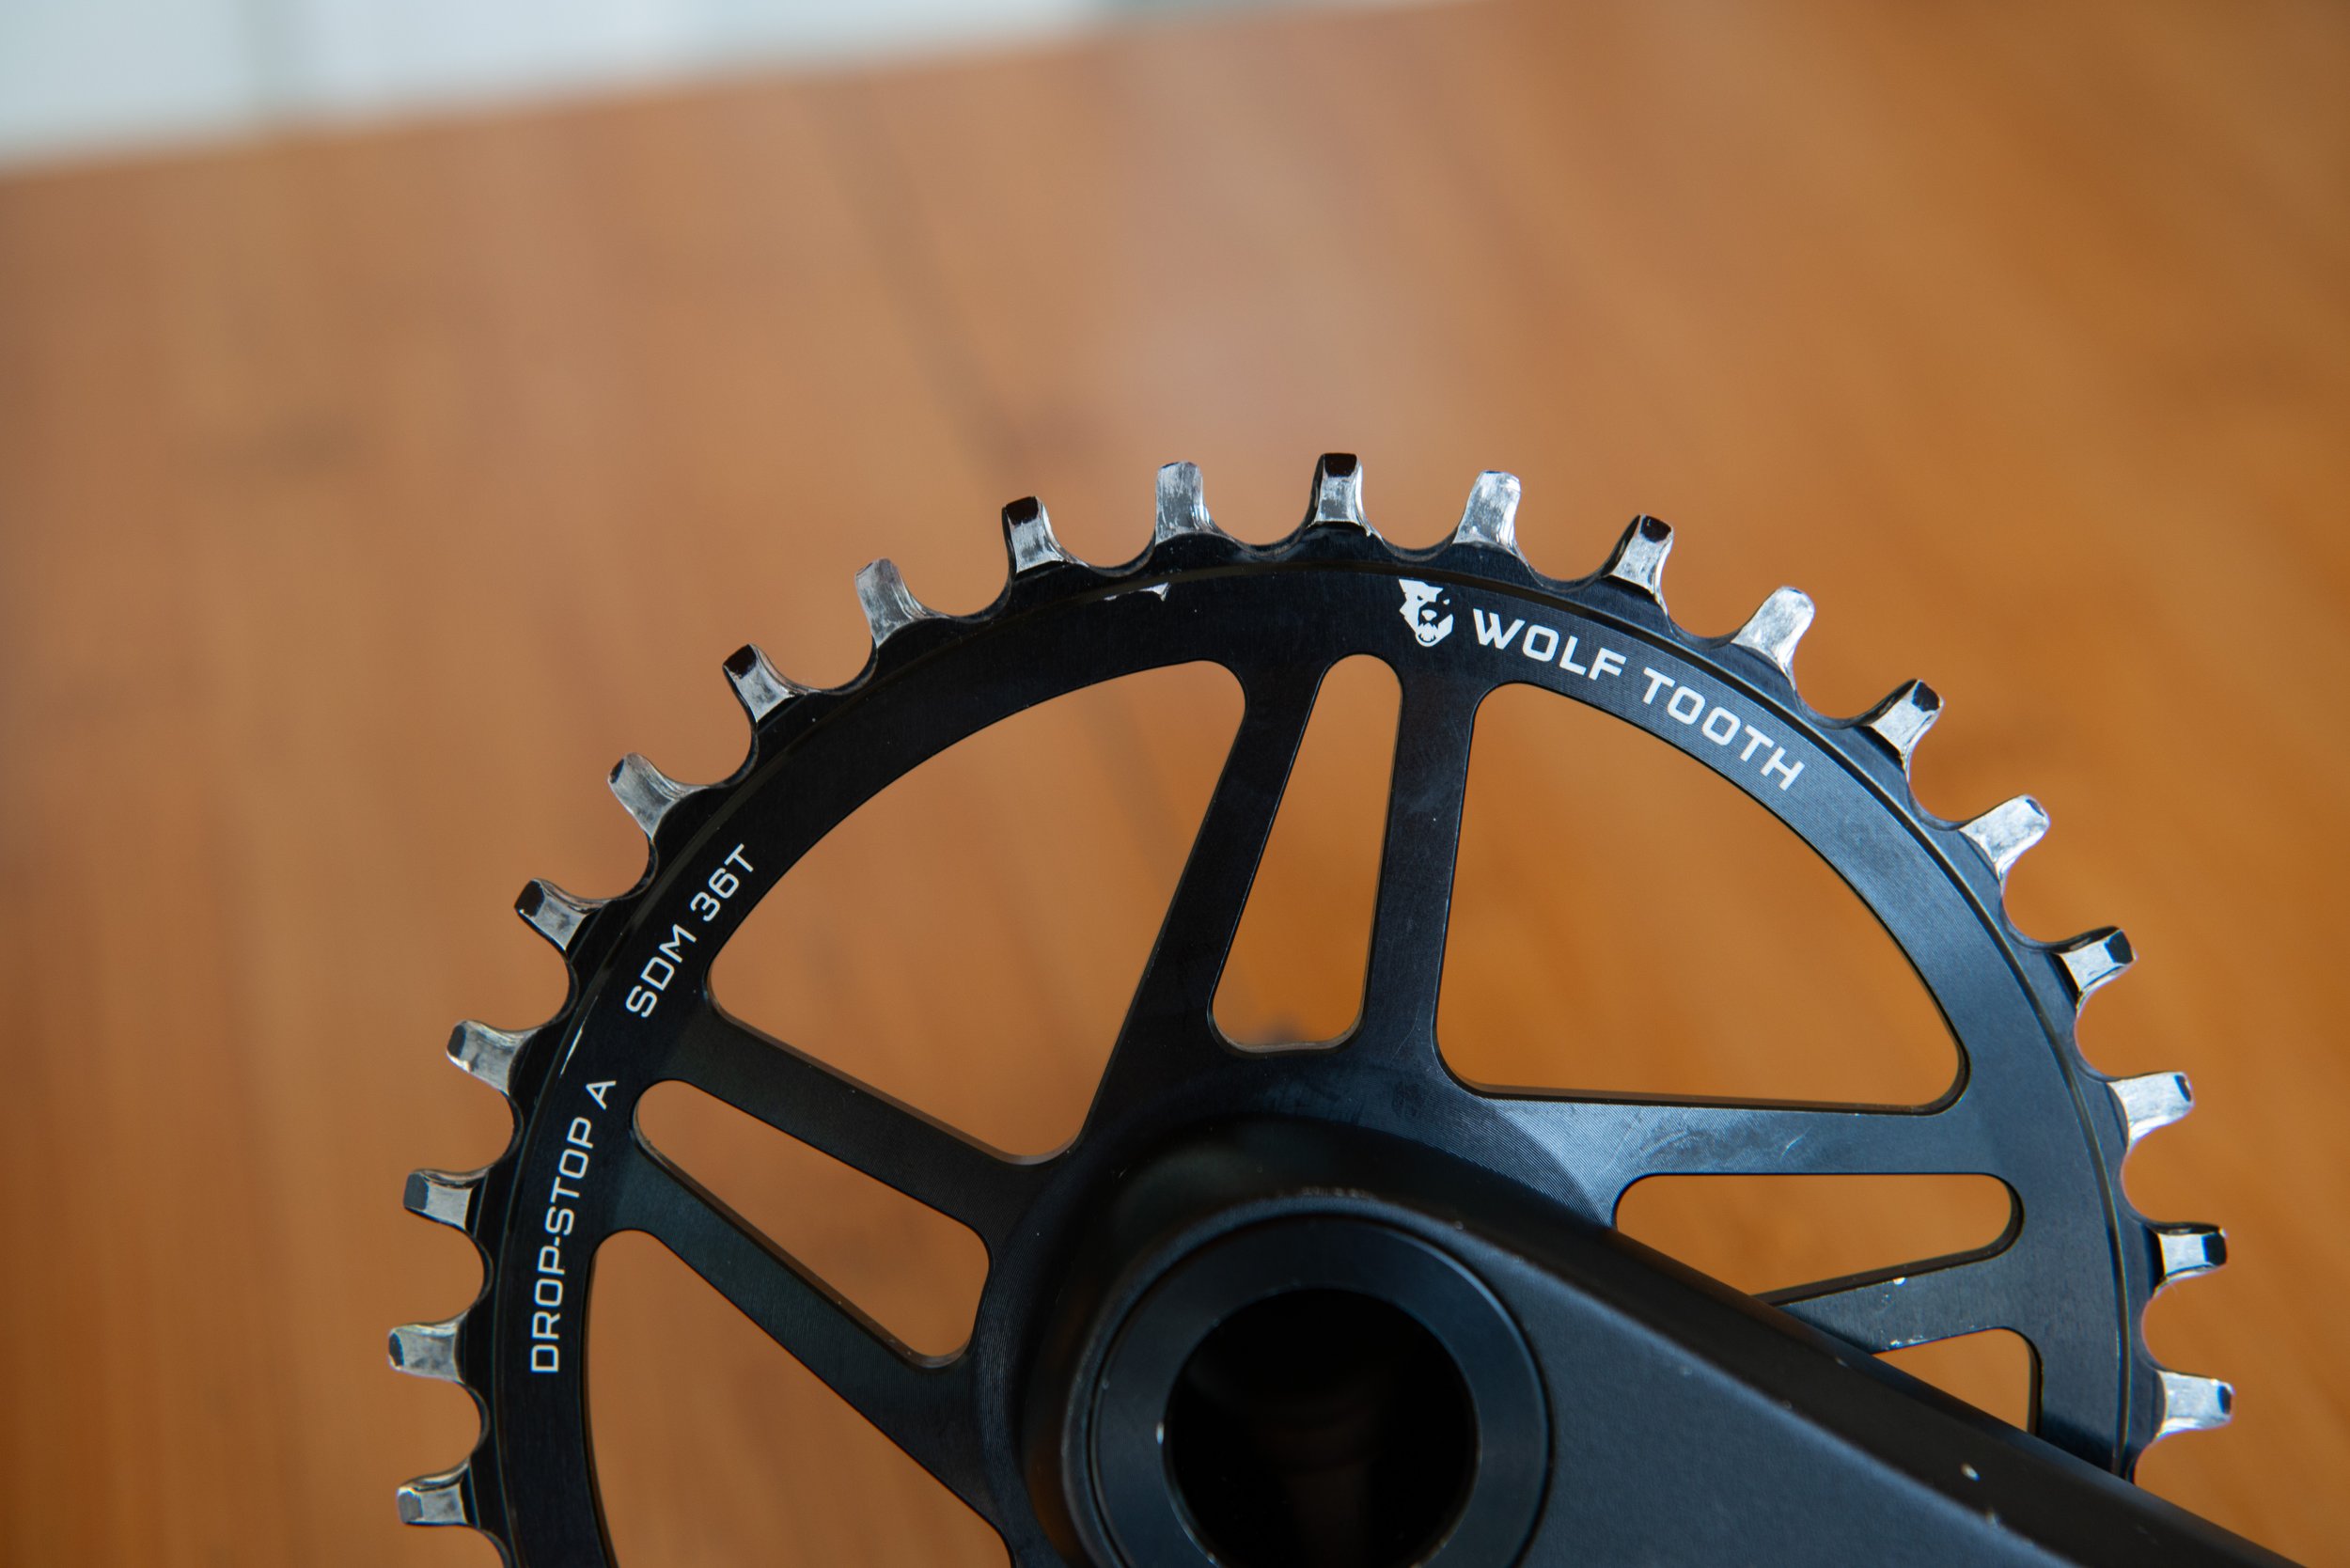
For this build, I opted for a 36T chainring, as I believe it will provide enough range for my needs. I am not concerned with speed for this build, as I expect the bike to be on the heavier side. My main focus is the ability to handle the steep climbs that we have here in Virginia, so I am willing to sacrifice top-end speed for easier gear range.
If this 36T chainring can help me, and my loaded bikepacking setup, navigate the Virginia mountain ranges during my Rockstar adventure, then I am confident that it will be the perfect match for this new build.
Some final touches
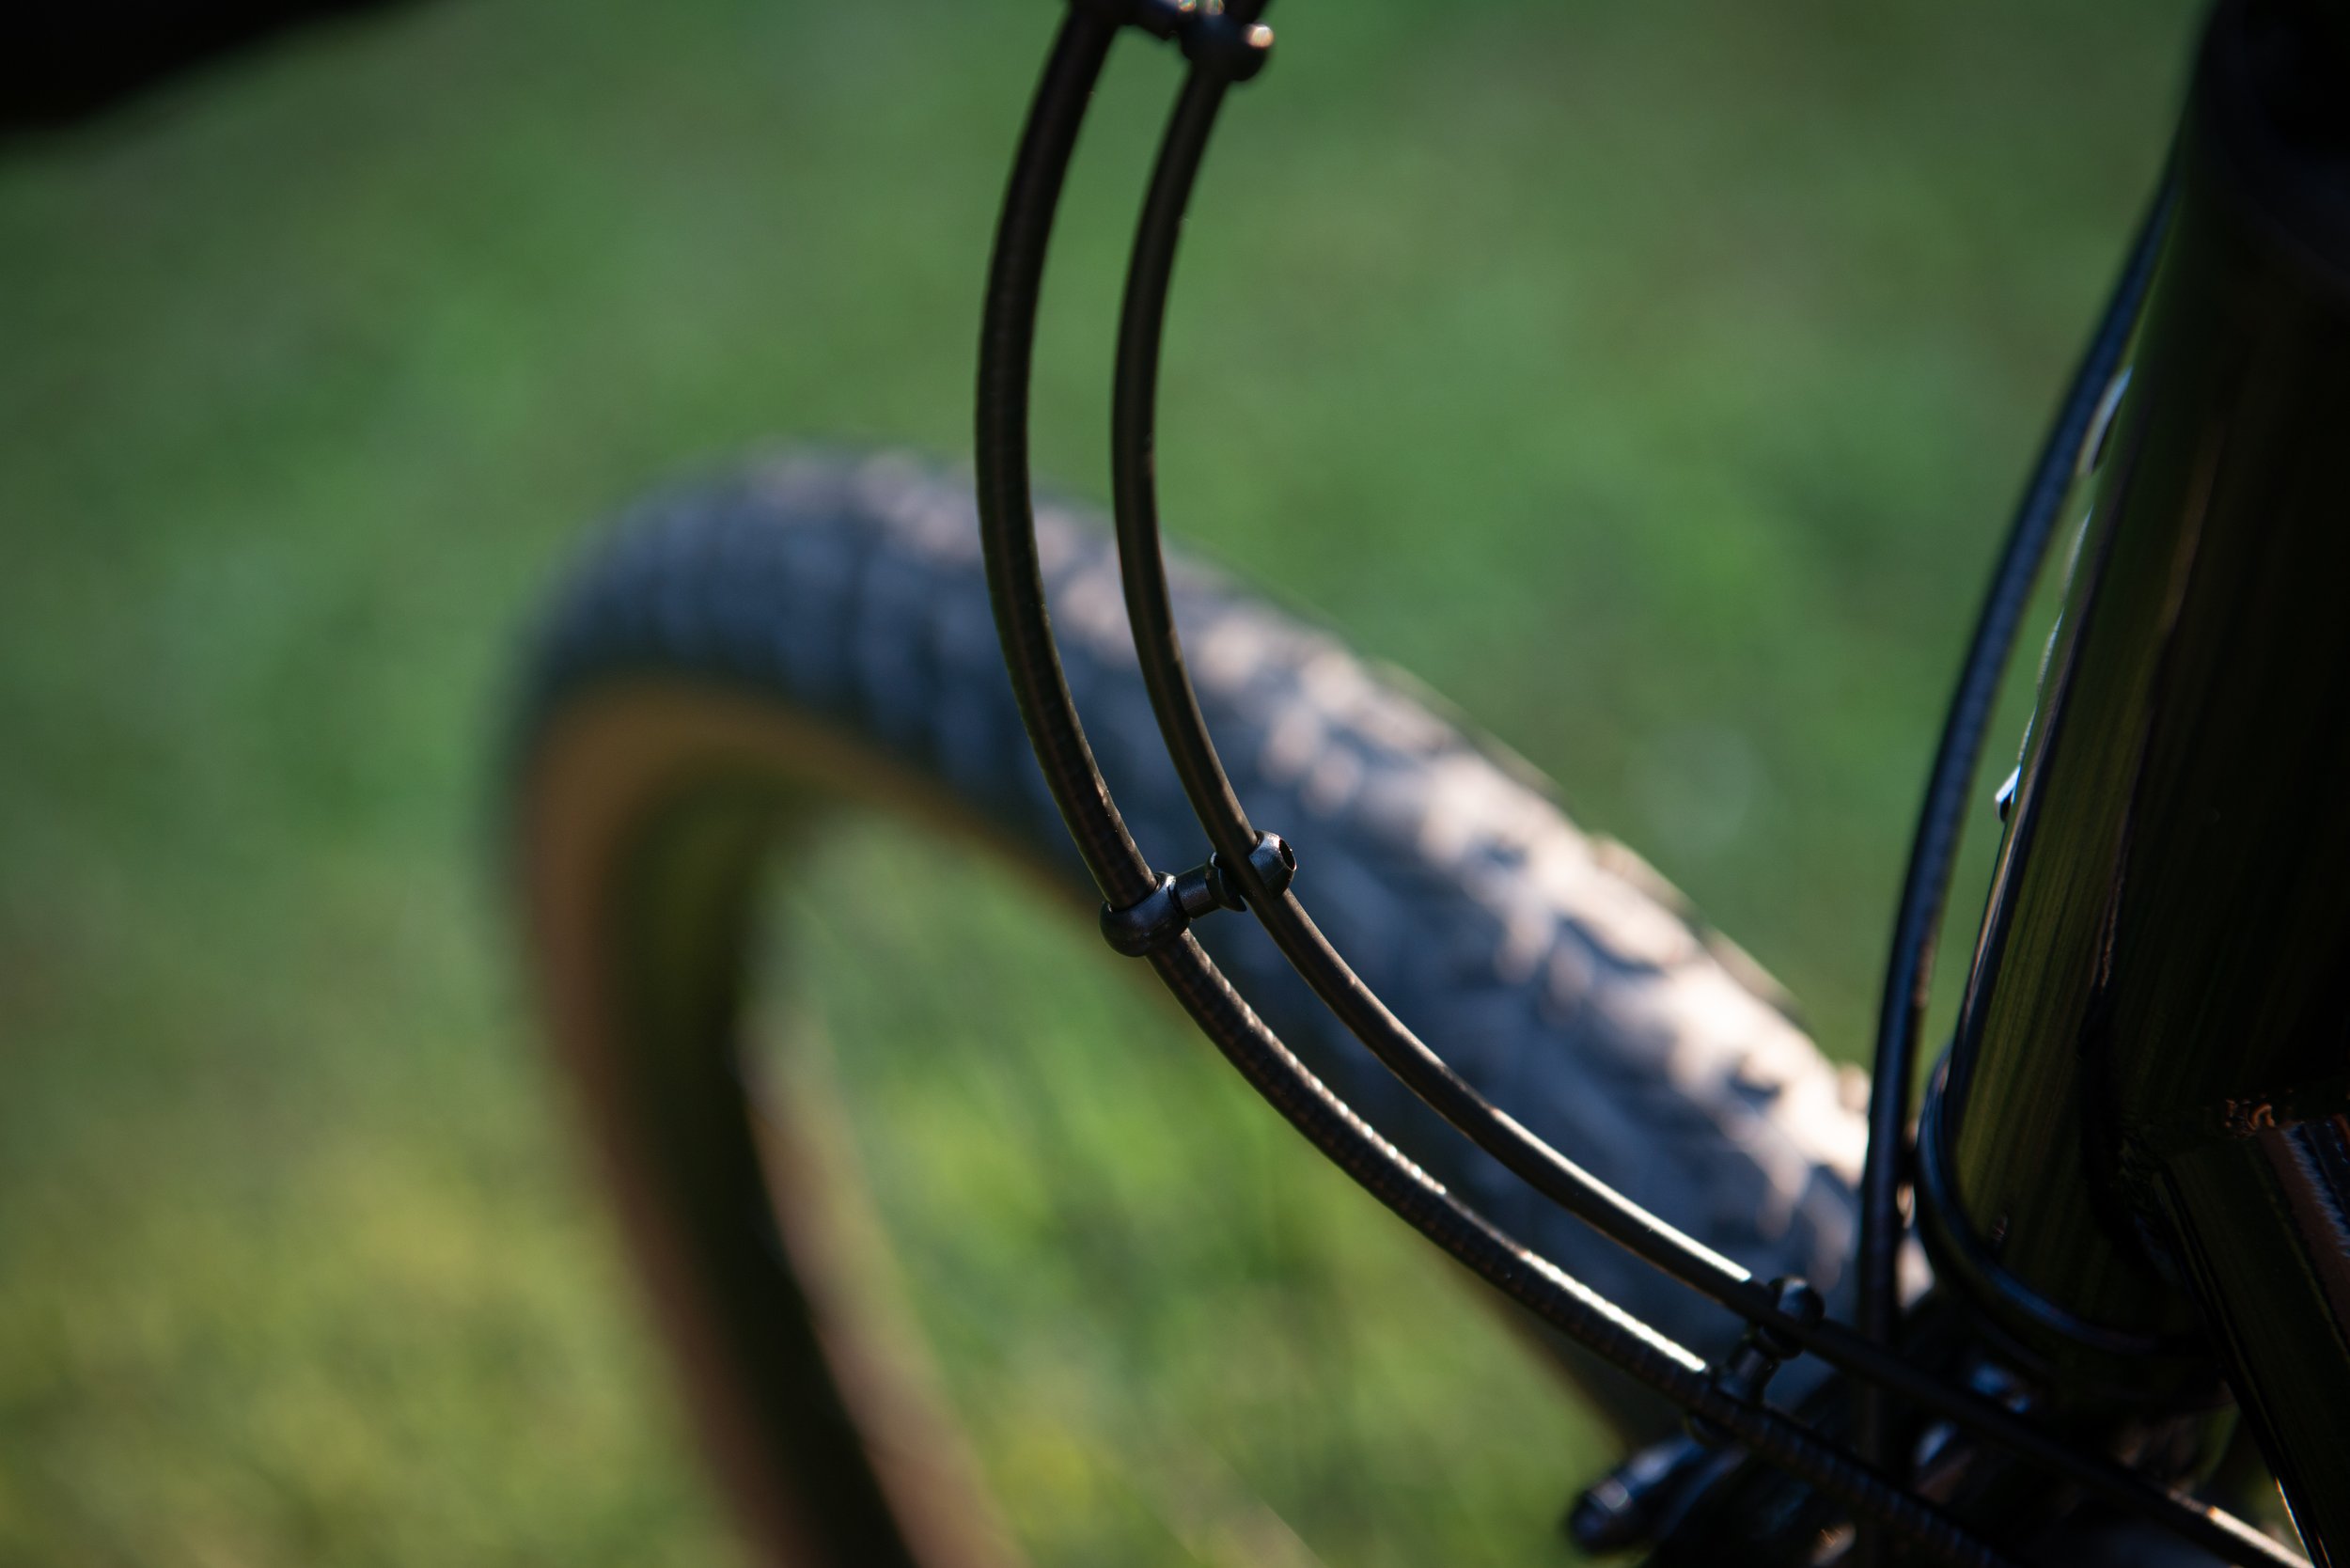
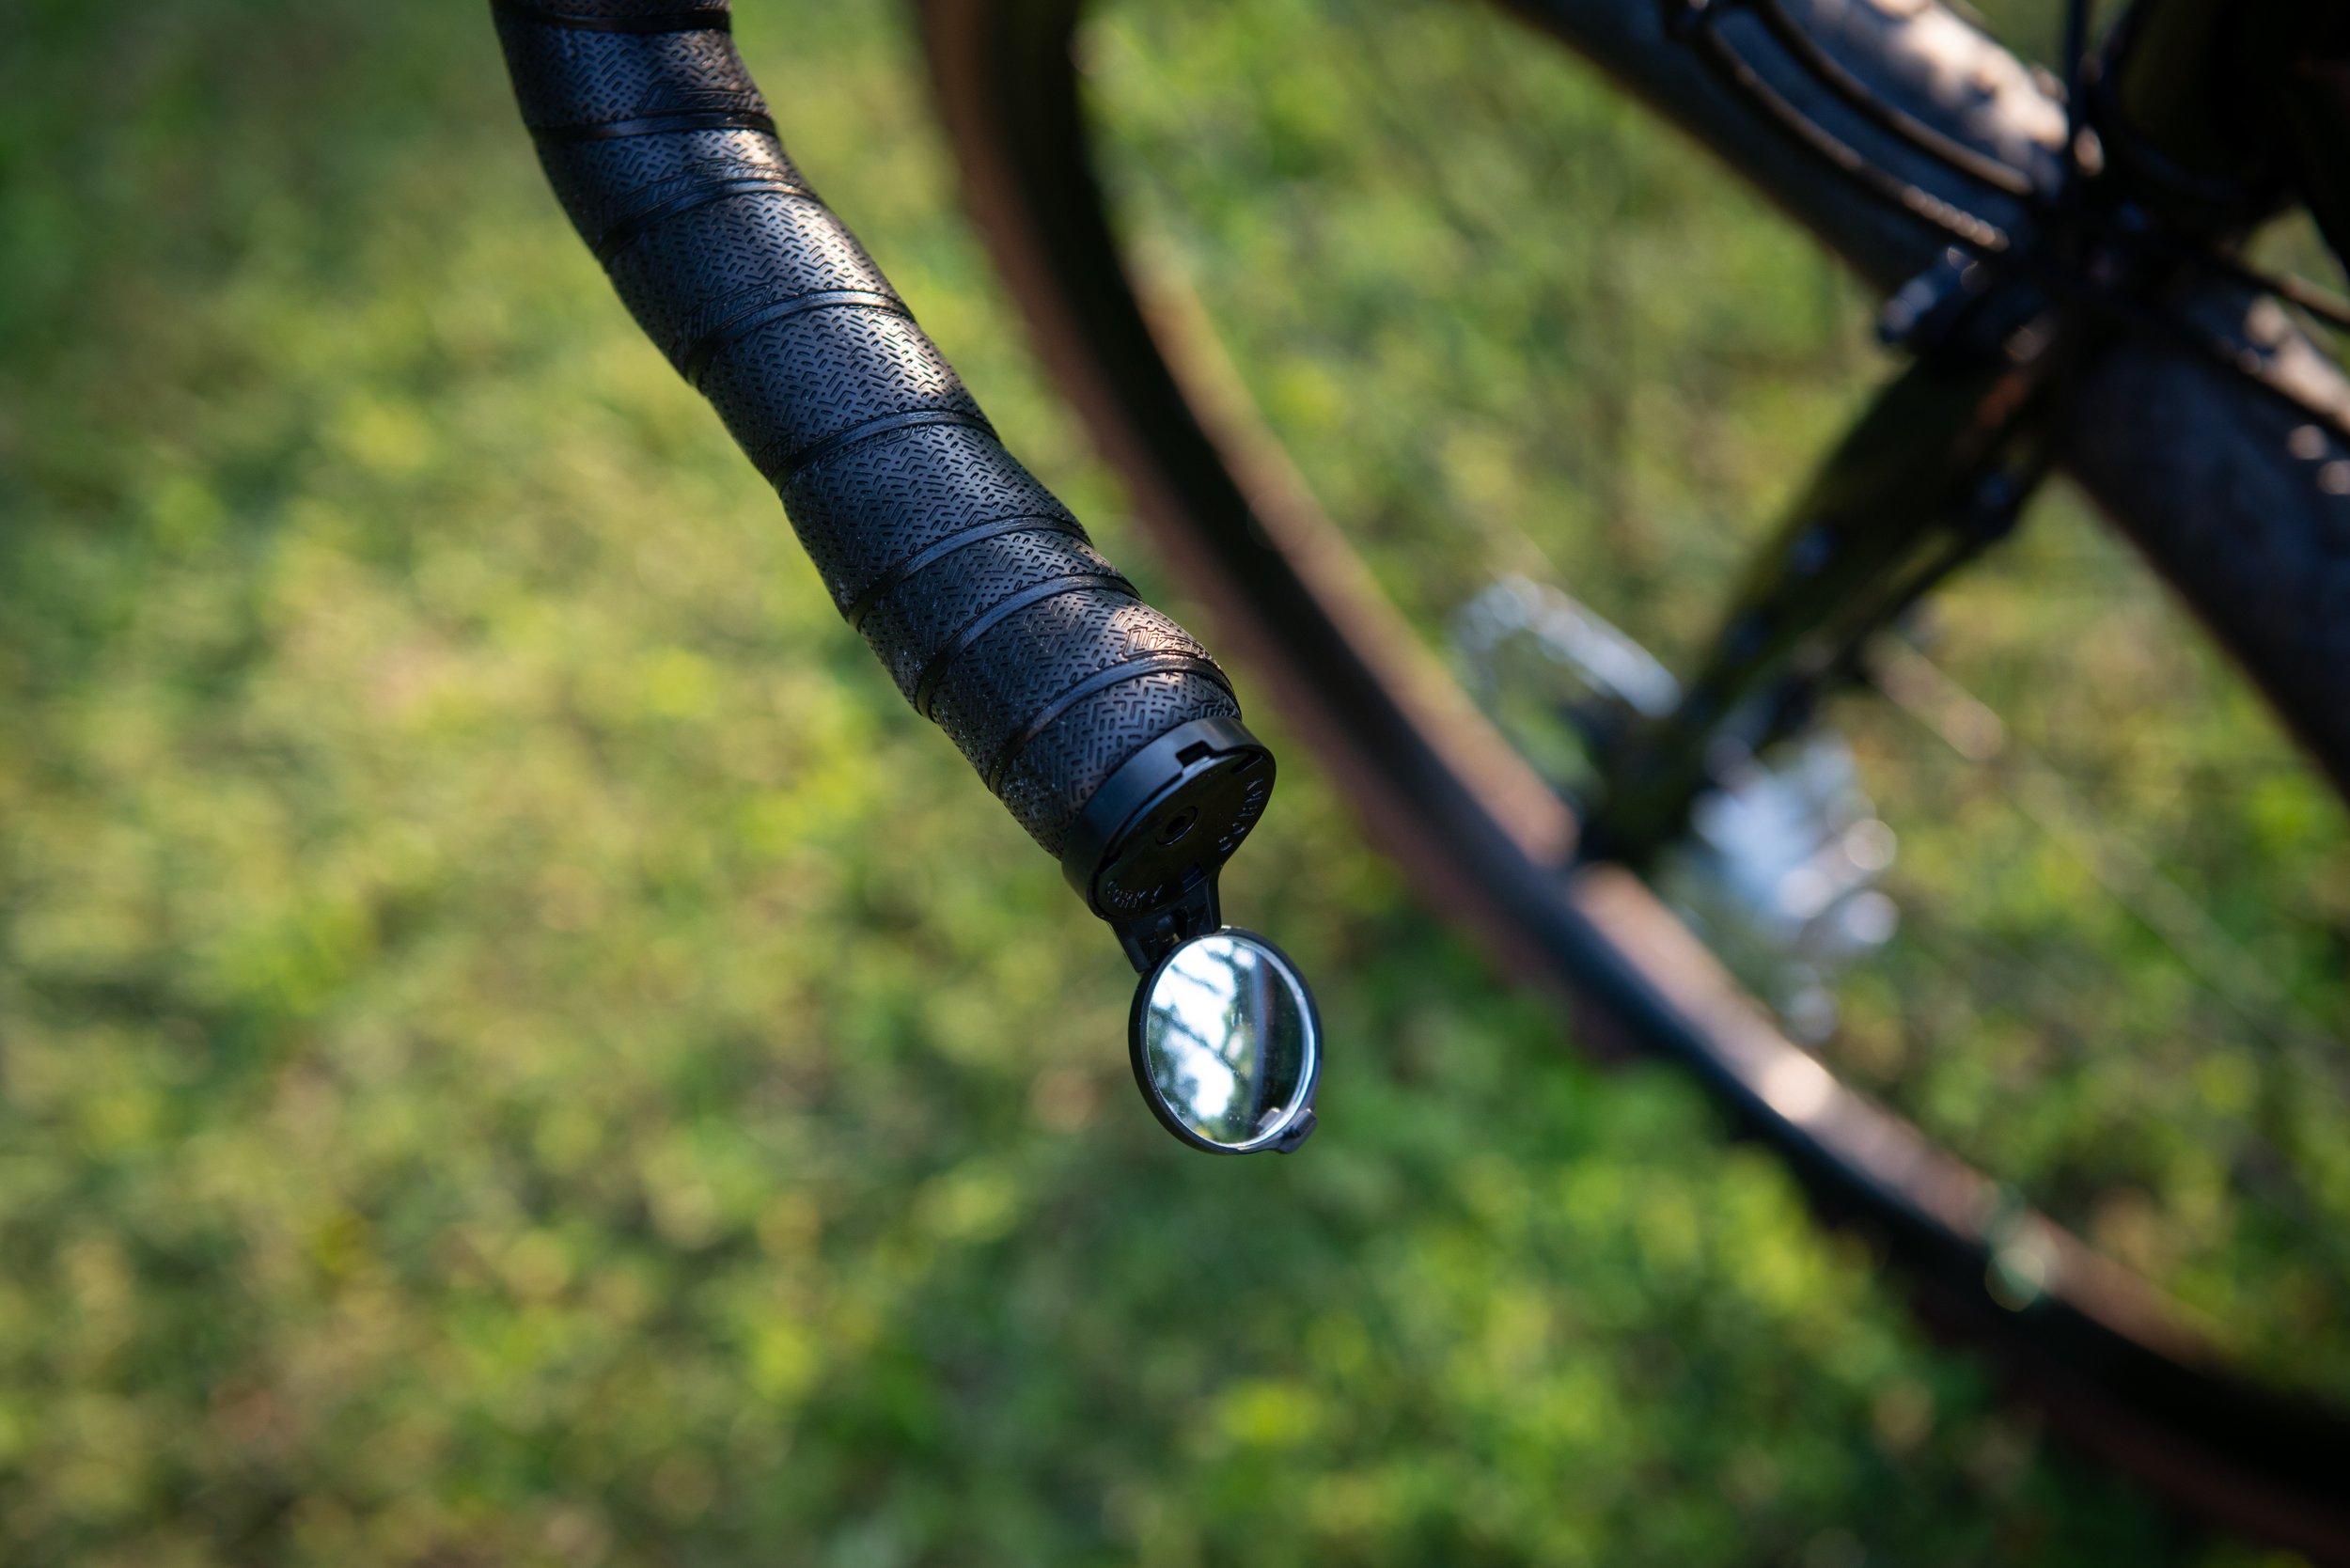
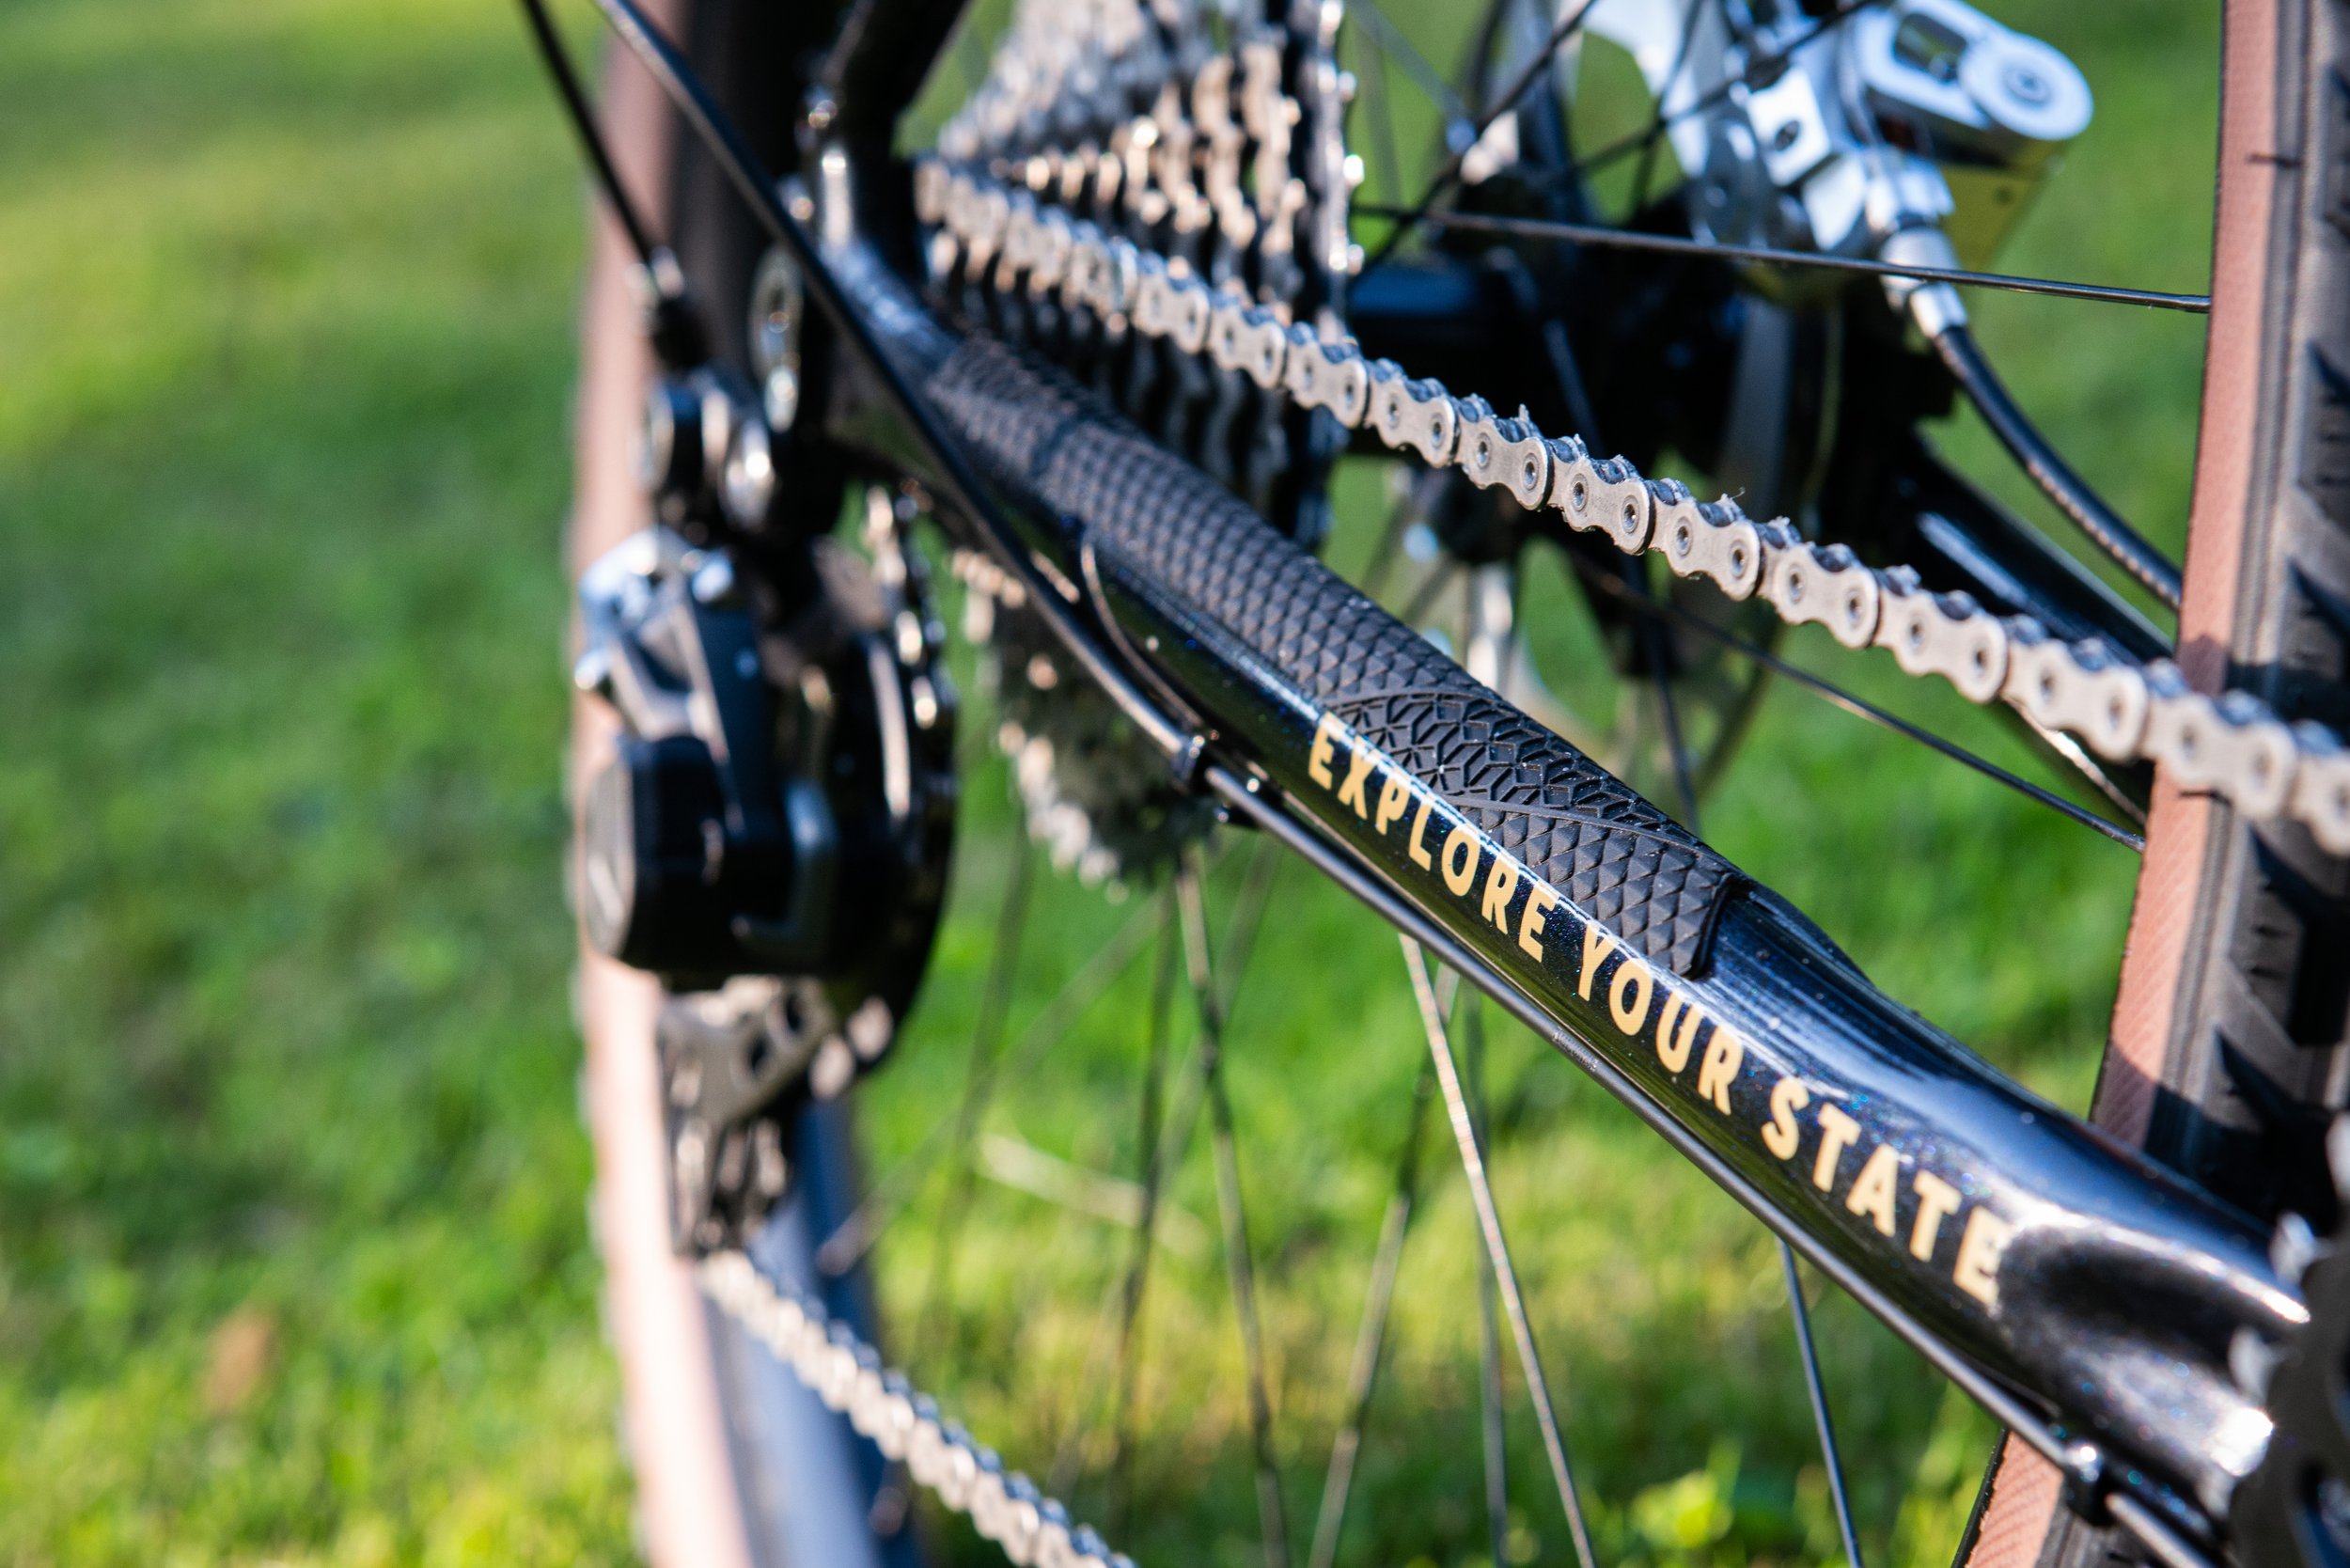
Lastly, this build received some final touches to create a more polished look. Cable clips were added at the front end to tidy up and guide the cables around the handlebar, preventing rub between shift and brake housing. The Corky Bar-end mirror replaced a bar-end plug, offering a neat solution to see oncoming traffic from behind. It can be easily flipped up or down as needed. In urban areas, it provides great peace of mind about passing vehicles. Additionally, a protective strip was added to the chainstay to prevent frame damage from chain slap, and cable cherries enable easy brake cable servicing without the need for new crimps each time the wire is detached. I the end, I think these custom touches complement the overall build perfectly!
Workhorse - From the daily commute to the great unknown.
In this post I wanted to share some highlights of the bike build. It is a combination of familiar components that I have used and trusted before, and some exciting new additions that I am eager to try out. Each piece may not have been specifically picked just for this build, but overall, this mixed-bag of components came together perfectly to create a very nice looking bike. This setup will hopefully provide the perfect balance for my occasional bike commutes as well as a wide range of adventures, whether they be grand bikepacking trips or leisurely rides from my doorstep. This bike's versatility will give me the freedom to tackle any type of ride, and I'm confident that it will live up to my expectations and provide a dependable and enjoyable experience. Be sure to stay tuned for more "Gravel Ride of the Week" videos down the line that will be filmed while onboard this bike. Until then, enjoy your ride!