Zwift on an iPad - Connect a mouse + Watch YouTube & Amazon Prime (Picture-in-Picture)
Disclaimer: This post contains affiliate links, through which we earn a commission.
Last year, I posted a video and blog post showing how to use a mouse on an iPad while working out on the indoor training app Zwift. That set-up was made possible because Apple released a dedicated operating system for the iPad (iPadOS 13), which still required a few geeky workarounds within the Accessibility settings to make it all work correctly. Fast-forward to today and things are now a lot easier and much more user friendly after Apple released the latest version of the software (iPadOS13.4) on March 24th, 2020. In this post we will follow-up on that previous post and show you how to connect a mouse to an iPad using the updated iPadOS 13.4. As an added bonus, I will also include a few extra tips and tricks, including how to play your favorite videos from YouTube or movies/shows from Amazon Prime on your iPad screen, while you are working out on Zwift. Be sure to check out the video for this blog post here!
1) Connect the Mouse
The first step to get a mouse connected to the iPad is to ensure that your iPad is running iPadOS 13.4. If your device isn’t set to automatically download the latest versions of the software, then you can navigate to the the software update section as follow: Settings -> General -> Software Update. It’s also worth pointing out that you don’t need to have the latest and greatest iPad on the market to install this updated software. I am using a 2016, 9.7’’ iPad Pro and everything that I am going to show you in this post works perfectly on my older device.

Next up, you’ll need to pair your bluetooth mouse with the iPad. This step is now much more user-friendly when compared to the older versions of the operating system. Simply head over to the Bluetooth section within Settings and look for your mouse, then select Pair.

In my examples, I use the Apple Magic Mouse 2 to navigate around with the pointer, but any bluetooth mouse should be able to connect in the exact same way. In fact, a big bonus with iPadOS 13.4 is that you can now even navigate on your iPad with a trackpad. Check out the Apple Magic Trackpad 2 for a great trackpad option. The trackpad comes with the added benefit of multi-finger gestures that makes navigation even easier. I won’t go into all the details, but you can see some of those gestures listed here.
If you are looking to dedicate an older (USB) mouse to your Zwift set-up, then don’t forget that you can also connect a USB receiver mouse to an iPad if you make use of the correct dongle. iPads, like mine, that still work with a lighting port, can utilize the Apple Lightning to USB3 Camera Adapter to connect a more traditional mouse. I’ve tested this on my set-up and it works! Plus, because this is not a bluetooth device, you get to skip the bluetooth pairing step I explained above, simply plug-and-play. If you are using the iPad Pro 2018/2020 models (which have a USB-C port instead), then check out the HyperDrive USB hub for a great solution on how to connect a USB-A mouse to your iPad.
With all the gadget geekiness out of the way, we can get onto the fun part and make use of this new input device while riding on Zwift. Let’s check out a few ways you can use your mouse and iPad to enhance the Zwifting experience even more.
2) Watch YouTube while Zwifting
As fun and engaging as Zwift is, there are still those days when you just need a bit more visual stimulation to get you through an extended workout. It’s on those days when a motivational video or movie can really help. Maybe my Zwift instructor video is exactly what you need! This is where YouTube comes in handy. In the next few steps, I’ll show you how to run a YouTube video within your Zwift screen (aka picture-in-picture).
Full disclosure, you don’t need to have a mouse connected in order for this to work. You can follow the exact same steps by tapping on the screen and it will work just as well. However having the mouse connected makes things just that little bit easier, especially if you need to play/pause a video during your ride.
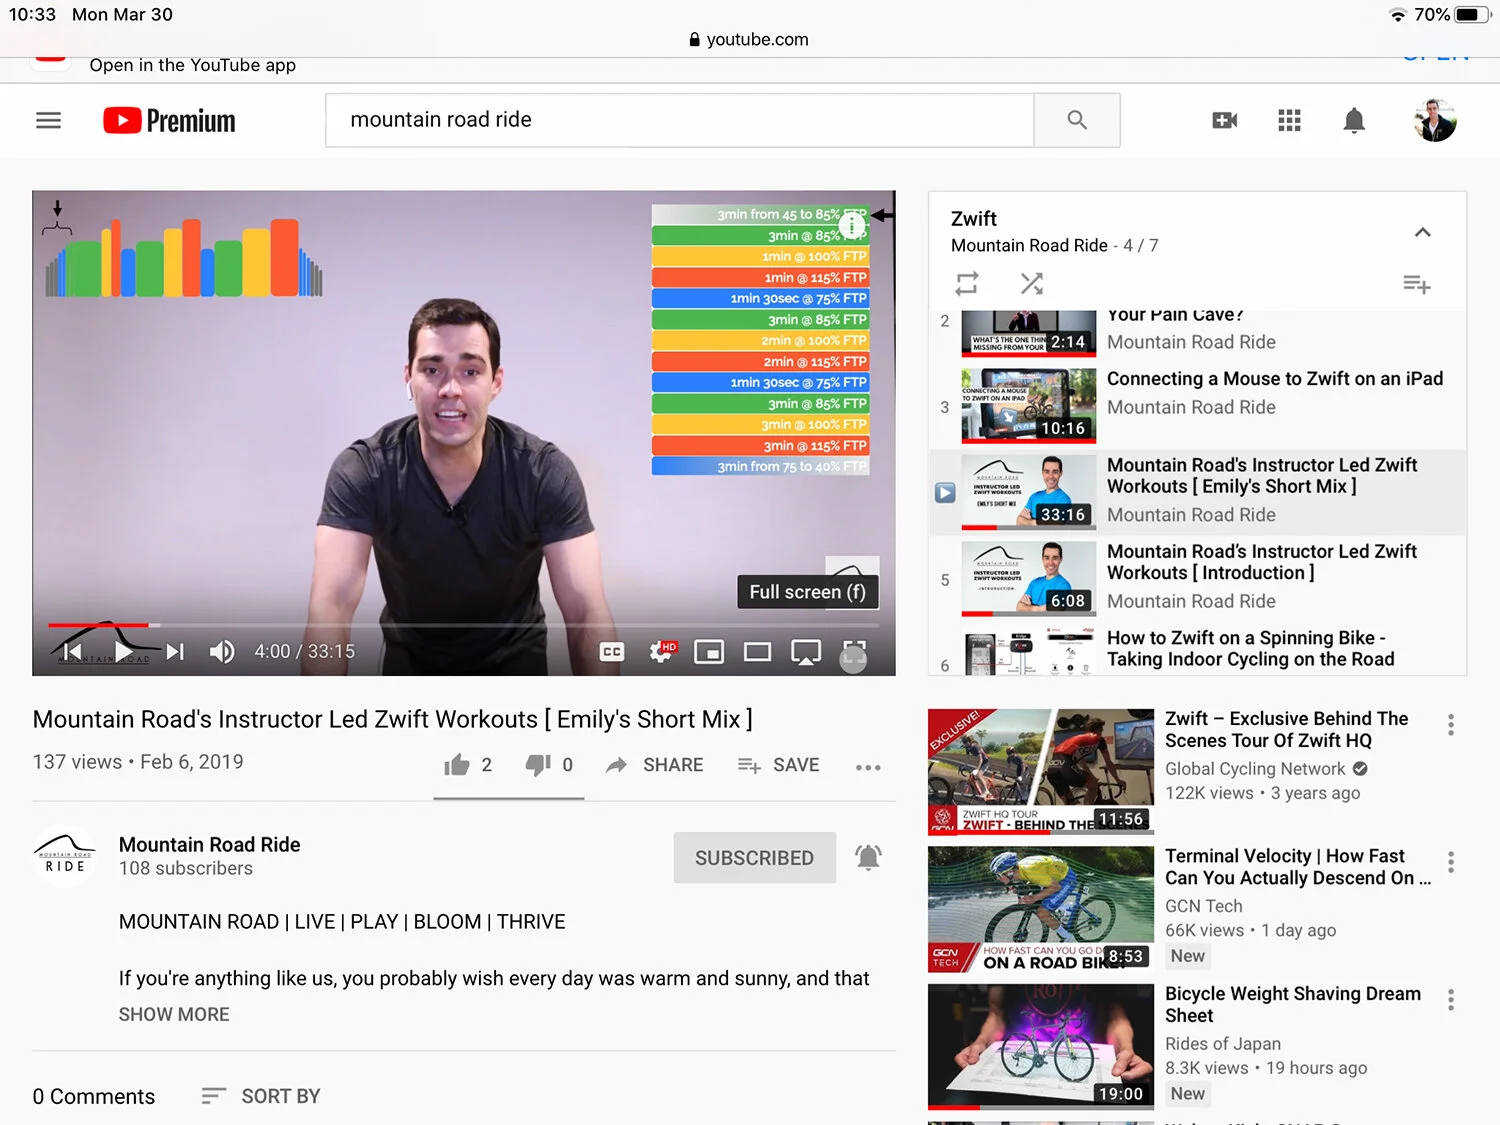
First, go to your Safari browser and pull up the YouTube website. Take note that you have to use the website for this trick to work. The YouTube App will not work as it does not provide you with the same functionality. Once you have your selected YouTube video/playlist opened up in the Safari browser, then look for the fullscreen button in the bottom corner of the video.
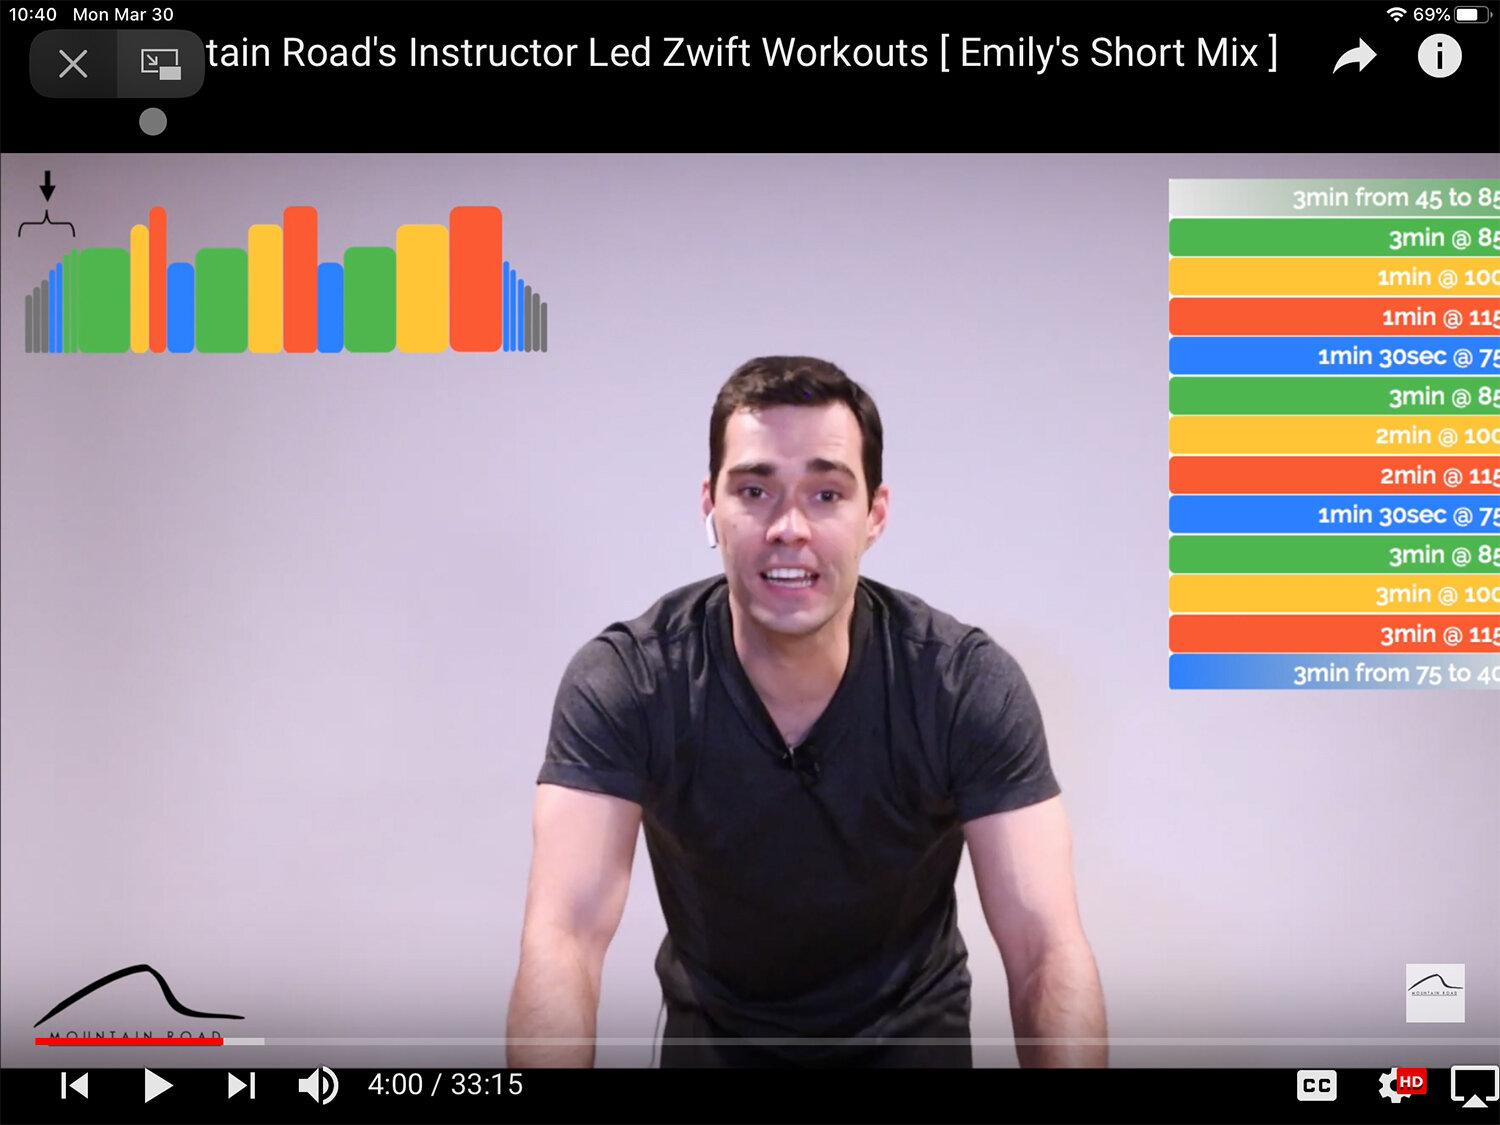
Click/tap on the fullscreen button to open up the video in fullscreen (or press F on your keyboard if you have one connected). Once in fullscreen mode, you will see a picture-in-picture button right next to the close-out X in the top left corner of the screen. Selecting that allows for the video to continue playing in the corner of the screen and allows you to navigate to any of your other apps - including Zwift!
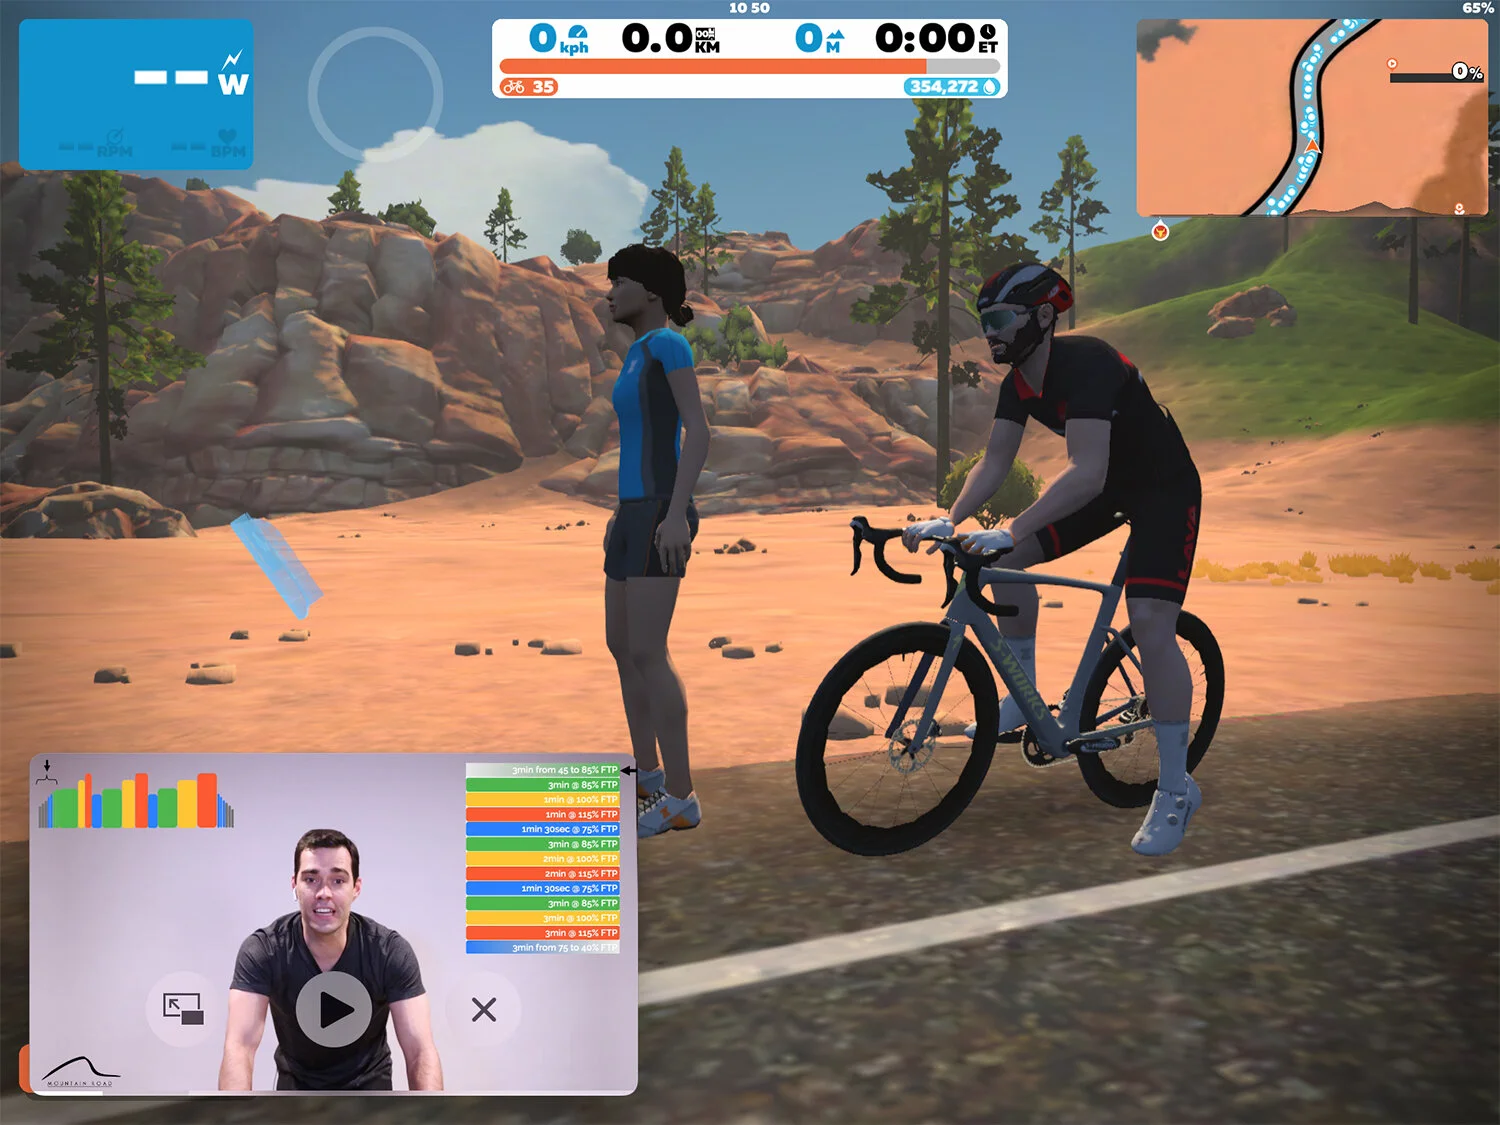
Easy, right? Now you can watch all your favorite Mountain Road videos while you are on Zwift and the best thing is that you don’t need two separate devices to achieve this, only your iPad ;) If you need more ideas for inspirational videos to watch while Zwifting, then be sure to check out this list from Bikepacking.com.
3) Watch Amazon Prime Video while Zwifting
This next trick aims to recreate the same picture-in-picture set-up that we accomplished with YouTube, but instead we’ll use Amazon’s Prime Video. This one works a bit differently since you don’t need to make use of the Safari browser. The Prime Video App actually has the picture-in-picture functionality built in and hence we’ll start by pulling up a movie/show of your choice within the app.
To all the gravel riders out there reading this, you will already be very familiar with Rebecca Rusch and the incredible impact that she has made to the gravel community. If you aren’t already familiar with her story, then do check out the documentary that I am using in my example. It’s available to stream on Prime and is called Blood Road - definitely a must-watch while you are pedaling away on Zwift.
Next, with your video playing, you need to do one of three things to evoke the picture-in-picture mode:
· If your device has a physical home button, press it.
· Swipe up from the bottom of the screen
· With the mouse connected, point the cursor to the bottom of the screen to reveal the dock. Point it down again and the video should move to picture-in-picture mode.
Similar to the YouTube set-up you can now go ahead and open up any other app while your Amazon Prime video keeps playing. Head over to Zwift and go clock some epic miles, all while you watch your favorite movie!

Wrap-Up:
There you have it. The updated workflow to connect a mouse to your iPad is so much better when compared to all the layers of settings that you needed to dig through in the past. Simply pull up the bluetooth settings and get a mouse connected for an easy way to interact with the Zwift app. No need to dangerously stretch out over your bike handlebars just to reach your iPad screen. Plus to make things even more entertaining while riding indoors, you now have all the steps necessary to pull up any of your favorite movies/videos from either YouTube or Amazon Prime while riding on Zwift. Hopefully riding indoors is just a temporary solution for many reading this, but at the same time, I also trust that the tips and tricks that I shared can help make the hours indoors a bit more entertaining.
Let us know in the comments below what your favorite movies/shows are that keeps you motivated when riding a bike.
-Wiehan